Bose Aviation Headset Owner's guide - Page 11
to theright
 |
View all Bose Aviation Headset manuals
Add to My Manuals
Save this manual to your list of manuals |
Page 11 highlights
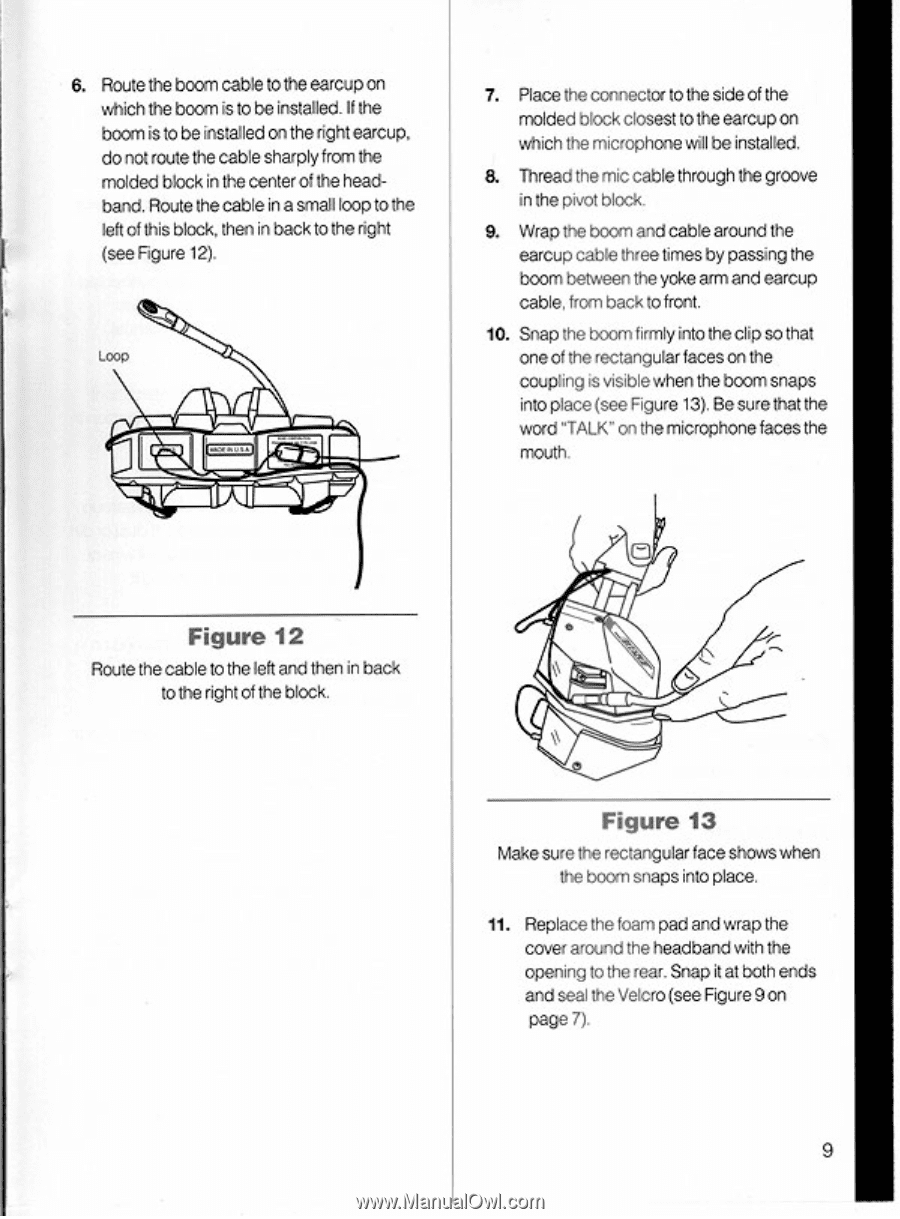
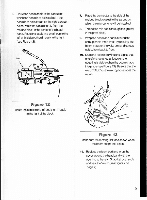
6. Routethebocmcableto theearcupan which theboonisto beinstalled.If the boomistobeinstalledontheright earcup. donot route the cablesharplyfromthe moldedblock in the center of the headband.Routethecableina smalllooptothe left ofthisblock.theninback totheright (seeFigure 12). LOOP 7. Placetheconnectorto thesideof the moldedblockclosestto theearcupon which themicrophonewillbeinstalled. & Threadthemiccablethroughthegroove inthe pivotblock. 9. Wrapthebocciandcablearoundthe earcupcablethreetimesbypassingthe boombetweenthe yokeaimand earcup cable,fromback tofront. 10. Snaptheboomfirmlyinto theclip sothat oneof therectangularfacesonthe couplingis visiblewhenthe boomsnaps intoplace (seeFigure 13). Besure that the word"TALK' onthemicrophonefacesthe mouth. Figure 12 Routethecableto theleft and theninback to the rightof the block. Figure 13 Makesure the rectangularface showswhen theboomsnapsintoplace. 11. Replacethefoampad andwrapthe cover aroundthe headbandwith the openingtotherear.Snapit at bothends andseal theVelcro(seeFigure9on Page 7). 9
-
 1
1 -
2
-
3
-
4
-
5
-
 6
6 -
 7
7 -
 8
8 -
 9
9 -
 10
10 -
 11
11 -
 12
12 -
 13
13 -
 14
14 -
 15
15 -
 16
16
 |
 |