Bose Aviation Headset Owner's guide - Page 8
Headset
 |
View all Bose Aviation Headset manuals
Add to My Manuals
Save this manual to your list of manuals |
Page 8 highlights
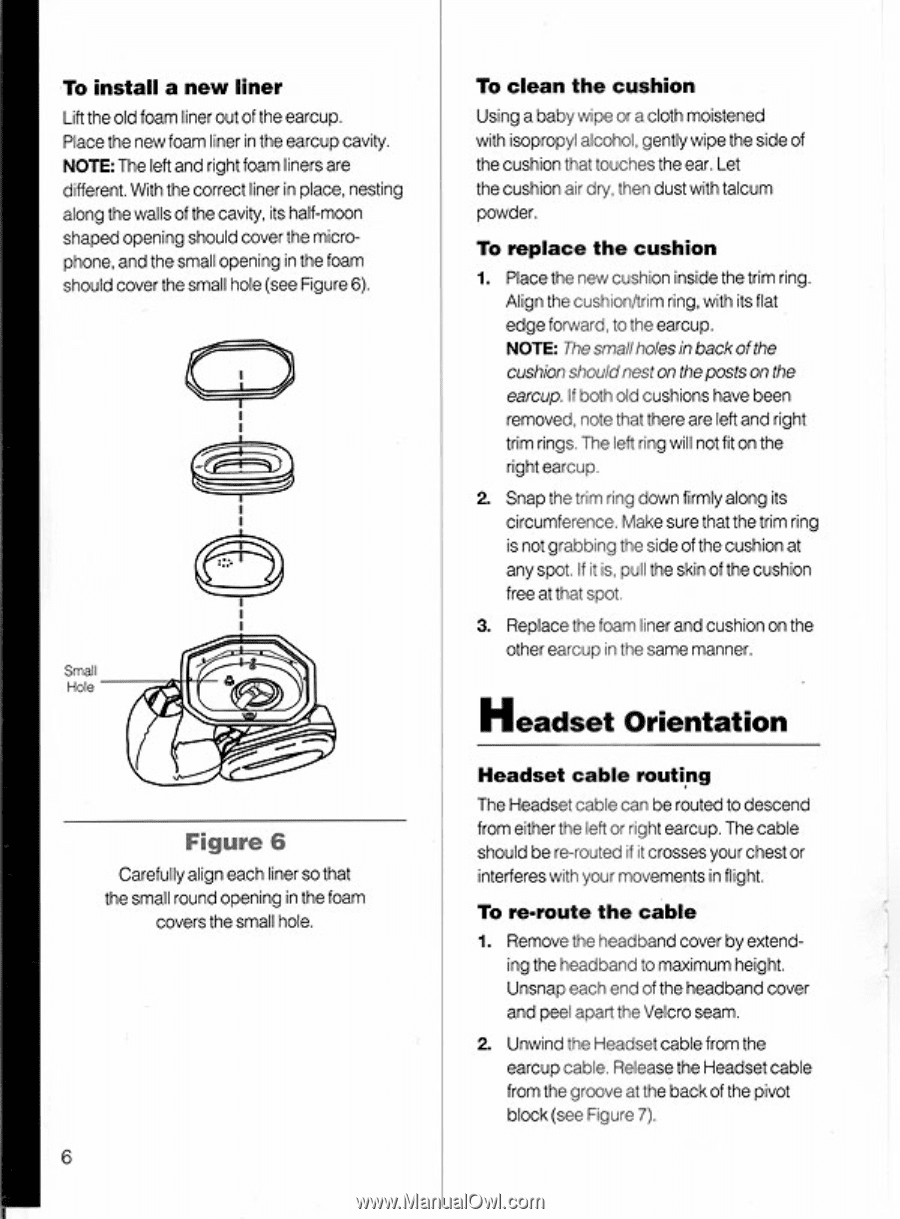
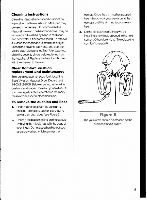
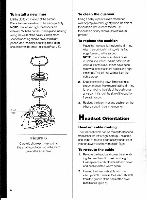
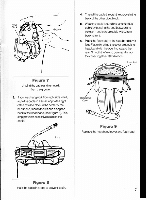
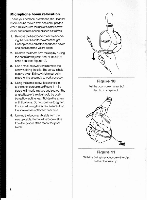
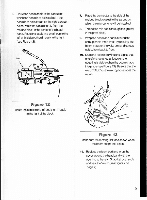
To install a new liner Lifttheoldfoamlinercutoftheearcup. Placethe newfoamliner inthe earcupcavity. NOTE:The leftand rightfoamlinersare different.With the correctliner inplace, nesting alongthe wallsofthe cavity,its half•moon shapedopeningshouldcoverthe microphone.andthe smallopeninginthe foam shouldcover the smallhole(seeFigure6). r" . Figure 6 Carefullyalign eachlinerso that the smallroundopeningin the foam coversthe smallhole. To clean the cushion Usingababywipeor aclothmoistened with isopropylalcohol.gentlywipe the side of thecushion that touchesthe ear. Let thecushionair dry. then dustwith talcum powder. To replace the cushion 1. Placethenewcushioninsidethe trimring. Alignthecushionitrimring.withitsflat edgeforward,to the earcup. NOTE: ThesmallWesinbackofthe cushionshouldnestonthepostsonthe earcup.Ifbotholdcushionshavebeen removed,notethat there areleftand right trimrings.Theleftringwillnotfit onthe right earcup. 2. Snapthetrimringdownfirmlyalongits circumference.Makesure that thetrim ring isnotgrabbingthesideof thecushionat anyspot.If itis.pulltheskinofthecushion freeat that spot. 3. Replacethefoamlinerandcushiononthe other earcup in the same manner. Headset Orientation Headset cable routing TheHeadsetcablecan be routed to descend fromeither the left or rightearcup.Thecable shouldbere-routedif itcrossesyourchestor interfereswith your movementsin flight. To re-routethe cable 1. Removetheheadbandcoverbyextend- ing the headbandto maximumheight. Unsnapeachendof theheadbandcover and peelapart the Velcroseam. 2. UnwindtheHeadsetcablefromthe earcupcable.Releasethe Headsetcable fromthegrooveat thebackof thepivot block(seeFigure7).
-
 1
1 -
2
-
 3
3 -
 4
4 -
 5
5 -
 6
6 -
 7
7 -
 8
8 -
 9
9 -
 10
10 -
 11
11 -
 12
12 -
 13
13 -
14
-
15
-
16
 |
 |