Brother International 1034D Users Manual - English and Spanish
Brother International 1034D Manual
 |
View all Brother International 1034D manuals
Add to My Manuals
Save this manual to your list of manuals |
Brother International 1034D manual content summary:
- Brother International 1034D | Users Manual - English and Spanish - Page 1
HANDBOOK FOR COMPACT OVERLOCK MACHINE MANUAL DE INSTRUCCIONES DE LA MAQUINA COMPACTA OVERLOCK 6 6 6 5 6 5 5 5 4 4 4 4 - Brother International 1034D | Users Manual - English and Spanish - Page 2
cord. 10. Keep fingers away from all moving parts. Special care is required around the sewing machine needle. 11. Always use the proper needle plate. The wrong plate can cause the needle to break. 12. Do not use bent needles. 13. Do not pull or push fabric while stitching. It may deflect the needle - Brother International 1034D | Users Manual - English and Spanish - Page 3
socketoutlet. • When servicing the sewing machine, or when removing covers or changing lamps, the machine or the electrical set must be disconnected destroyed as a plug with bared flexible cords is hazardous if engaged in a live socket outlet. In the event of replacing the plug fuse, use a fuse - Brother International 1034D | Users Manual - English and Spanish - Page 4
estudie el manual. Si se necesitara mayor información sobre el uso de esta máquina, el proveedor autorizado más cercano estará encantado de ofrecerle sus servicios. CAUTION! WHEN THREADING, REPLACING NEEDLE OR LIGHT BULB, BE SURE TO TURN OFF THE MAIN POWER SWITCH OF THE MACHINE. WHEN THE MACHINE IS - Brother International 1034D | Users Manual - English and Spanish - Page 5
sewing machine is 1,300 stitches per minute, which is quite fast compared to the normal operating speed of 300 to 800 stitches per minute for the ordinary foot-operated sewing machine part of the machines normal operation. CAUTION WHEN THREADING THE MACHINE, REPLACING A NEEDLE, OR WHEN THE MACHINE - Brother International 1034D | Users Manual - English and Spanish - Page 6
of Narrow Overlock/Rolled Edge Stitch 45 Chapter 14 Examples of Sewing Applications for this Serger 47 Blind stitching with blind stitch presser foot 48 Flatlock stitching with blind stitch presser foot 50 Pin tuck stitching with blind stitch presser foot 52 Decorative stitching ...54 Chapter - Brother International 1034D | Users Manual - English and Spanish - Page 7
INDICE Capítulo 1 Nombres de las partes y sus funciones 1 Accesorios incluidos con la máquina de coser 3 Aguja ...5 Para máquinas de coser 47 Puntadas invisibles con prensatelas multipropósito 48 Costura Overlock plana con prensatelas multipropósito 50 Costuras de pliegues pequeños con - Brother International 1034D | Users Manual - English and Spanish - Page 8
Chapter Chapter Chapter Chapter Chapter Chapter Chapter Chapter Chapter Chapter Chapter CONTENTS 1 2 3 4 5 6 7 8 9 10 11 12 13 14 15 16 17 18 PQ M N J E Nombres de las partes y sus funciones D E 6 5 4 H 6 5 4 AB C FG RS I 6 5 4 6 5 4 32 5 0 6 7 8 L K T O 9 Names of - Brother International 1034D | Users Manual - English and Spanish - Page 9
plate cover A Spool stand (thread tree support) B Left needle thread tension dial C Right needle thread tension dial D Presser foot lifting lever E Hand wheel F Upperlooper thread tension dial G Lowerlooper thread tension dial H Front cover I Material slide plate (for overlock stitch) J Main power - Brother International 1034D | Users Manual - English and Spanish - Page 10
Chapter Chapter Chapter Chapter Chapter Chapter Chapter Chapter Chapter Chapter Chapter Chapter Chapter Chapter CONTENTS 1 2 3 Accessories included with your serger Accesorios incluidos con la máquina de coser 1 X77871-000 3 X75902001 6 X75906001 2 122991002 4 X75904000 5 X77260000 - Brother International 1034D | Users Manual - English and Spanish - Page 11
2 Accessory bag 3 Tweezers 4 Thread net Two-needle models (4) One-needle models (3) 5 Thread spool cap Two-needle models (4) One-needle models (3) 6 Cleaning brush 7 Hexagonal (Allen) wrench (on Two-needle models) 8 Needle set: SCHMETZ 130/705M 80/12: 2 pcs. 90/14: 2 pcs. 9 Blind stitch foot (Option - Brother International 1034D | Users Manual - English and Spanish - Page 12
This machine uses a standard home sewing machine needle. The recommended needle is SCHMETZ 130/705H. To remove the needle (1) Turn the main power switch to the OFF position. (2) Turn the hand wheel counter-clockwise by hand until the needle is at its highest position. (3) Loosen the needle set screw - Brother International 1034D | Users Manual - English and Spanish - Page 13
have been inserted correctly, the right needle should be set slightly lower than the left one. CAUTION The needle set screw holds both needles. Keep this in mind when you loosen the set screw to exchange one or both needles. 8 Needle set screw 9 Tighten 0 Loosen A Hexagonal wrench NOTA: Modelos - Brother International 1034D | Users Manual - English and Spanish - Page 14
direction of arrow). This is the same direction as an ordinary home sewing machine. 1 Hand wheel Para cambiar la dirección del motor • El open the front cover when threading this machine. NOTE: For your safety, make sure that the front cover is closed when operating the machine. Abre y cierre de - Brother International 1034D | Users Manual - English and Spanish - Page 15
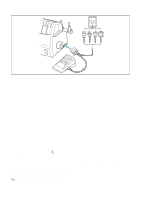
speed. As the pedal is pressed further, the machine will increase speed. When the pedal is released, the machine stops. 2 Foot Controller: Model N Note (For U.S.A. only): This foot controller can be used for sewing machine models 1034D, 1034, 1030D and 1030. Funcionamiento Encendido de la máquina - Brother International 1034D | Users Manual - English and Spanish - Page 16
Chapter Chapter Chapter Chapter Chapter Chapter Chapter Chapter Chapter Chapter Chapter Chapter Chapter Chapter CONTENTS Removing the Bed Extension for Free-Arm Sewing Removing the bed extension Extraiga el suplemento para la mesa para realizar la costura sin brazo Extraiga el suplemento para la - Brother International 1034D | Users Manual - English and Spanish - Page 17
) and 7 mm (9/32 inch). The normal stitch width setting for regular overlock stitch is 5mm (13/64 inch). One-needle models • The width is factory set to 3.5mm (9/64 inch). A Two-needle models B One-needle models 1 Stitch width lever 2 Regular needle plate A 67 5 2 R Ancho de puntada Modelos de - Brother International 1034D | Users Manual - English and Spanish - Page 18
Instructions for the Differential Feed Mechanism (Models with Differential Feed) This serger is equipped with two sets of feed dogs under the presser foot to move the fabric through the machine ratio is set at greater than 1, the front feed dogs move faster than the back feed dogs, gathering the - Brother International 1034D | Users Manual - English and Spanish - Page 19
(front) Effect Application 0.7 - 1.0 Material is pulled tight. Prevents thin materials from puckering 1.0 1.0 - 2.0 Without differential feed. Normal sewing Material is gathered or pushed together. Prevents stretch materials from stretching or puckering 4 5 6 7 8 9 10 11 12 13 14 15 - Brother International 1034D | Users Manual - English and Spanish - Page 20
of the material.) The more elastic the material, the further toward 2.0 the differential feed ratio should be set. Test sew with a scrap of the fabric to find the correct adjustment. CAUTION When sewing thick non-stretchable material such as denim, do not use the differential feed as it may damage - Brother International 1034D | Users Manual - English and Spanish - Page 21
agujas 4 Posición correcta 4 2 3 4 5 6 7 8 9 10 11 12 13 14 15 16 17 18 CAUTION When threading, always thread in this order: upperlooper, lowerlooper, right needle and then the left needle. PRECAUCION Cuando haga el enhebrado, enhebre siempre en este orden: áncora superior, áncora inferior - Brother International 1034D | Users Manual - English and Spanish - Page 22
13 14 15 16 17 18 Tension release button This serger is equipped with a thread tension release button. When threading, be sure to: (1) Hold the tension release button directly above the tension adjustment wheel to the right. (2) Pass the thread through the tension disc which is in the channel next - Brother International 1034D | Users Manual - English and Spanish - Page 23
(1) Turn off the main power switch for safety. (2) Raise the presser foot using presser foot lever. CAUTION When threading the needle, always be sure to lift the presser foot lever, and also take care to thread in the proper order. (3) Set the needle bar in its highest position by turning the - Brother International 1034D | Users Manual - English and Spanish - Page 24
thread guide on the thread tree from back to front. 3 Pull the thread about an extra 15cm (6 inches) through the front of the thread tree. 4 Pass the thread through the proper thread guide. 5 Slide and hold the thread tension ndola hacia la derecha y guiando la parte superior hacia usted. 2 Saque el - Brother International 1034D | Users Manual - English and Spanish - Page 25
upperlooper thread breaks during sewing This may be caused by the lowerlooper thread getting caught on the upperlooper. If this happens, lower the upperlooper by turning the hand wheel, remove the lowerlooper thread from the upperlooper, and re-thread the upperlooper from at least the tension disc - Brother International 1034D | Users Manual - English and Spanish - Page 26
up through the thread guide on the thread tree from back to front. 3 Pull the thread about an extra 15cm (6 inches) through the front of the thread tree. 4 Pass the thread through the proper thread guide. 19 1 Abra la tapa delantera deslizándola hacia la derecha y guiando la parte superior hacia - Brother International 1034D | Users Manual - English and Spanish - Page 27
lever. NOTE: If the lowerlooper thread breaks during sewing, cut and remove thread from both of the needles. Before re-threading the lowerlooper, make sure that the lowerlooper re-threading is done exactly as diagrammed above. The machine will not operate properly if the threading is not done in the - Brother International 1034D | Users Manual - English and Spanish - Page 28
tension adjustment dial. Release the button. 5 Guide the thread down the channel and across through the threading points next to the pink color marks following the numerical order in the accompanying illustration. 6 Bring the thread down through the guide 7 above the needle por la parte delantera del - Brother International 1034D | Users Manual - English and Spanish - Page 29
TABLE OF Chapter Chapter Chapter Chapter Chapter Chapter Chapter Chapter Chapter Chapter Chapter Chapter Chapter Chapter Chapter Chapter Chapter Chapter CONTENTS 1 2 3 4 5 6 7 8 9 10 11 12 13 14 15 16 17 18 22 4 6 5 3 2 2 2 3 5 4 6 7 1 6 7 - Brother International 1034D | Users Manual - English and Spanish - Page 30
tension adjustment dial. Release the button. 5 Guide the thread down the channel and across through the threading points next to the yellow color marks following the numerical order in the accompanying illustration. 6 Bring the thread down through the guide 7 above the needle por la parte delantera - Brother International 1034D | Users Manual - English and Spanish - Page 31
TABLE OF Chapter Chapter Chapter Chapter Chapter Chapter Chapter Chapter Chapter Chapter Chapter Chapter Chapter Chapter Chapter Chapter Chapter Chapter CONTENTS 1 2 3 4 5 6 7 8 9 10 11 12 13 14 15 16 17 18 24 2 3 5 4 6 7 1 2 6 7 4 6 5 4 3 2 6 7 3 - Brother International 1034D | Users Manual - English and Spanish - Page 32
Crepe de chine Georgette Lawn Organdy Narrow/rolled Hem stitch Medium materials Poplin Gingham Seersucker Gabardine Serge Knitted Overlock stitch Smaller than 2.0 Needle thread Polyester : #80 Nylon : #80 Looper thread Polyester : #80 Nylon : #80 Woolly nylon thread SCHMETZ 130/705H #70 #80 - Brother International 1034D | Users Manual - English and Spanish - Page 33
50 - 80 Poliester : n°50 - 80 SCHMETZ 130/705H n°70 n°80 SCHMETZ 130/705H n°80 n°90 Cachemir Tejidos Tweed gruesos Tejano Jersey Puntada Overlock 3,0 - 4,0 Algodón : n°40 - 60 Seda : n°40 - 60 Poliester : n°30 - 60 Nilón : n°30 - 60 SCHMETZ 130/705H n°90 NOTA: Un hilo decorativo dará mejores - Brother International 1034D | Users Manual - English and Spanish - Page 34
Chapter Chapter Chapter Chapter Chapter Chapter CONTENTS 1 2 3 4 5 6 Thread Tension Thread tension dial From the left to right: 1 Yellow marked tension disc is for left needle. 2 Pink marked tension disc is for right needle. 3Green marked tension disc is for upperlooper. 4 Blue marked - Brother International 1034D | Users Manual - English and Spanish - Page 35
dial for each needle thread, the lowerlooper thread and the upperlooper thread. The correct thread tension may vary according to the type and thickness of the fabric and the type of thread used. Thread tension adjustments may be necessary for any change in sewing materials. If the stitch quality is - Brother International 1034D | Users Manual - English and Spanish - Page 36
Chapter Chapter Chapter Chapter Chapter Chapter Chapter Chapter Chapter Chapter Chapter Chapter CONTENTS 1 Chart of Thread Tension Adjustment Two-needle (Four-thread) A C B A Left needle thread is loose. A Reverse Revés El hilo de la aguja izquierda está suelto. B Surface Derecho C Left - Brother International 1034D | Users Manual - English and Spanish - Page 37
(pink) Afloje el hilo de la aguja derecha. (Rosado) NOTE: Order of thread tension adjustment When you adjust the thread tension, do it in the following order: (1) Left needle thread (2) Right needle thread (3) Upperlooper thread (4) Lowerlooper thread This is the easiest way to obtain the correct - Brother International 1034D | Users Manual - English and Spanish - Page 38
TABLE OF Chapter Chapter Chapter Chapter Chapter Chapter Chapter Chapter Chapter Chapter Chapter Chapter Chapter Chapter Chapter Chapter Chapter Chapter CONTENTS 1 One-needle (Three-thread) C A B Needle thread is loose. A Reverse Revés El hilo de la aguja está suelto. B Surface Derecho C - Brother International 1034D | Users Manual - English and Spanish - Page 39
del áncora inferior. (Azul) NOTE: Order of thread tension adjustment When you adjust the thread tension, do it in the following order: (1) Needle thread (2) Upperlooper thread (3) Lowerlooper thread This is the easiest way to obtain the correct thread tension. 5 6 7 8 9 10 11 12 13 14 15 16 - Brother International 1034D | Users Manual - English and Spanish - Page 40
a piece of scrap material under the presser foot for test sewing. NOTE: Always lift the presser foot before placing the fabric under it. Just running the fabric under the foot without lifting the presser foot may cause an uneven seam. (2) Holding the needle threads with your left hand, turn the - Brother International 1034D | Users Manual - English and Spanish - Page 41
Chapter Chapter Chapter CONTENTS 1 2 Chaining-off • After test-sewing, continue to depress the foot controller slightly and chain off 4 inches. The threads will entwine themselves into a chain automatically. NOTE: If the thread tension is not correctly balanced, the chaining-off result will be - Brother International 1034D | Users Manual - English and Spanish - Page 42
Chapter Chapter CONTENTS 1 2 3 4 Sewing To start sewing • Thread the machine and pull the threads out about 15 cm (6 inches) behind the presser foot. • Lift the presser foot and place the material well underneath the presser foot before starting to sew. Slowly sew a few stitches by turning the - Brother International 1034D | Users Manual - English and Spanish - Page 43
13 14 15 16 17 18 If threads break during sewing • Remove the material and re-thread in the correct order. Upperlooper, Lowerlooper, right needle and then the left needle. Replace the material under the presser foot and sew 3-5 cm (1-1/8 to 2 inches) over the previous stitches. CAUTION Do not leave - Brother International 1034D | Users Manual - English and Spanish - Page 44
13 14 15 16 17 18 To sew fine materials (1) Adjust the presser foot to prevent the material from puckering and to allow sewing of curves. (See next page.) (2) Loosen the thread tension, but remember that if the tension is too loose, the thread may break and stitches may be skipped. (3) Dull knives - Brother International 1034D | Users Manual - English and Spanish - Page 45
top left of this machine. Since this machine has already been adjusted to a pressure suitable for light to medium fabrics, no further adjustment is necessary except when sewing on very heavy or very light materials. Usually, when sewing on very light materials, the presser foot pressure should be - Brother International 1034D | Users Manual - English and Spanish - Page 46
5 6 7 Troubleshooting This sewing machine is designed for trouble-free operation. However, the following chart indicates trouble which may occur if basic adjustments are not made properly. Trouble 1. Does not feed 2. Needles break 3. Threads break 4. Skipped stitches Cause Remedy Presser foot - Brother International 1034D | Users Manual - English and Spanish - Page 47
rota. 2. La aguja está mal colocada. 3. La aguja es inadecuada. 4. El hilo está mal enhebrado. 5. La presión del prensatelas es insuficiente. Las tensiones de los hilos no fueron bien ajustadas. 1. La tensión del hilo es demasiada fuerte. 2. Los hilos están mal enhebrados o están enredados. Remedio - Brother International 1034D | Users Manual - English and Spanish - Page 48
8 9 10 11 12 13 14 15 16 17 18 One-needle models • This sewing machine can sew two different stitches. (1) Three-thread overlock stitch (3.5 mm/9/64 inch) Use: For overlock stitching on suits, blouses, slacks, etc. (2) Narrow/rolled hemming stitches (2.0mm/1/32 inch) Use as decorative or finishing - Brother International 1034D | Users Manual - English and Spanish - Page 49
Rayon Linen/Light Cotton Broad Cloth (3) Thread the machine for a three thread overlock, using the right needle. (4) Remove the stitch finger. 1 Raise the presser foot lever. 2 Pull all threads toward the back of the machine. 3 Check to make sure that the thread is no longer wrapped around the - Brother International 1034D | Users Manual - English and Spanish - Page 50
18 1 5 2 6 4 3 (5) Adjust the stitch width for rolled hemming. Move the stitch width lever (located on the left side of the machine toward the front) up to the "R" position. 7 Stitch width lever 8 Needle plate with stitch finger removed A Two-needle models B One-needle models (5) Ajuste el ancho - Brother International 1034D | Users Manual - English and Spanish - Page 51
to fold around the remaining stitch finger. After completing steps (1) through (6) above, adjust your machine to these recommended thread tension settings: Upperlooper thread tension at 1-4 Lowerlooper thread tension at 5-7 Right needle thread tension at 4 Tension may vary slightly according to - Brother International 1034D | Users Manual - English and Spanish - Page 52
Chapter Chapter Chapter Chapter CONTENTS 1 2 3 4 5 6 Chart of Narrow Overlock/Rolled Edge Stitch Stitch Style Rolled edge stitch Underside of material Narrow overlock stitch Underside of material Fabrics Needle thread Upperlooper thread Top of material Light material Crepe de chine - Brother International 1034D | Users Manual - English and Spanish - Page 53
Chapter Chapter Chapter Chapter Chapter Chapter Chapter Chapter Chapter Chapter Chapter Chapter Chapter Chapter Chapter Chapter Chapter CONTENTS 1 2 3 4 5 6 Tabla para puntadas overlock estrechas/de borde enrollado Estilo de puntada Puntada de borde enrollado Revés del tejido Puntada - Brother International 1034D | Users Manual - English and Spanish - Page 54
when sewing special stitches like flatlock, pin tuck and other decorative stitches. • This stitch guide is easily adjustable without using any tool. How to change feet • Turn off the main power switch or disconnect the electric supply plug. (1) Raise the presser foot lever. 1 (2) Set the needle to - Brother International 1034D | Users Manual - English and Spanish - Page 55
garments or home decoration projects. Use it to hem pants, skirts, or draperies. a Replace the presser foot with a blind stitch presser foot (multi purpose presser foot). (Refer to page 47.) b Set up the machine for 3 thread overlock stitch with one needle in the left position (on Twoneedle models - Brother International 1034D | Users Manual - English and Spanish - Page 56
are the recommended setting. Stitch Width :5 mm (Two-needle models) 3.5 mm (One-needle models) Stitch Length :3 ~ 4 mm Needle Thread Tension :Slightly Slackened (0-2) Upper Looper Thread Tension :Slightly Tightened (5-7) Lower Looper Thread Tension :Slightly Slackened (2-4) Test sew on a scrap of - Brother International 1034D | Users Manual - English and Spanish - Page 57
flat. If you sew with the right sides together, the needle thread ladder will decorate the right side when pulled flat. a Replace the presser foot with a blind stitch presser foot (multi purpose presser foot). (Refer to page 47.) b Set up the machine for 3 thread overlock with one needle in the left - Brother International 1034D | Users Manual - English and Spanish - Page 58
recommended setting. Stitch Width :5 mm (Two-needle models) 3.5 mm (One-needle models) Stitch Length :2 ~ 4 mm Needle Thread Tension :0-3 Upper Looper Thread Tension :2-5 Lower Looper Thread Tension :6-9 Test sew on a scrap of the fabric to adjust the fabric guide and the thread tension. 1 Reverse - Brother International 1034D | Users Manual - English and Spanish - Page 59
uses a rolled edge to add shape and decoration to any sewing project. Fold the fabric on a line where the pin tuck is to be located and guide the fold through the serger. Contrasting thread in the upper looper adds an accent to your project. Use the blind stitch presser foot to make narrow overlock - Brother International 1034D | Users Manual - English and Spanish - Page 60
Chapter CONTENTS 1 2 3 4 5 6 7 Test sew on a scrap of the fabric to adjust the fabric guide and the thread tension. 1 On Two-needle models 2 Upperlooper 3 Stitch finger 4 Stitch finger release lever 5 Stitch width lever 6 Regular needle plate 7 Stitch length adjustment lever 8 Making lines - Brother International 1034D | Users Manual - English and Spanish - Page 61
15 16 17 18 Other special purpose presser feet that are available (1) Tape presser foot For all models: LT5 Parts No. X76663001 SA212 (U.S.A., CANADA) (2) Pearl sequence presser foot Presser foot: LS Parts No. XB0537001 (3) Piping presser foot Presser foot: LP Parts No. XB0241101 Otros prensatelas - Brother International 1034D | Users Manual - English and Spanish - Page 62
13 14 15 16 17 18 The top part of the upper knife will stick out above the needle plate. • Use the projecting part of the upper knife as a guide for the fabric. Adjust the stitch width lever to move the upper knife to the desired guide position. La parte superior de la cuchilla superior saldrá por - Brother International 1034D | Users Manual - English and Spanish - Page 63
14 15 16 17 18 Replacing the lower knife (1) Loosen the lower knife set screw and pull down the lower knife. (2) Insert the new knife into the lower knife holder. (3) Position the lower knife so that its edge is flush with the needle plate. (4) Tighten the lower knife set screw. • It is important - Brother International 1034D | Users Manual - English and Spanish - Page 64
3 Oiling For smooth and silent operation, the moving parts of the machine should be oiled periodically. (See diagram below.) REMARKS: Be sure to oil your sewing machine before use. Always clean the lint off your machine before you apply oil. OIL THE MACHINE ONCE OR TWICE A MONTH FOR NORMAL USE. IF - Brother International 1034D | Users Manual - English and Spanish - Page 65
power before carrying out the following operation. Changing the light bulb. • Remove the lamp cover as shown in the illustra- tion. • Loosen the lightbulb cover set screw pull up the light bulb cover and remove it. • Take out the light bulb and replace it with a new - Brother International 1034D | Users Manual - English and Spanish - Page 66
64 to 5/32 inch) Needle bar stroke 25 mm (1 inch) Presser foot Free presser type Presser foot lift 5 mm to 6 mm (3/16 to 15/64 inch) Needle SCHMETZ 130/705H No. of needles and threads Three/Four threads convertible Two needles or single needle Machine net weight 7.0 kgs. Needle set SCHMETZ 130/705H - Brother International 1034D | Users Manual - English and Spanish - Page 67
Chapter Chapter Chapter CONTENTS SETTING RECORD / NOTAS DE AJUSTES FABRIC TEJIDO THREAD HILO NEEDLE AGUJA THREAD TENSION TENSION DE HILO left right upper- lower- needle needle looper looper aguja aguja áncora áncora izquier- derecha superior inferior da g NOTE NOTA STITCH TYPE Tipo de - Brother International 1034D | Users Manual - English and Spanish - Page 68
1034D 193345-011 Printed in Taiwan
-
 1
1 -
 2
2 -
 3
3 -
 4
4 -
 5
5 -
 6
6 -
 7
7 -
8
-
9
-
10
-
11
-
12
-
13
-
14
-
15
-
16
-
17
-
18
-
19
-
20
-
21
-
22
-
23
-
24
-
25
-
26
-
27
-
28
-
29
-
30
-
31
-
32
-
33
-
34
-
35
-
36
-
37
-
38
-
39
-
40
-
41
-
42
-
43
-
44
-
45
-
46
-
47
-
48
-
49
-
50
-
51
-
52
-
53
-
54
-
55
-
56
-
57
-
58
-
59
-
60
-
61
-
62
-
63
-
64
-
65
-
66
-
67
-
68
 |
 |

HANDBOOK FOR COMPACT
OVERLOCK MACHINE
MANUAL DE INSTRUCCIONES DE LA
MAQUINA COMPACTA OVERLOCK
5
4
6
5
4
6
5
4
6
5
4
6