Brother International 1034D Users Manual - English and Spanish - Page 50
antes de coser con puntadas overlock normales.
 |
View all Brother International 1034D manuals
Add to My Manuals
Save this manual to your list of manuals |
Page 50 highlights
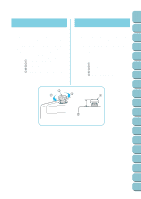
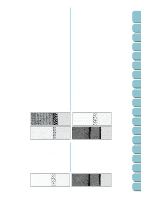
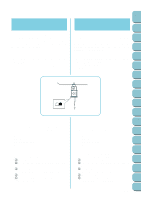
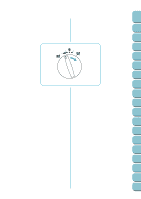
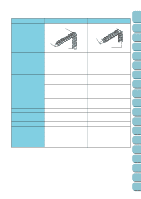
TABLE OF Chapter Chapter Chapter Chapter Chapter Chapter Chapter Chapter Chapter Chapter Chapter Chapter Chapter Chapter Chapter Chapter Chapter Chapter CONTENTS 1 2 6 Press the stitch finger release lever to remove the stitch finger. 7 Storage for the stitch finger is provided on the inside of the front cover illustrated. NOTE: Make sure to install stitch finger when sewing regular overlock stitches. 1 Upperlooper 2 Stitch finger 3 Stitch finger release lever 4 Front cover 5 Stitch finger holder 6 Stitch finger 6 Apriete la palanca de liberación de la uñeta de puntadas para retirar la uñeta. 7 El alojamiento de la uñeta de puntada se encuentra en el interior de la tapa delantera ilustrada. NOTA: Asegúrese siempre de instalar la uñeta de puntadas antes de coser con puntadas overlock normales. 1 Ancora superior 2 Uñeta de puntadas 3 Palance de la uñeta de puntadas 4 Tapad elantera 5 Soporte para uñeta de puntada 6 Uñeta de puntadas 3 4 5 6 7 8 9 10 11 12 13 14 15 16 17 18 1 5 2 6 4 3 (5) Adjust the stitch width for rolled hemming. Move the stitch width lever (located on the left side of the machine toward the front) up to the "R" position. 7 Stitch width lever 8 Needle plate with stitch finger removed A Two-needle models B One-needle models (5) Ajuste el ancho de las puntadas para borde enrollado. Mueva la palanca de anchura de las puntadas (situada a la izquierda de la máquina, hacia adelante) hacia la posición "R". 7 Palanca de anchura de las puntadas 8 Placa de aguja con uñeta de puntadas extraída A Modelos de dos agujas B Modelos de una aguja A 67 B 8 8 5 3.5 R R 7 7 43
-
 1
1 -
2
-
3
-
4
-
5
-
6
-
7
-
8
-
9
-
10
-
11
-
12
-
13
-
14
-
15
-
16
-
17
-
18
-
19
-
20
-
21
-
22
-
23
-
24
-
25
-
26
-
27
-
28
-
29
-
30
-
31
-
32
-
33
-
34
-
35
-
36
-
37
-
38
-
39
-
40
-
41
-
42
-
43
-
44
-
 45
45 -
 46
46 -
 47
47 -
 48
48 -
 49
49 -
 50
50 -
 51
51 -
 52
52 -
 53
53 -
 54
54 -
 55
55 -
56
-
57
-
58
-
59
-
60
-
61
-
62
-
63
-
64
-
65
-
66
-
67
-
68
 |
 |
