Brother International DCP 8045D Quick Setup Guide - English - Page 29
the list of machines and click, The model you are installing will be listed
 |
UPC - 012502610335
View all Brother International DCP 8045D manuals
Add to My Manuals
Save this manual to your list of manuals |
Page 29 highlights
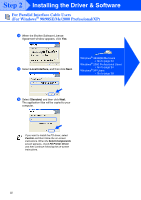
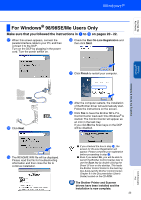
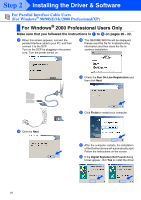
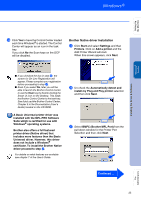
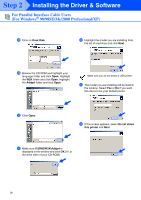
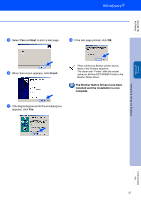
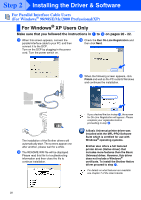
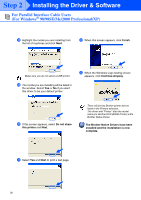
Step 2 Installing the Driver & Software For Parallel Interface Cable Users (For Windows® 98/98SE/Me/2000 Professional/XP) R Click on Have Disk. V Highlight the model you are installing from the list of machines and click Next. S Browse the CD-ROM and highlight your language folder and click Open. Highlight the W2K folder and click Open. Highlight the Addprt folder and click Open. Make sure you do not select a USB printer. W The model you are installing will be listed in the window. Select Yes or No if you want this driver to be your default printer. T Click Open. X If this screen appears, select Do not share this printer and Next. U Make sure X:\ENG\W2K\Addprt is displayed in the window and click OK (X:\ is the drive letter of your CD-ROM). 26
-
 1
1 -
2
-
3
-
4
-
5
-
6
-
7
-
8
-
9
-
10
-
11
-
12
-
13
-
14
-
15
-
16
-
17
-
18
-
19
-
20
-
21
-
22
-
23
-
 24
24 -
 25
25 -
 26
26 -
 27
27 -
 28
28 -
 29
29 -
 30
30 -
 31
31 -
 32
32 -
 33
33 -
 34
34 -
35
-
36
-
37
-
38
-
39
-
40
-
41
-
42
-
43
-
44
-
45
-
46
-
47
-
48
-
49
-
50
-
51
-
52
-
53
-
54
 |
 |
