Brother International HL 5170DN Quick Setup Guide - English - Page 12
Print a Test Do NOT connect the interface cable., You will be prompted to connect - print test page
 |
UPC - 012502612667
View all Brother International HL 5170DN manuals
Add to My Manuals
Save this manual to your list of manuals |
Page 12 highlights
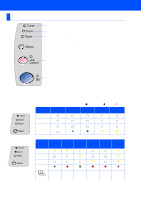
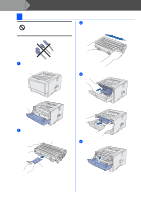
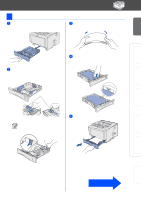
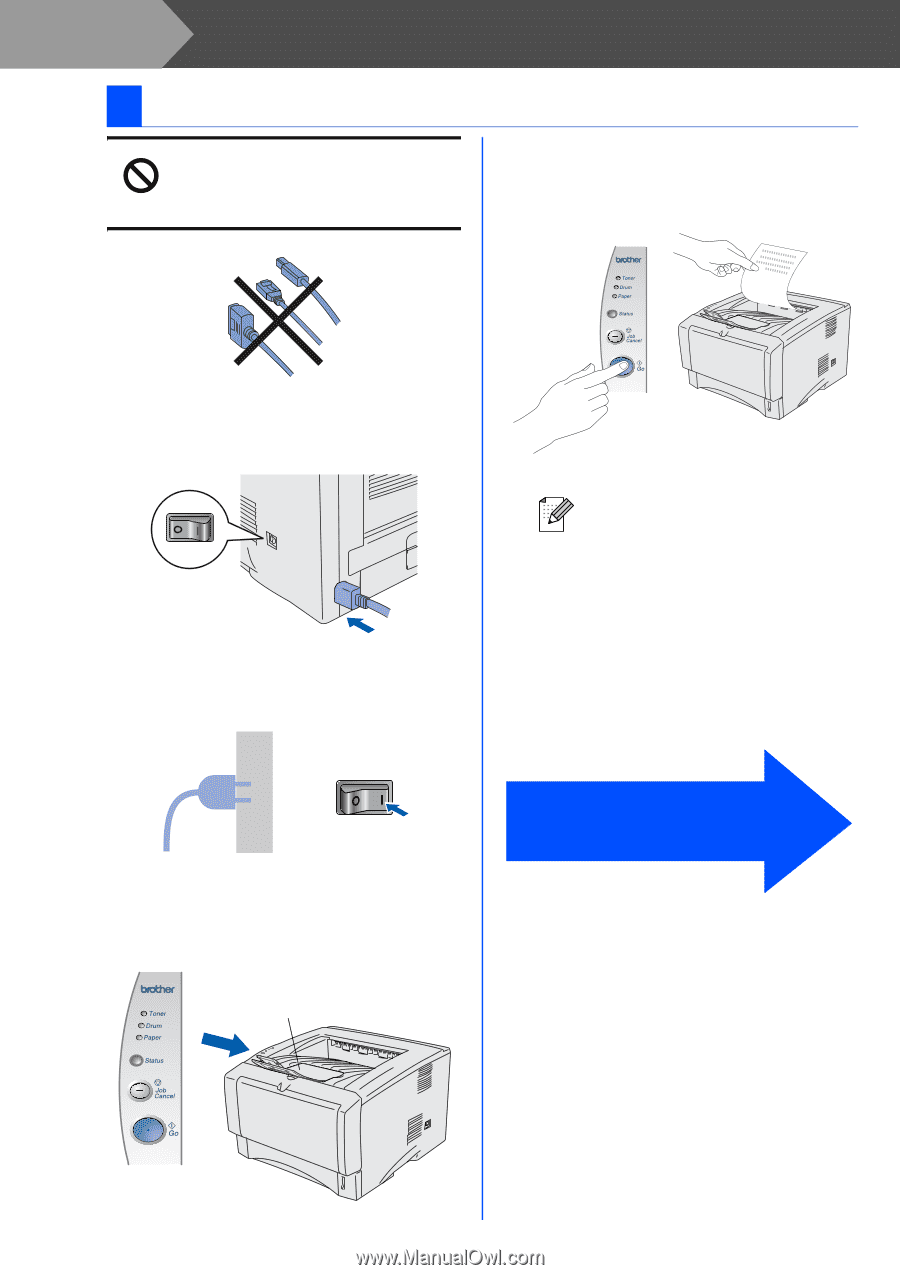
Step 1 Setting Up Your Printer 4 Print a Test Page Do NOT connect the interface cable. You will be prompted to connect the interface cable during the driver installation. 4 Press the Go button. The printer prints a test page. Check that the test page has printed correctly. 1 Make sure that the printer power switch is off. Connect the AC power cord to the printer. This function won't be available after sending a print job from your PC. 2 Plug the AC power cord into an AC outlet. Turn the power switch on. 3 After the printer has finished warming up, the Status LED stops blinking and stays green. Unfold the Support flap. Go to the next page to install the driver. 10
-
 1
1 -
2
-
3
-
4
-
5
-
6
-
 7
7 -
 8
8 -
 9
9 -
 10
10 -
 11
11 -
 12
12 -
 13
13 -
 14
14 -
 15
15 -
 16
16 -
 17
17 -
18
-
19
-
20
-
21
-
22
-
23
-
24
-
25
-
26
-
27
-
28
-
29
-
30
-
31
-
32
-
33
-
34
-
35
 |
 |
10
Setting Up Your Printer
Do NOT connect the interface cable.
You will be prompted to connect the
interface cable during the driver
installation.
1
Make sure that the printer power switch is
off.
Connect the AC power cord to the printer.
2
Plug the AC power cord into an AC outlet.
Turn the power switch on.
3
After the printer has finished warming up,
the
Status
LED stops blinking and stays
green.
4
Press the
Go
button. The printer prints a
test page.
Check that the test page has printed
correctly.
4
Print a Test Page
Unfold the Support
flap.
This function won’t be available after
sending a print job from your PC.
Go to the next page
to install the driver.
Step 1