Brother International HL-L5000D Online Users Guide HTML - Page 230
Con IEEE 802.1x Authentication for a Wired or a Wireless Network Using Web Based Management (Web Browser)
 |
View all Brother International HL-L5000D manuals
Add to My Manuals
Save this manual to your list of manuals |
Page 230 highlights
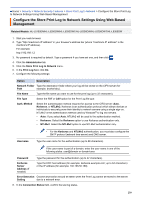
Home > Security > Network Security Features > Use IEEE 802.1x Authentication for a Wired or a Wireless Network > Configure IEEE 802.1x Authentication for a Wired or a Wireless Network Using Web Based Management (Web Browser) Configure IEEE 802.1x Authentication for a Wired or a Wireless Network Using Web Based Management (Web Browser) Related Models: HL-L5100DN/HL-L5200DW/HL-L5200DWT/HL-L6200DW/HL-L6200DWT/HL-L6300DW • If you configure your machine using EAP-TLS authentication, you must install the client certificate issued by a CA before you start configuration. Contact your network administrator about the client certificate. If you have installed more than one certificate, we recommend writing down the certificate name you want to use. • Before you verify the server certificate, you must import the CA certificate that has been issued by the CA that signed the server certificate. Contact your network administrator or your Internet Service Provider (ISP) to confirm whether a CA certificate import is necessary. You can also configure IEEE 802.1x authentication using: • BRAdmin Professional 3 (Wired and wireless network) • Wireless setup wizard from the control panel (Wireless network) • Wireless setup wizard on the CD-ROM (Wireless network) 1. Start your web browser. 2. Type "http://machine's IP address" in your browser's address bar (where "machine's IP address" is the machine's IP address). For example: http://192.168.1.2 • If you are using a Domain Name System or enable a NetBIOS name, you can type another name, such as "SharedPrinter" instead of the IP address. - For example: http://SharedPrinter If you enable a NetBIOS name, you can also use the node name. - For example: http://brnxxxxxxxxxxxx The NetBIOS name can be found in the Network Configuration Report. • For Macintosh, access Web Based Management by clicking the machine's icon on the Status Monitor screen. 3. No password is required by default. Type a password if you have set one, and then click . 4. Click the Network tab. 5. Do one of the following: Option Wired network Description Click Wired, and then select Wired 802.1x Authentication. Wireless network Click Wireless, and then select Wireless (Enterprise). 6. Configure the IEEE 802.1x authentication settings. 225
-
 1
1 -
2
-
3
-
4
-
5
-
6
-
7
-
8
-
9
-
10
-
11
-
12
-
13
-
14
-
15
-
16
-
17
-
18
-
19
-
20
-
21
-
22
-
23
-
24
-
25
-
26
-
27
-
28
-
29
-
30
-
31
-
32
-
33
-
34
-
35
-
36
-
37
-
38
-
39
-
40
-
41
-
42
-
43
-
44
-
45
-
46
-
47
-
48
-
49
-
50
-
51
-
52
-
53
-
54
-
55
-
56
-
57
-
58
-
59
-
60
-
61
-
62
-
63
-
64
-
65
-
66
-
67
-
68
-
69
-
70
-
71
-
72
-
73
-
74
-
75
-
76
-
77
-
78
-
79
-
80
-
81
-
82
-
83
-
84
-
85
-
86
-
87
-
88
-
89
-
90
-
91
-
92
-
93
-
94
-
95
-
96
-
97
-
98
-
99
-
100
-
101
-
102
-
103
-
104
-
105
-
106
-
107
-
108
-
109
-
110
-
111
-
112
-
113
-
114
-
115
-
116
-
117
-
118
-
119
-
120
-
121
-
122
-
123
-
124
-
125
-
126
-
127
-
128
-
129
-
130
-
131
-
132
-
133
-
134
-
135
-
136
-
137
-
138
-
139
-
140
-
141
-
142
-
143
-
144
-
145
-
146
-
147
-
148
-
149
-
150
-
151
-
152
-
153
-
154
-
155
-
156
-
157
-
158
-
159
-
160
-
161
-
162
-
163
-
164
-
165
-
166
-
167
-
168
-
169
-
170
-
171
-
172
-
173
-
174
-
175
-
176
-
177
-
178
-
179
-
180
-
181
-
182
-
183
-
184
-
185
-
186
-
187
-
188
-
189
-
190
-
191
-
192
-
193
-
194
-
195
-
196
-
197
-
198
-
199
-
200
-
201
-
202
-
203
-
204
-
205
-
206
-
207
-
208
-
209
-
210
-
211
-
212
-
213
-
214
-
215
-
216
-
217
-
218
-
219
-
220
-
221
-
222
-
223
-
224
-
 225
225 -
 226
226 -
 227
227 -
 228
228 -
 229
229 -
 230
230 -
 231
231 -
 232
232 -
 233
233 -
 234
234 -
 235
235 -
236
-
237
-
238
-
239
-
240
-
241
-
242
-
243
-
244
-
245
-
246
-
247
-
248
-
249
-
250
-
251
-
252
-
253
-
254
-
255
-
256
-
257
-
258
-
259
-
260
-
261
-
262
-
263
-
264
-
265
-
266
-
267
-
268
-
269
-
270
-
271
-
272
-
273
-
274
-
275
-
276
-
277
-
278
-
279
-
280
-
281
-
282
-
283
-
284
-
285
-
286
-
287
-
288
-
289
-
290
-
291
-
292
-
293
-
294
-
295
-
296
-
297
-
298
-
299
-
300
-
301
-
302
-
303
-
304
-
305
-
306
-
307
-
308
-
309
-
310
-
311
-
312
-
313
-
314
-
315
-
316
-
317
-
318
-
319
-
320
-
321
-
322
-
323
-
324
-
325
-
326
-
327
-
328
-
329
-
330
-
331
-
332
-
333
-
334
-
335
-
336
-
337
-
338
-
339
-
340
-
341
-
342
-
343
-
344
-
345
-
346
-
347
-
348
-
349
-
350
-
351
-
352
-
353
-
354
-
355
-
356
-
357
-
358
-
359
-
360
-
361
-
362
-
363
-
364
-
365
-
366
-
367
-
368
-
369
-
370
-
371
-
372
-
373
-
374
-
375
-
376
-
377
-
378
-
379
-
380
-
381
-
382
-
383
-
384
-
385
-
386
-
387
-
388
 |
 |
