Brother International HS-5300 Service Manual - Page 119
Platen, ground, spring, Bearing, upper, roller, lower, roller unit
 |
View all Brother International HS-5300 manuals
Add to My Manuals
Save this manual to your list of manuals |
Page 119 highlights
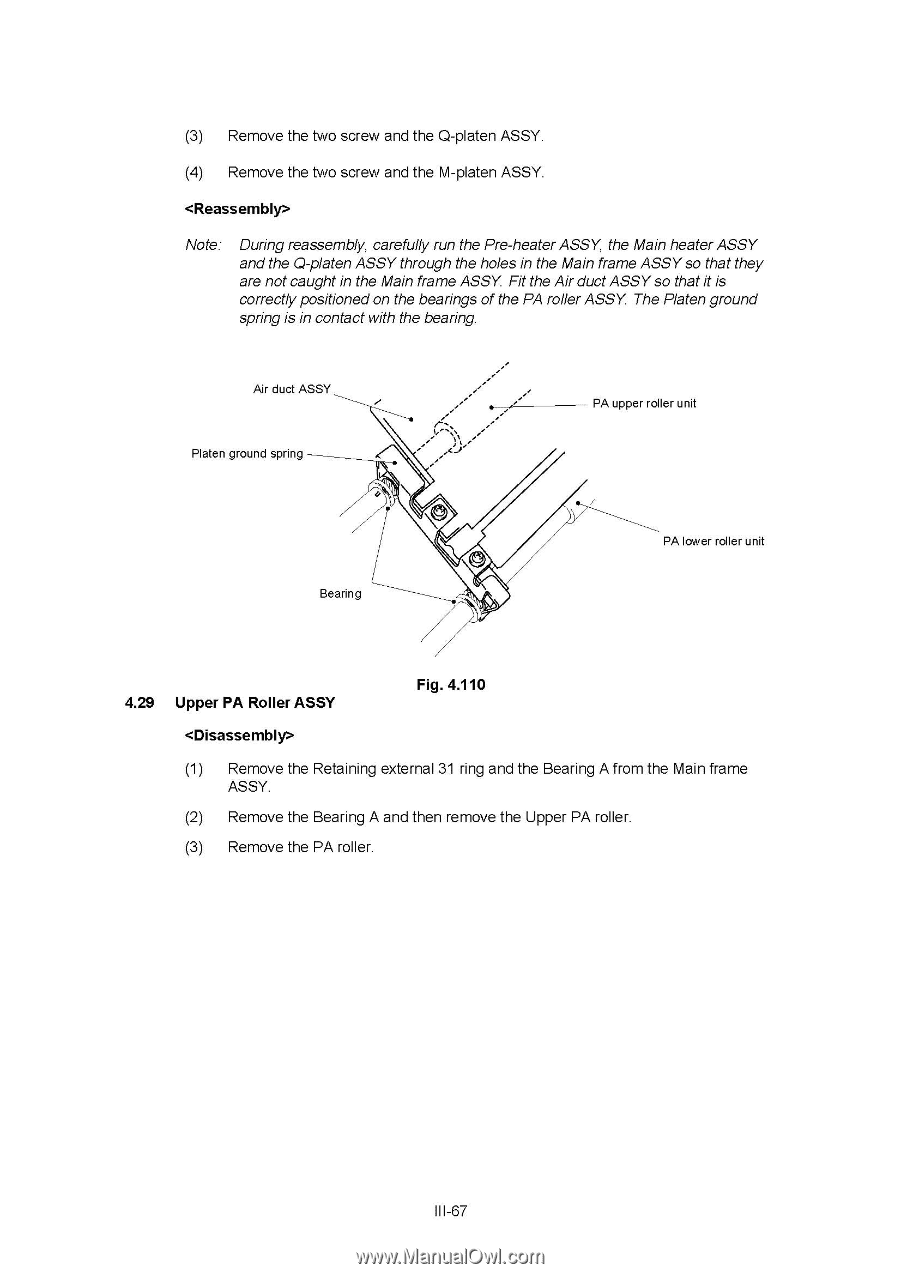
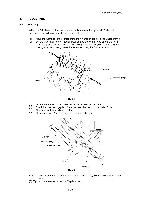
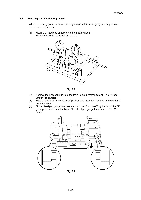
(3) Remove the two screw and the Q-platen ASSY. (4) Remove the two screw and the M-platen ASSY. Note: During reassembly, carefully run the Pre-heater ASSY, the Main heater ASSY and the Q-platen ASSY through the holes in the Main frame ASSY so that they are not caught in the Main frame ASSY. Fit the Air duct ASSY so that it is correctly positioned on the bearings of the PA roller ASSY. The Platen ground spring is in contact with the bearing. Air duct ASSY Platen ground spring ". ' -, ,zy PA upper roller unit 0 Bearing PA lower roller unit 4.29 Upper PA Roller ASSY Fig. 4.110 (1) Remove the Retaining external 31 ring and the Bearing A from the Main frame ASSY. (2) Remove the Bearing A and then remove the Upper PA roller. (3) Remove the PA roller. III-67
-
 1
1 -
2
-
3
-
4
-
5
-
6
-
7
-
8
-
9
-
10
-
11
-
12
-
13
-
14
-
15
-
16
-
17
-
18
-
19
-
20
-
21
-
22
-
23
-
24
-
25
-
26
-
27
-
28
-
29
-
30
-
31
-
32
-
33
-
34
-
35
-
36
-
37
-
38
-
39
-
40
-
41
-
42
-
43
-
44
-
45
-
46
-
47
-
48
-
49
-
50
-
51
-
52
-
53
-
54
-
55
-
56
-
57
-
58
-
59
-
60
-
61
-
62
-
63
-
64
-
65
-
66
-
67
-
68
-
69
-
70
-
71
-
72
-
73
-
74
-
75
-
76
-
77
-
78
-
79
-
80
-
81
-
82
-
83
-
84
-
85
-
86
-
87
-
88
-
89
-
90
-
91
-
92
-
93
-
94
-
95
-
96
-
97
-
98
-
99
-
100
-
101
-
102
-
103
-
104
-
105
-
106
-
107
-
108
-
109
-
110
-
111
-
112
-
113
-
 114
114 -
 115
115 -
 116
116 -
 117
117 -
 118
118 -
 119
119 -
 120
120 -
 121
121 -
 122
122 -
 123
123 -
 124
124 -
125
-
126
-
127
-
128
-
129
-
130
-
131
-
132
-
133
-
134
-
135
-
136
-
137
-
138
-
139
-
140
-
141
-
142
-
143
-
144
-
145
-
146
-
147
-
148
-
149
-
150
-
151
-
152
-
153
-
154
-
155
-
156
-
157
-
158
-
159
-
160
-
161
-
162
-
163
-
164
-
165
-
166
-
167
-
168
 |
 |