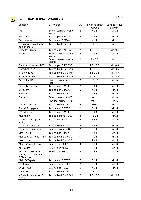
Brother International HS-5300 Service Manual - Page 59
First, sheet, feeder, Second, Positioning, frame, Lower, first, Regist, sensor, actuator
 |
View all Brother International HS-5300 manuals
Add to My Manuals
Save this manual to your list of manuals |
Page 59 highlights
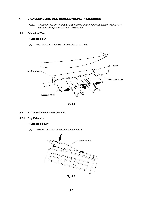
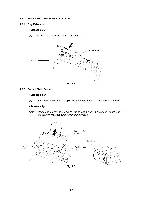
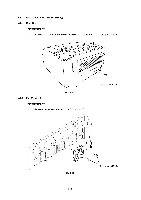
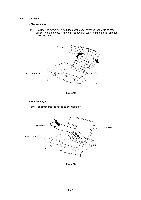
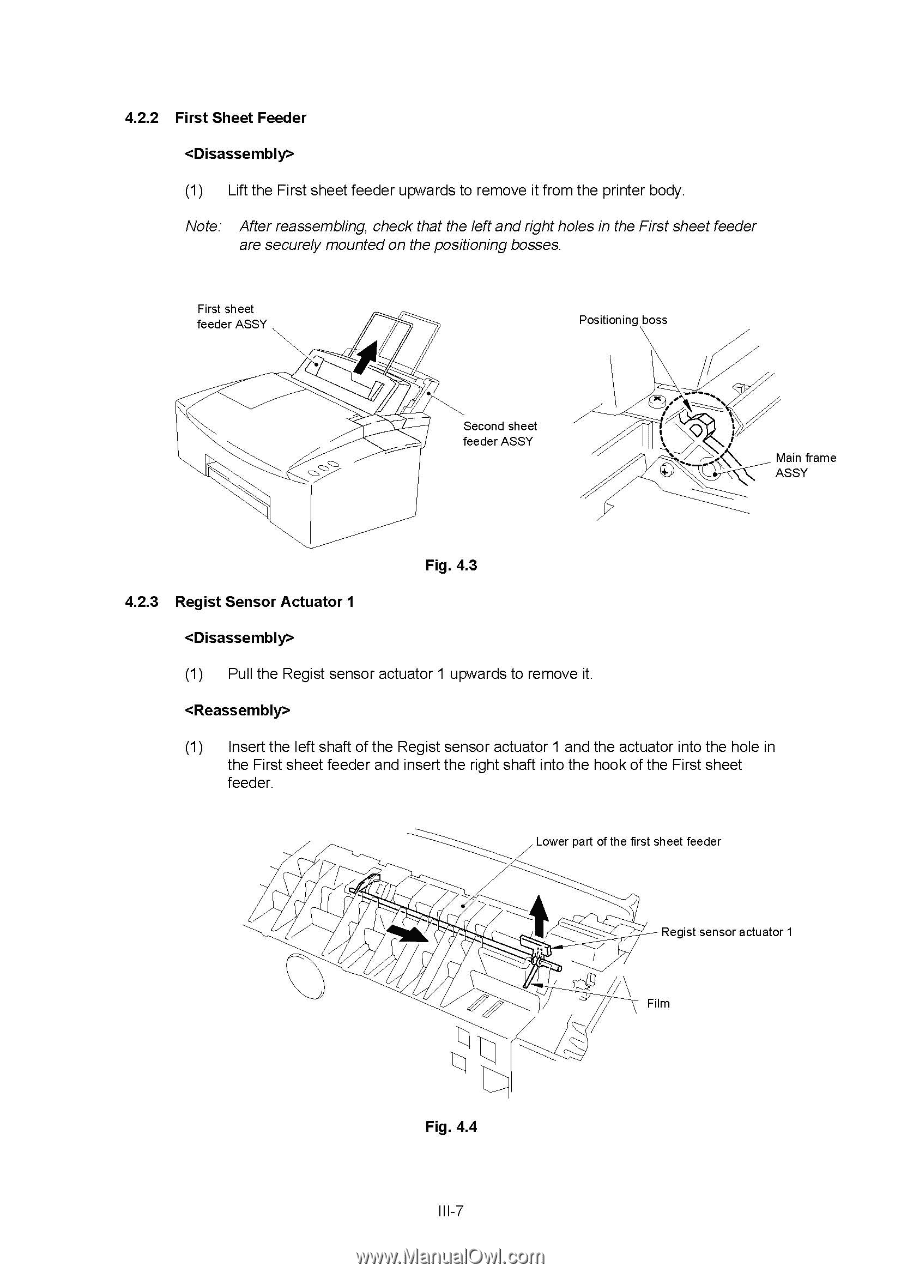
4.2.2 First Sheet Feeder (1) Lift the First sheet feeder upwards to remove it from the printer body. Note: After reassembling, check that the left and right holes in the First sheet feeder are securely mounted on the positioning bosses. First sheet feeder ASSY Positioning boss N N \ z ,.i,' ------_ Second sheet feeder ASSY 10 ....•.., 1.7 ----___ I t '-.% C) - C Main frame ASSY Fig. 4.3 4.2.3 Regist Sensor Actuator 1 (1) Pull the Regist sensor actuator 1 upwards to remove it. (1) Insert the left shaft of the Regist sensor actuator 1 and the actuator into the hole in the First sheet feeder and insert the right shaft into the hook of the First sheet feeder. Lower part of the first sheet feeder , Regist sensor actuator 1 Film Fig. 4.4 III-7
-
 1
1 -
2
-
3
-
4
-
5
-
6
-
7
-
8
-
9
-
10
-
11
-
12
-
13
-
14
-
15
-
16
-
17
-
18
-
19
-
20
-
21
-
22
-
23
-
24
-
25
-
26
-
27
-
28
-
29
-
30
-
31
-
32
-
33
-
34
-
35
-
36
-
37
-
38
-
39
-
40
-
41
-
42
-
43
-
44
-
45
-
46
-
47
-
48
-
49
-
50
-
51
-
52
-
53
-
 54
54 -
 55
55 -
 56
56 -
 57
57 -
 58
58 -
 59
59 -
 60
60 -
 61
61 -
 62
62 -
 63
63 -
 64
64 -
65
-
66
-
67
-
68
-
69
-
70
-
71
-
72
-
73
-
74
-
75
-
76
-
77
-
78
-
79
-
80
-
81
-
82
-
83
-
84
-
85
-
86
-
87
-
88
-
89
-
90
-
91
-
92
-
93
-
94
-
95
-
96
-
97
-
98
-
99
-
100
-
101
-
102
-
103
-
104
-
105
-
106
-
107
-
108
-
109
-
110
-
111
-
112
-
113
-
114
-
115
-
116
-
117
-
118
-
119
-
120
-
121
-
122
-
123
-
124
-
125
-
126
-
127
-
128
-
129
-
130
-
131
-
132
-
133
-
134
-
135
-
136
-
137
-
138
-
139
-
140
-
141
-
142
-
143
-
144
-
145
-
146
-
147
-
148
-
149
-
150
-
151
-
152
-
153
-
154
-
155
-
156
-
157
-
158
-
159
-
160
-
161
-
162
-
163
-
164
-
165
-
166
-
167
-
168
 |
 |
4.2.2
First
Sheet
Feeder
<Disassembly>
(1)
Lift
the
First
sheet
feeder
upwards
to remove
it
from
the
printer
body.
Note:
After
reassembling,
check
that
the
left
and
right
holes
in
the
First
sheet
feeder
are
securely
mounted
on
the
positioning
bosses.
N
First
sheet
feeder
ASSY
N
\
z
.
,,
i'
------_
Second
sheet
feeder
ASSY
Fig.
4.3
Positioning
boss
4.2.3
Regist
Sensor
Actuator
1
<Disassembly>
(1)
Pull
the
Regist
sensor
actuator
1
upwards
to remove
it.
<Reassembly>
1
.
7
10
....
•..,
----___
I
t
'-.%
Main
frame
C)
-
C
ASSY
(1)
Insert
the
left
shaft
of
the
Regist
sensor
actuator
1
and
the
actuator
into
the
hole
in
the
First
sheet
feeder
and
insert
the
right
shaft
into
the
hook
of
the
First
sheet
feeder.
Lower
part
of
the
first
sheet
feeder
,
Fig.
4.4
Regist
sensor
actuator
1
Film
III
-7