Brother International PE 150 Users Manual - English - Page 28
CHANGING THE NEEDLE, Set the needle securely.
 |
UPC - 012502101802
View all Brother International PE 150 manuals
Add to My Manuals
Save this manual to your list of manuals |
Page 28 highlights
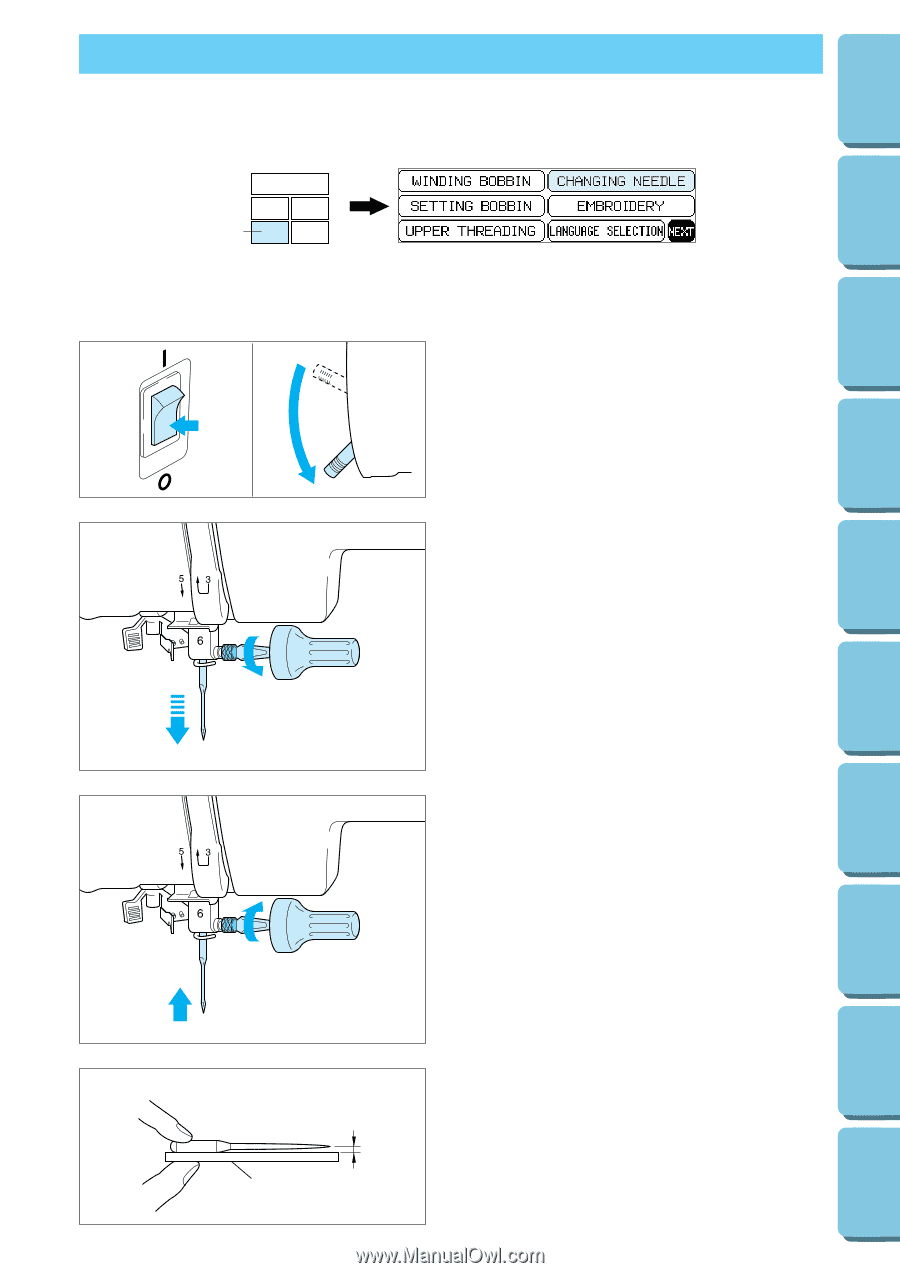
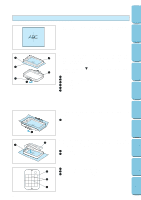
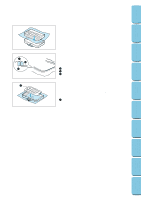
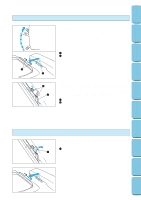
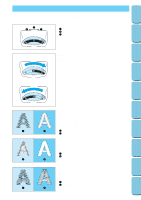
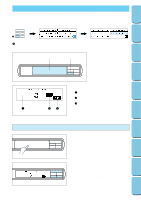
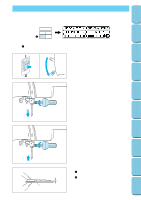
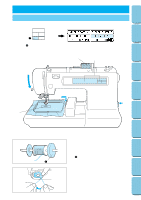
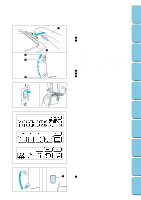
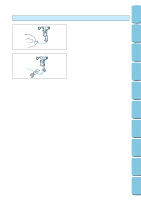
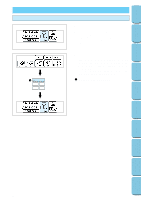
CONTENTS MACHINE KNOWLEDGE EMBROIDERING MAINTENANCE CHANGING THE NEEDLE Set the needle securely. 1 1 "BASIC OPERATION" key 1 1. Turn the power switch off and lower the presser foot lever. Turn the balance wheel to raise the needle to its highest position. 2. Loosen the needle screw with a screwdriver. 3. Slide the needle out. 2 3 4 4. Insert the new needle into the needle shaft as far up as it will go with the flat side of the needle facing away from you. Secure it by firmly tightening the screw with a screwdriver. 5. Turn the power switch on. ERROR MESSAGE TROUBLESHOOTING PATTERNS EMBROIDERING USING A SMALL FRAME (OPTIONAL) EMBROIDERING USING A EXTRA-SMALL FRAME (OPTIONAL) EMBROIDERING USING A LARGE FRAME (OPTIONAL) 1 2 Checking for a bent needle 1 Place the needle on a flat surface and check whether the space is parallel or not. 2 Flat surface (Needle-plate, glass, ruler etc.) If the space is not parallel then the needle is bent and should be thrown away to prevent damage to your project or the machine. 25
-
 1
1 -
2
-
3
-
4
-
5
-
6
-
7
-
8
-
9
-
10
-
11
-
12
-
13
-
14
-
15
-
16
-
17
-
18
-
19
-
20
-
21
-
22
-
 23
23 -
 24
24 -
 25
25 -
 26
26 -
 27
27 -
 28
28 -
 29
29 -
 30
30 -
 31
31 -
 32
32 -
 33
33 -
34
-
35
-
36
-
37
-
38
-
39
-
40
-
41
-
42
-
43
-
44
-
45
-
46
-
47
-
48
-
49
-
50
-
51
-
52
-
53
-
54
-
55
-
56
-
57
-
58
-
59
-
60
-
61
-
62
-
63
-
64
-
65
-
66
-
67
-
68
-
69
-
70
-
71
-
72
-
73
-
74
-
75
-
76
-
77
-
78
-
79
-
80
-
81
-
82
-
83
-
84
-
85
-
86
-
87
-
88
-
89
-
90
-
91
-
92
-
93
-
94
-
95
-
96
-
97
-
98
-
99
-
100
-
101
-
102
-
103
-
104
-
105
-
106
-
107
-
108
-
109
-
110
-
111
-
112
-
113
-
114
-
115
-
116
-
117
-
118
-
119
-
120
-
121
-
122
-
123
-
124
-
125
-
126
-
127
-
128
-
129
-
130
-
131
-
132
-
133
-
134
-
135
-
136
-
137
-
138
-
139
-
140
-
141
-
142
-
143
-
144
-
145
-
146
 |
 |