Brother International PEDESIGN 6.0 Users Manual - English - Page 220
Viewing the Stitch Pattern While Creating It, Drawing a Stitch Pattern in Fill/Stamp
 |
View all Brother International PEDESIGN 6.0 manuals
Add to My Manuals
Save this manual to your list of manuals |
Page 220 highlights
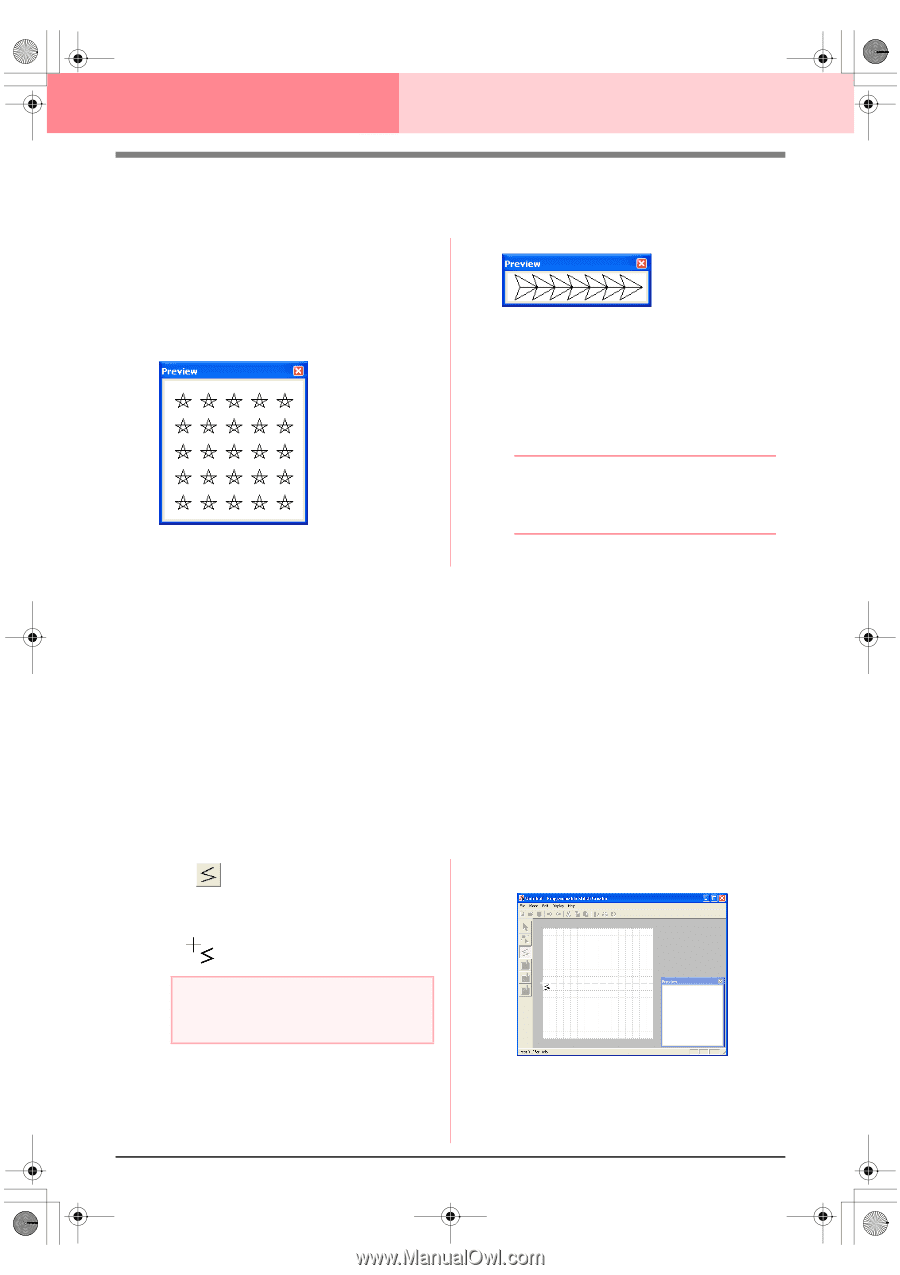
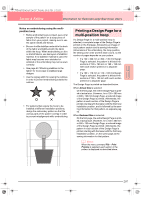
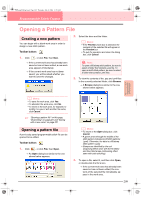
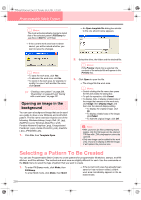
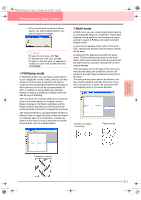
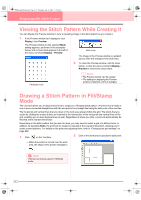
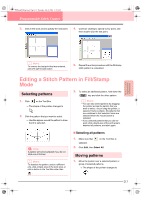
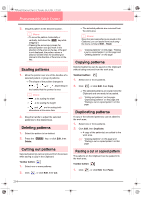
PeDesignV6Eng.book Page 212 Thursday, July 8, 2004 11:59 AM Programmable Stitch Creator Viewing the Stitch Pattern While Creating It You can display the Preview window to view a repeating image of the stitch pattern as you create it. 1. If the Preview window isn't displayed, click Display, then Preview. The Preview window for the selected Mode setting appears, as shown in the examples below, and a check mark appears to the left of the menu command Display - Preview. Motif mode The image in the Preview window is updated as you enter the changes in the work area. 2. To close the Preview window, click its close button, or click the menu command Display - Preview to remove the check mark. Fill/Stamp mode b Memo: • The Preview window can be resized. • The setting for displaying the Preview window is retained, until it is changed. Drawing a Stitch Pattern in Fill/Stamp Mode The Line tool allows you to draw broken lines to create your fill/stamp stitch pattern. A broken line is made of one or more connected straight lines with the end point of one straight line being the start point of the next line. The horizontal and vertical lines that you draw on the work area always follow the grid. The points that you create by clicking the mouse button are inserted at the intersection of the horizontal and vertical lines of the grid, enabling you to draw diagonal lines as well. Regardless of where you click, a point will automatically be inserted at the nearest intersection. Depending on the stitch pattern that you want to draw, you may need to select a grid of a different size. In addition, by selecting None, the point will no longer be inserted at the nearest intersection, allowing you to create curved patterns. For details on the grids and adjusting them, refer to "Changing the grid settings" on page 222. 1. Click on the Tool Box. 2. Click in the work area to specify the start point. → When the pointer is moved over the work area, the shape of the pointer changes to . a Note: This tool can only be used in Fill/Stamp mode. 212
-
 1
1 -
2
-
3
-
4
-
5
-
6
-
7
-
8
-
9
-
10
-
11
-
12
-
13
-
14
-
15
-
16
-
17
-
18
-
19
-
20
-
21
-
22
-
23
-
24
-
25
-
26
-
27
-
28
-
29
-
30
-
31
-
32
-
33
-
34
-
35
-
36
-
37
-
38
-
39
-
40
-
41
-
42
-
43
-
44
-
45
-
46
-
47
-
48
-
49
-
50
-
51
-
52
-
53
-
54
-
55
-
56
-
57
-
58
-
59
-
60
-
61
-
62
-
63
-
64
-
65
-
66
-
67
-
68
-
69
-
70
-
71
-
72
-
73
-
74
-
75
-
76
-
77
-
78
-
79
-
80
-
81
-
82
-
83
-
84
-
85
-
86
-
87
-
88
-
89
-
90
-
91
-
92
-
93
-
94
-
95
-
96
-
97
-
98
-
99
-
100
-
101
-
102
-
103
-
104
-
105
-
106
-
107
-
108
-
109
-
110
-
111
-
112
-
113
-
114
-
115
-
116
-
117
-
118
-
119
-
120
-
121
-
122
-
123
-
124
-
125
-
126
-
127
-
128
-
129
-
130
-
131
-
132
-
133
-
134
-
135
-
136
-
137
-
138
-
139
-
140
-
141
-
142
-
143
-
144
-
145
-
146
-
147
-
148
-
149
-
150
-
151
-
152
-
153
-
154
-
155
-
156
-
157
-
158
-
159
-
160
-
161
-
162
-
163
-
164
-
165
-
166
-
167
-
168
-
169
-
170
-
171
-
172
-
173
-
174
-
175
-
176
-
177
-
178
-
179
-
180
-
181
-
182
-
183
-
184
-
185
-
186
-
187
-
188
-
189
-
190
-
191
-
192
-
193
-
194
-
195
-
196
-
197
-
198
-
199
-
200
-
201
-
202
-
203
-
204
-
205
-
206
-
207
-
208
-
209
-
210
-
211
-
212
-
213
-
214
-
 215
215 -
 216
216 -
 217
217 -
 218
218 -
 219
219 -
 220
220 -
 221
221 -
 222
222 -
 223
223 -
 224
224 -
 225
225 -
226
-
227
-
228
-
229
-
230
-
231
-
232
-
233
-
234
-
235
-
236
-
237
-
238
-
239
-
240
-
241
-
242
-
243
-
244
-
245
-
246
-
247
-
248
-
249
-
250
-
251
-
252
-
253
-
254
-
255
-
256
-
257
-
258
-
259
-
260
-
261
-
262
-
263
-
264
-
265
-
266
-
267
-
268
-
269
-
270
-
271
-
272
 |
 |