Brother International XL-2027 Users Manual - English - Page 10
Straight, stitch
 |
View all Brother International XL-2027 manuals
Add to My Manuals
Save this manual to your list of manuals |
Page 10 highlights
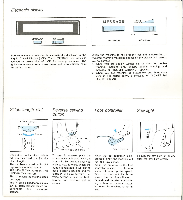
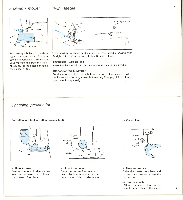
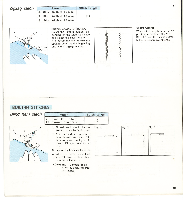
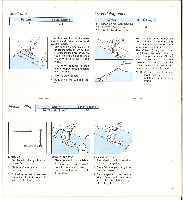
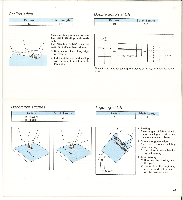
STRAIGHT AND ZIGZAG STITCHING Straight stitch Pattern 2 (Left needle position) 3 (Center needle position) 21 (Stretch Straight Stitch) Stitch Length 1-4 4 How to Start Sewing 1. Raise the needle to its highest position and lift the presser foot. 2. Pull up the lower thread by turning the balance wheel toward you and pull both upper and lower thread to the back of presser foot. 3. Place fabric under the presser foot and position needle 3/8 inch. (10 mm) beyond fabric edge. 4. Lower the presser foot. 5. To back tack, push the Reverse Sewing Button as far as it goes. Reserve sewing is used for locking end of seam and where reinforcement is needed. 6. Release the Reverse Sewing Button and start sewing in forward direction. 15 How to Change Sewing Direction 1. Stop the machine at the turn- ing point while the needle is in the fabric. 2. Raise the presser foot and turn the fabric to its new direction while the needle acts as the axis. 3. Lower the presser foot and start sewing in new direction. How to Finish Your Sewing Project Reverse stitching is used to lock the threads at the end of the seam or wherever reinforcement is needed. 1. This is done by stitching to the end of the seam. Then stop. 2. Push the Reverse Sewing Button and stitch backward for 3/8 inch (10 mm) from end of the seam fabric. ■ Thread cutter , 3. Lift the presser foot and pull out the fabric gently to the left side. 4. Cut both threads by the thread cutter equipped with the machine. 5. To prepare the machine for the next seam, pull 4 inches (10 cm) of thread between the toe of the presser foot toward the back of the machine. How to Remove from Machine 1. Stop the machine. 2. Raise the needle to its highest position and make sure that the thread take-up lever is also in the highest position. Top Stitching and Stretch Materials No. 2 (Left needle position) is used for Top stitching and sewing light weight fabrics. No. 21 (Stretch Straight Stitch)s for stretchable fabrics. 16
-
 1
1 -
2
-
3
-
4
-
 5
5 -
 6
6 -
 7
7 -
 8
8 -
 9
9 -
 10
10 -
 11
11 -
 12
12 -
 13
13 -
 14
14 -
 15
15 -
16
-
17
-
18
-
19
-
20
-
21
-
22
 |
 |
