Brother International XL-2027 Users Manual - English - Page 7
Winding, bobbin, Lower, threading
 |
View all Brother International XL-2027 manuals
Add to My Manuals
Save this manual to your list of manuals |
Page 7 highlights
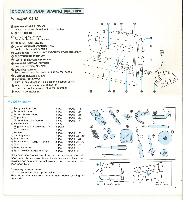
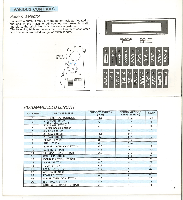
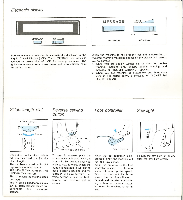
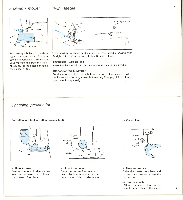
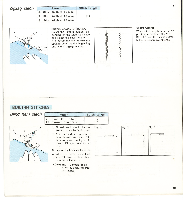
9 THREADING THE MACHINE Winding the bobbin *Set a spool holder firmly so that the thread spool will not turn. The thread end should be delivered around the bobbin in clockwise direction. Bobbin winding ) Spool Holder 1 1 - I A1 r Tighten c Loosen Slit Spring Clutch Release Knob II 2. Holding the thread end, push the bobbin winder shaft to the right. *The slit on the bobbin should match with the spring on the shaft. 3. Loosen the Clutch Release Knob by turning toward you. 1. Deliver thread through the thread-guides as illustrated. Winding the bobbin (CONTINUED) Lower threading Slot Tension spring Metal finger Notch 0 0 z 4. Holding the thread end, depress the foot controller to wind the thread. The machine stops automatically when the bobbin is full. 5. Push the shaft to the left. Remove the full bobbin from the shaft, and trim the excess thread. Tighten the clutch release knob securely. 6. Unwind about 4 inches (10 cm) from the bobbin, and insert the bobbin into the bobbin case. Pull the trailing thread into the slot, down and to the left until it enters the delivery eye under the tension spring. 7. Holding the bobbin case latch, insert the bobbin into the shuttle race. Make sure to fit the metal finger into the notch at the top of race. 10
-
 1
1 -
 2
2 -
 3
3 -
 4
4 -
 5
5 -
 6
6 -
 7
7 -
 8
8 -
 9
9 -
 10
10 -
 11
11 -
 12
12 -
13
-
14
-
15
-
16
-
17
-
18
-
19
-
20
-
21
-
22
 |
 |
