Brother International XL-2027 Users Manual - English - Page 12
Shell, Elastic, stitch, Overedging
 |
View all Brother International XL-2027 manuals
Add to My Manuals
Save this manual to your list of manuals |
Page 12 highlights
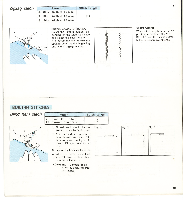
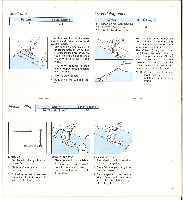
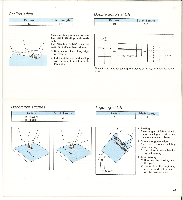
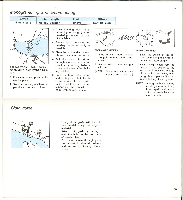
Shell tuck Pattern 8 Stitch Length 2-4 19 Overedging stitch Pattern 9 (Elastic Overlock Stitch) 17 (Arrow-Head Stitch) 19 (Slant Overlock Stitch) Stitch Length 4 This stitch can be used for sewing a picot edge on a light weight fabric. 1. Sew fabric on bias, placing it under the presser foot so that straight stitches are sewn on seam line and zig zag stitches are sewn slightly over folded edge. 2. This work requires a little tighter upper thread tension than normal. 3. Sew at slow speed. 4. Edge of material will be picoted. Position the fabric under the presser foot so the right (zig zag) side of the stitch pattern forms along the cut edge of the fabric. The left hand (straight stitch pattern) forms the seam stitching line of approximately 1/4 inch seam allowance. If the seam allowance is wider than the stitch pattern, trim away any excess fabric after stitching. NOTE: When sewing elastic materials, Elastic Overlock Stitch is useful as illustrated. Elastic stitch Pattern 10 (Elastic Stitch) Stitch Length F-2 (.) MENDING 1. Set the stitch Length Dial be- tween F-1. 2. Place reinforcement fabric under tear. 3. Following the line of tear, sew using the elastic to join both sides of the tear. SEWING ELASTIC 1. Place the elastic on the fabric. 2. As you sew, stretch elastic both in front and in back of the presser foot as shown in illustration. JOINING STITCH 1. The elastic stitch is used to join fabric together. 2. Place fabric edge to edge under the presser foot. 3. Sew together using elastic stitch. Care should be taken to keep the two fabric edges close together. 20
-
 1
1 -
2
-
3
-
4
-
5
-
6
-
 7
7 -
 8
8 -
 9
9 -
 10
10 -
 11
11 -
 12
12 -
 13
13 -
 14
14 -
 15
15 -
 16
16 -
 17
17 -
18
-
19
-
20
-
21
-
22
 |
 |
