Brother International XL-2600 Owner's Manual (Español) - Spanish - Page 47
Make sure that you fit the bobbin case - bobbin cover
 |
View all Brother International XL-2600 manuals
Add to My Manuals
Save this manual to your list of manuals |
Page 47 highlights
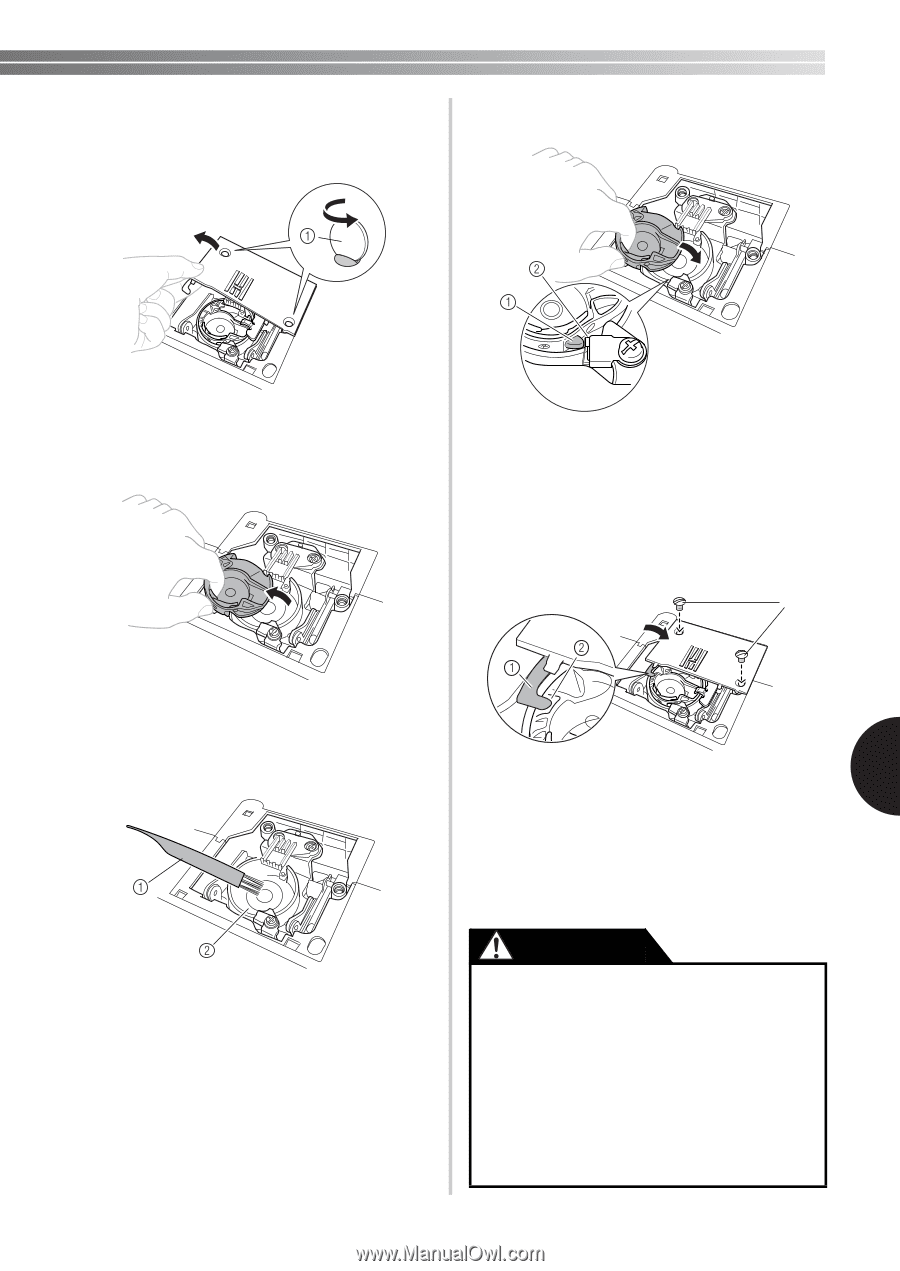
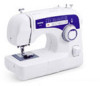
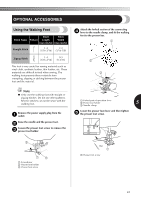
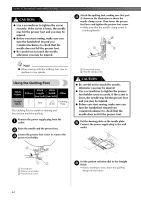
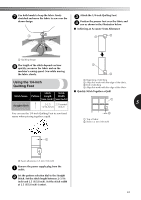
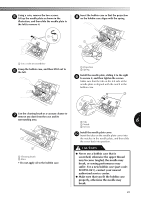
Using a coin, remove the two screws. 5 Lift up the needle plate as shown in the illustration, and then slide the needle plate to the left to remove it. Insert the bobbin case so that the projection 8 on the bobbin case aligns with the spring. 1 Use a coin or screwdriver Grasp the bobbin case, and then lift it out to 6 the left. 1 Projection 2 Spring Install the needle plate, sliding it to the right 9 to secure it, and then tighten the screws. Make sure that the tab on the left side of the needle plate is aligned with the notch in the bobbin case. 3 Use the cleaning brush or a vacuum cleaner to 7 remove any dust from the race and its surrounding area. 1 Tab 6 2 Notch 3 Screws Install the needle plate cover. 0 Insert the tabs on the needle plate cover into the notches in the needle plate, and then slide the cover back into position. 1 Cleaning brush 2 Race • Do not apply oil to the bobbin case. CAUTION ● Never use a bobbin case that is scratched; otherwise the upper thread may become tangled, the needle may break, or sewing performance may suffer. For a new bobbin case (part code: XC8993-021), contact your nearest authorized service center. ● Make sure that you fit the bobbin case properly, otherwise the needle may break. 45
-
 1
1 -
2
-
3
-
4
-
5
-
6
-
7
-
8
-
9
-
10
-
11
-
12
-
13
-
14
-
15
-
16
-
17
-
18
-
19
-
20
-
21
-
22
-
23
-
24
-
25
-
26
-
27
-
28
-
29
-
30
-
31
-
32
-
33
-
34
-
35
-
36
-
37
-
38
-
39
-
40
-
41
-
 42
42 -
 43
43 -
 44
44 -
 45
45 -
 46
46 -
 47
47 -
 48
48 -
 49
49 -
 50
50 -
 51
51 -
 52
52
 |
 |