Brother International XL-3030 Users Manual - English - Page 35
Straight, Stitching, Puntadas, rectas
 |
View all Brother International XL-3030 manuals
Add to My Manuals
Save this manual to your list of manuals |
Page 35 highlights
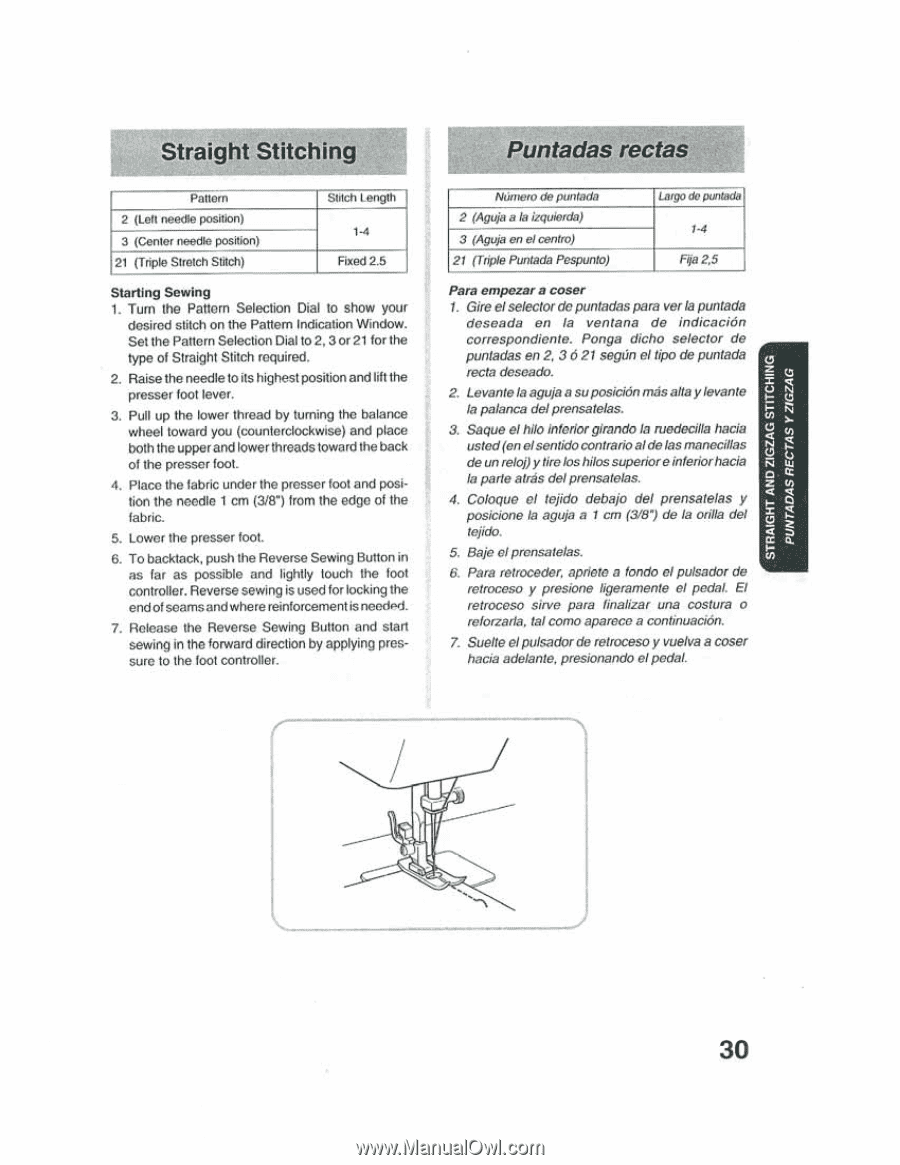
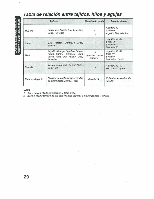
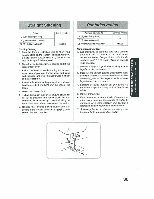
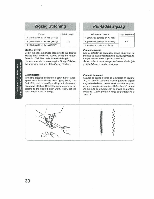
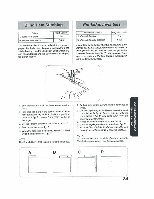
STRAIGHT AND ZIGZAG STITCHING PUNTADAS RECTAS Y ZIGZAG Straight Stitching Pattern 2 (Left needle position) 3 (Center needle position) 21 (Triple Stretch Stitch) Side/I I englli 1-4 Fixed 2.5 Starting Sewing 1. Turn the Pattorn Selection Dial to show your desired stitch on the Pattern Indication Window. Set the Pattern Selection Dial to 2, 3 or 21 for the type of Straight Stitch required. 2. Raise the needle to its highest positionandlift the presser foot lever. 3. Pull up the lower thread by turning the balance wheel toward you (counterclockwise) and place both the upper and lower threads toward the back of the presser foot. 4. Place the fabric under the presser foot and position the needle 1 cm (3/8") from the edge of the fabric. 5. Lower the presser foot. 6. To backtack, push the Reverse Sewing Button in as far as possible and lightly touch the foot controller. Reverse sewing is used for locking the endof seamsandwherereinforcementisneed&d. 7. Release the Reverse Sewing Button and start sewing in the forward direction by applying pressure to the foot controller. Puntadas rectas MilllefO 2 (Aguja a la frqulerdM 3 (Aguja en el centro) 21 (Mate Puntada Pespunto) Lave d° puntada 1-4 Frle 2.5 Pam empezar a coser 1. Gire elselector depuntadas pare vet puntada deseada en la ventana de indication correspondiente. Ponga dicho selector de puntadas en 2, 3 6 21 segem el tipo de puntada recta deseado. 2. Levant&la aguja a supastel&mas alta ylevante la palanca delprensatelas. 3. Segue el hilo inferior girando la ruedecilla hacia usted(enelsentido contrarioaldelasmantillas de unreloj)y tireloshilos superior einteriorhacia la parte apes delprensatelas. 4. Coloque el tejido debajo del prensatelas y posicione la aguja a 1 cm (318) de la orilla del tejido. 5. Baje elpronsatelas. 6. Para retroceder, apriete a tondo elpulsador de retroceso y presione ligeramente el pedal. El retroceso sirve para finalizar una costura o relorzarla, tel coma aparece a continuation. 7. Svelte elpulsador de retroceso y vuelva a corer hacia adelante. presionando elpedal. 30
-
 1
1 -
2
-
3
-
4
-
5
-
6
-
7
-
8
-
9
-
10
-
11
-
12
-
13
-
14
-
15
-
16
-
17
-
18
-
19
-
20
-
21
-
22
-
23
-
24
-
25
-
26
-
27
-
28
-
29
-
 30
30 -
 31
31 -
 32
32 -
 33
33 -
 34
34 -
 35
35 -
 36
36 -
 37
37 -
 38
38 -
 39
39 -
 40
40 -
41
-
42
-
43
-
44
-
45
-
46
-
47
-
48
-
49
-
50
-
51
-
52
-
53
-
54
-
55
-
56
-
57
-
58
-
59
-
60
-
61
-
62
-
63
-
64
-
65
-
66
-
67
-
68
-
69
-
70
-
71
-
72
 |
 |