Canon BJC-8200 User Manual - Page 20
Install the Color Image Scanner Cartridge IS-52 - windows 7
 |
View all Canon BJC-8200 manuals
Add to My Manuals
Save this manual to your list of manuals |
Page 20 highlights
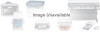
1 Install the Color Image Scanner Cartridge IS-52 The Scanner Cartridge is installed after removing the BJ Print Head. 1. Switch on the printer and open the front cover. • The BJ Print Head moves to the centre automatically. 2. Remove the BJ Print Head and insert it into the storage container. 1 Raise the lock lever and remove the BJ Print Head. 2 Place the BJ Print Head in the storage container. • To prevent the print head from becoming dirty or drying out, place the BJ Print Head in a storage container immediately after you remove it from the printer. The container can be used to store the BJ Print Head or the Scanner Cartridge. Caution • To avoid personal injury, never touch the electrical contacts on the BJ Print Head after removing it from the printer. The electrical contacts become very hot during printing. • To avoid spilling ink on your hands or clothing, handle the BJ Print Head carefully to avoid dropping it. • When you are finished scanning, remove the Scanner Cartridge from the printer and install the BJ Print Head in the printer. Do not leave the Scanner Cartridge installed in the printer. 3. Install the Scanner Cartridge in the printer. 1 Install the Scanner Cartridge in the holder where you removed the BJ Print Head. 2 Lower the lock lever to lock the Scanner Cartridge in place. Caution • To avoid poor scanning performance caused by static electricity or foreign matter like dust or dirt, never touch the scanning head or electrical contacts. Storage container 4. Close the front cover. Windows Macintosh P.19 P.23 18
-
 1
1 -
2
-
3
-
4
-
5
-
6
-
7
-
8
-
9
-
10
-
11
-
12
-
13
-
14
-
 15
15 -
 16
16 -
 17
17 -
 18
18 -
 19
19 -
 20
20 -
 21
21 -
 22
22 -
 23
23 -
 24
24 -
 25
25 -
26
-
27
-
28
-
29
-
30
-
31
-
32
-
33
-
34
-
35
-
36
-
37
-
38
-
39
-
40
-
41
-
42
-
43
-
44
-
45
-
46
-
47
-
48
-
49
-
50
-
51
-
52
-
53
-
54
-
55
-
56
-
57
-
58
-
59
-
60
-
61
-
62
-
63
-
64
-
65
-
66
-
67
-
68
-
69
-
70
-
71
-
72
-
73
-
74
-
75
-
76
-
77
-
78
-
79
-
80
-
81
-
82
-
83
-
84
-
85
 |
 |
