Canon CanoScan 4400F Quick Start Guide Instructions - Page 5
Try Scanning - driver
 |
View all Canon CanoScan 4400F manuals
Add to My Manuals
Save this manual to your list of manuals |
Page 5 highlights
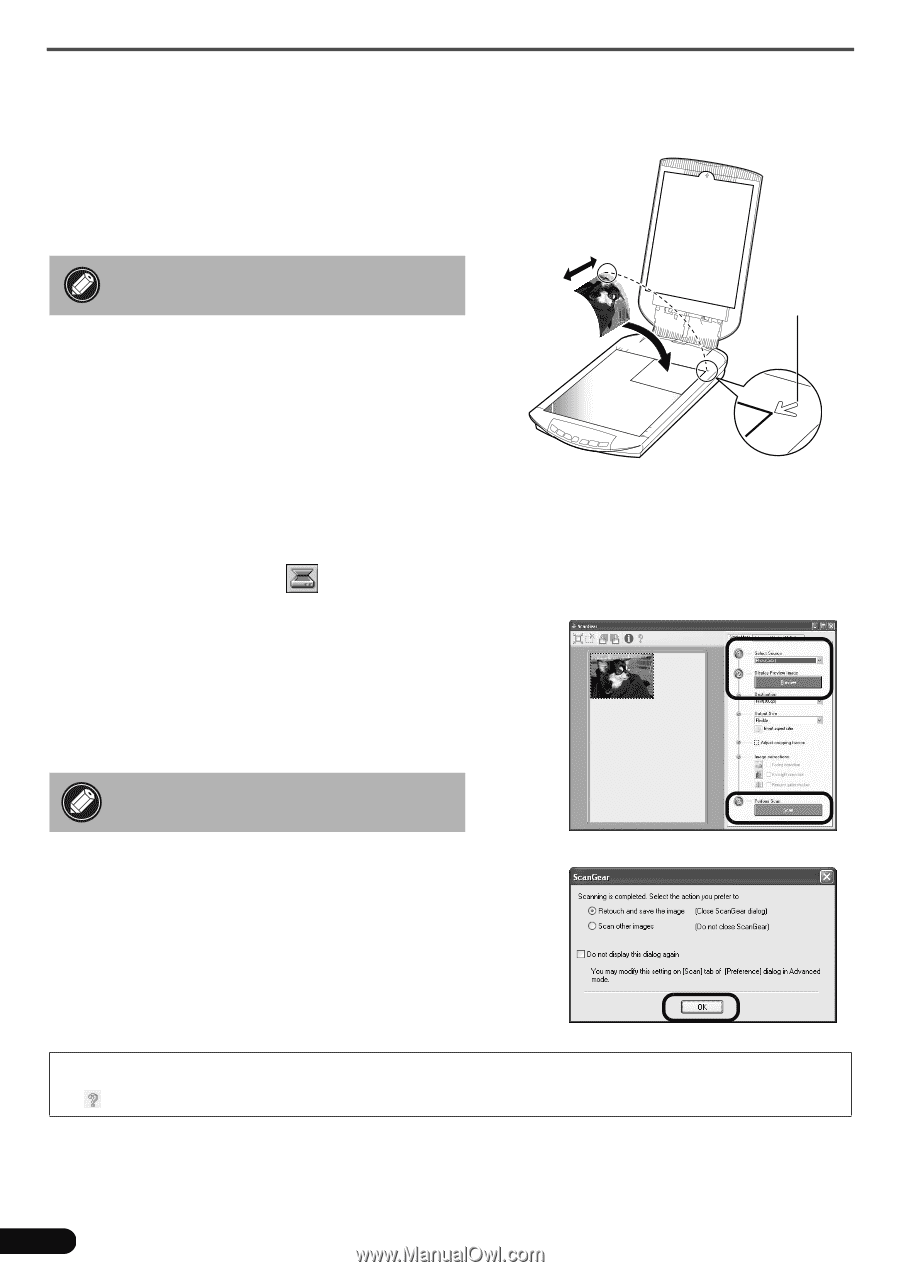
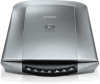
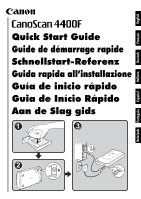
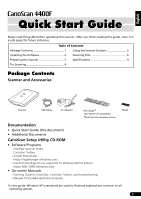
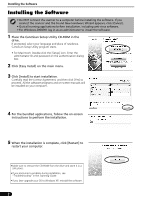
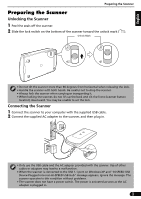
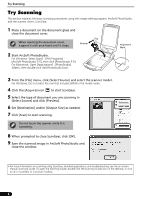
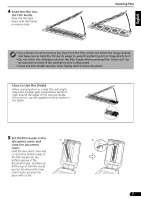
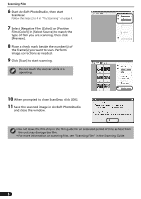
Try Scanning Try Scanning This section explains the basic scanning procedures using the image editing program, ArcSoft PhotoStudio, and the scanner driver, ScanGear. 1 Place a document on the document glass and close the document cover. When opening the document cover, support it with your hand until it stops. Top Bottom 2 Start ArcSoft PhotoStudio. For Windows: Select [start] - [(All) Programs] [ArcSoft PhotoStudio 5.5], then click [PhotoStudio 5.5]. For Macintosh: Open [Applications] - [PhotoStudio] folders, then double-click the [PhotoStudio] icon. Alignment Mark 3 From the [File] menu, click [Select Source] and select the scanner model. For Windows: Do not select the one that includes [WIA] in the model name. 4 Click the [Acquire] icon to start ScanGear. 5 Select the type of document you are scanning in [Select Source] and click [Preview]. 6 Set [Destination] and/or [Output Size] as needed. 7 Click [Scan] to start scanning. Do not touch the scanner while it is operating. 8 When prompted to close ScanGear, click [OK]. 9 Save the scanned image in ArcSoft PhotoStudio and close the window. • For more information on scanning using ScanGear, bundled applications, and troubleshooting, see the on-screen manual Scanning Guide. To open the Scanning Guide, double-click the Scanning Guide icon on the desktop, or click on in ScanGear or CanoScan Toolbox. 4
-
 1
1 -
 2
2 -
 3
3 -
 4
4 -
 5
5 -
 6
6 -
 7
7 -
 8
8 -
 9
9 -
 10
10 -
 11
11 -
12
-
13
-
14
-
15
-
16
-
17
-
18
-
19
-
20
-
21
-
22
-
23
-
24
-
25
-
26
-
27
-
28
-
29
-
30
-
31
-
32
-
33
-
34
-
35
-
36
-
37
-
38
-
39
-
40
-
41
-
42
-
43
-
44
-
45
-
46
-
47
-
48
-
49
-
50
-
51
-
52
-
53
-
54
-
55
-
56
-
57
-
58
-
59
-
60
-
61
-
62
-
63
-
64
-
65
-
66
-
67
-
68
-
69
-
70
-
71
-
72
-
73
 |
 |