Canon CanoScan D2400UF CanoScan D1230U/D2400U Plug-in Module CS-U 4.1 for Mac - Page 11
Set the Scan Mode, Output Device, Resolution
 |
View all Canon CanoScan D2400UF manuals
Add to My Manuals
Save this manual to your list of manuals |
Page 11 highlights
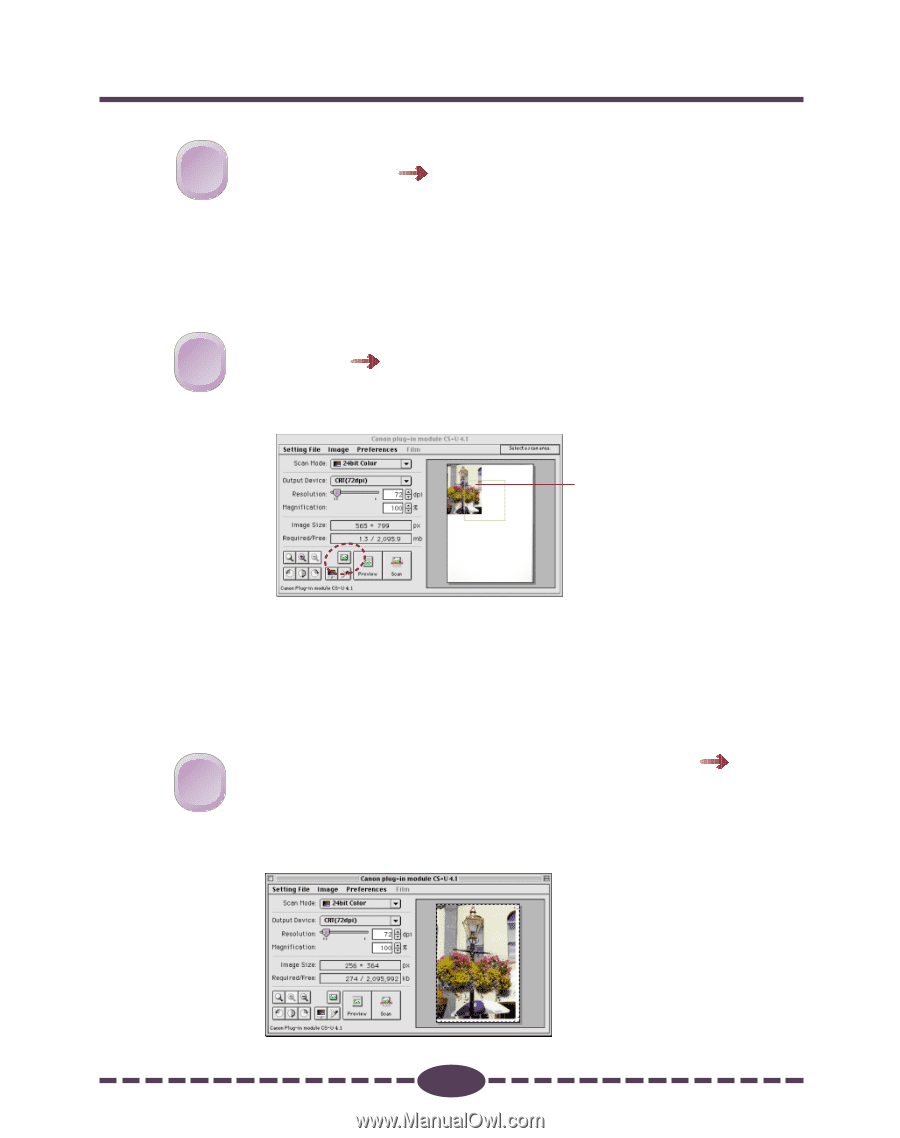
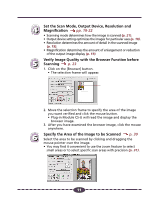
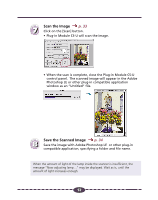
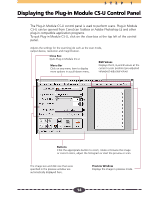
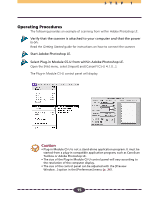
Set the Scan Mode, Output Device, Resolution and 44 Magnification pp. 18-22 • Scanning mode determines how the image is scanned (p. 21). • Output device setting optimizes the images for particular uses (p. 18). • Resolution determines the amount of detail in the scanned image (p. 19). • Magnification determines the amount of enlargement or reduction of the output image display (p. 19). Verify Image Quality with the Browser Function before 55 Scanning p. 23 1. Click on the [Browser] button. • The selection frame will appear. 2. Move the selection frame to specify the area of the image you want verified and click the mouse button. • Plug-in Module CS-U will read the image and display the browser image. 3. After you have examined the browser image, click the mouse anywhere. 6 Specify the Area of the Image to be Scanned p. 30 Select the area to be scanned by clicking and dragging the mouse pointer over the image. • You may find it convenient to use the zoom feature to select small areas or to select specific scan areas with precision (p. 31). 11
-
 1
1 -
2
-
3
-
4
-
5
-
 6
6 -
 7
7 -
 8
8 -
 9
9 -
 10
10 -
 11
11 -
 12
12 -
 13
13 -
 14
14 -
 15
15 -
 16
16 -
17
-
18
-
19
-
20
-
21
-
22
-
23
-
24
-
25
-
26
-
27
-
28
-
29
-
30
-
31
-
32
-
33
-
34
-
35
-
36
-
37
-
38
-
39
-
40
-
41
-
42
-
43
-
44
-
45
-
46
-
47
-
48
-
49
-
50
-
51
-
52
-
53
-
54
-
55
-
56
-
57
-
58
-
59
-
60
-
61
-
62
-
63
-
64
-
65
-
66
-
67
-
68
-
69
-
70
-
71
-
72
-
73
 |
 |