Canon CanoScan LiDE 600F Quick Start Guide Instructions - Page 7
Scanning Film - film and negative scanner
 |
View all Canon CanoScan LiDE 600F manuals
Add to My Manuals
Save this manual to your list of manuals |
Page 7 highlights
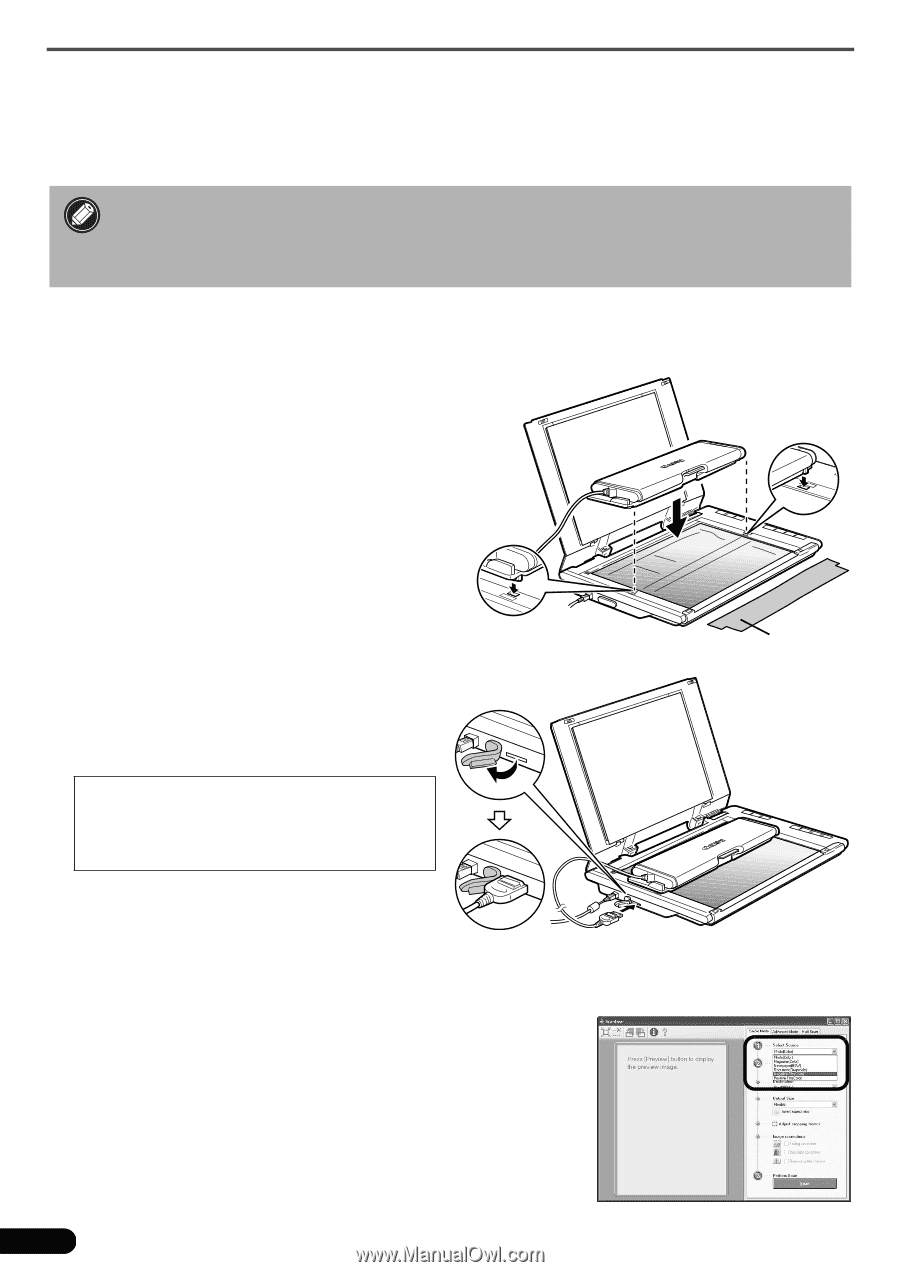
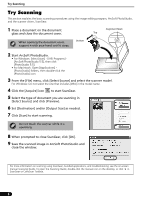
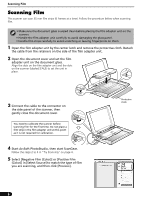
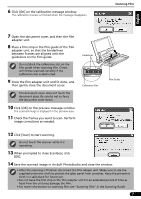
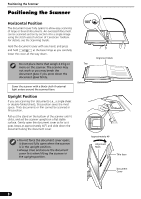
Scanning Film Scanning Film This scanner can scan 35 mm film strips (6 frames at a time). Follow the procedure below when scanning film. • Make sure the document glass is wiped clean before placing the film adapter unit on the scanner. • Handle the film adapter unit carefully to avoid damaging the glass panel. • Handle film strips carefully to avoid scratching or leaving fingerprints on them. 1 Open the film adapter unit by the center latch and remove the protective cloth. Detach the cable from the retainers on the side of the film adapter unit. 2 Open the document cover and set the film adapter unit on the document glass. Align the dots on the film adapter unit and the dots on the scanner (labeled [FAU]) to set the unit in place. 3 Connect the cable to the connector on the side panel of the scanner, then gently close the document cover. You need to calibrate the scanner before scanning film for the first time. Do not place a film strip in the film adapter unit at this point as it is not required for calibration. 4 Start ArcSoft PhotoStudio, then start ScanGear. Follow the steps 2 to 4 in "Try Scanning" on page 4. 5 Select [Negative Film (Color)] or [Positive Film (Color)] in [Select Source] to match the type of film you are scanning, and then click [Preview]. 6 Protective Cloth
-
 1
1 -
 2
2 -
 3
3 -
 4
4 -
 5
5 -
 6
6 -
 7
7 -
 8
8 -
 9
9 -
 10
10 -
 11
11 -
 12
12 -
13
-
14
-
15
-
16
-
17
-
18
-
19
-
20
-
21
-
22
-
23
-
24
-
25
-
26
-
27
-
28
-
29
-
30
-
31
-
32
-
33
-
34
-
35
-
36
-
37
-
38
-
39
-
40
-
41
-
42
-
43
-
44
-
45
-
46
-
47
-
48
-
49
-
50
-
51
-
52
-
53
-
54
-
55
-
56
-
57
-
58
-
59
-
60
-
61
-
62
-
63
-
64
-
65
-
66
-
67
-
68
-
69
-
70
-
71
-
72
-
73
 |
 |