Canon ELURA 100 ELURA100 Instruction Manual - Page 91
Selecting the movie size - video capture software
 |
UPC - 013803063738
View all Canon ELURA 100 manuals
Add to My Manuals
Save this manual to your list of manuals |
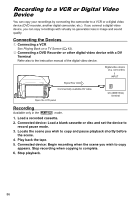
Page 91 highlights
1. Check that a memory card is inserted. • If a cassette is loaded, make sure that the tape is stopped. • If "AV DV" is displayed, change the setting ( 93). 2. Selecting the still image quality: E Press the FUNC. button. Select ( ) the still image quality symbol followed ( ) by a setting option and press the FUNC. button. Selecting the movie size: Press the FUNC. button. Select ( ) the movie size symbol followed ( ) by a setting option and press the FUNC. menu. 3. Connected device: Load a recorded cassette or disc and start the playback. When recording a still image: 4. Press the PHOTO button halfway when the scene you wish to record appears. • The captured scene appears as a still image and the remaining card capacity for still images and other card information appears on screen. • If you press the PHOTO button on the wireless controller, the still image is recorded immediately. 5. Press the PHOTO button fully. When recording a movie: 4. Press the start/stop button when the scene you wish to record appears. Pressing the start/stop button again stops recording. Editing Blank sections may be recorded as anomalous picture. If the picture does not appear, reconnect the DV cable or turn the camcorder off and back on again. Do not connect any devices to the camcorder's USB terminal. You can only record video signals from devices with the logo from recordings in SD (standard definition) standard, in SP or LP recording mode. Note that signals from identically shaped DV (IEEE1394) terminals may be in different video standards ( 112). We recommend powering the camcorder from a household power source. The data code of the image will reflect the date and time it has been recorded on the memory card. An image recorded from an image in widescreen mode will be vertically compressed. Copyright Signal Certain software tapes are copyright protected. If you attempt to play back such tape, "COPYRIGHT PROTECTED PLAYBACK IS RESTRICTED" appears and you will not be able to view the contents of the tape. If you attempt to record from such tape via the DV terminal, "COPYRIGHT PROTECTED DUBBING RESTRICTED" appears and you will not be able to record the contents of the tape. 91
-
 1
1 -
2
-
3
-
4
-
5
-
6
-
7
-
8
-
9
-
10
-
11
-
12
-
13
-
14
-
15
-
16
-
17
-
18
-
19
-
20
-
21
-
22
-
23
-
24
-
25
-
26
-
27
-
28
-
29
-
30
-
31
-
32
-
33
-
34
-
35
-
36
-
37
-
38
-
39
-
40
-
41
-
42
-
43
-
44
-
45
-
46
-
47
-
48
-
49
-
50
-
51
-
52
-
53
-
54
-
55
-
56
-
57
-
58
-
59
-
60
-
61
-
62
-
63
-
64
-
65
-
66
-
67
-
68
-
69
-
70
-
71
-
72
-
73
-
74
-
75
-
76
-
77
-
78
-
79
-
80
-
81
-
82
-
83
-
84
-
85
-
 86
86 -
 87
87 -
 88
88 -
 89
89 -
 90
90 -
 91
91 -
 92
92 -
 93
93 -
 94
94 -
 95
95 -
 96
96 -
97
-
98
-
99
-
100
-
101
-
102
-
103
-
104
-
105
-
106
-
107
-
108
-
109
-
110
-
111
-
112
-
113
-
114
-
115
-
116
-
117
-
118
-
119
-
120
-
121
-
122
-
123
-
124
-
125
-
126
-
127
-
128
-
129
-
130
-
131
-
132
 |
 |
