Canon ELURA 100 ELURA100 Instruction Manual - Page 98
Printing with the, Print/Share Button, Printing after Selecting the Print Settings
 |
UPC - 013803063738
View all Canon ELURA 100 manuals
Add to My Manuals
Save this manual to your list of manuals |
Page 98 highlights
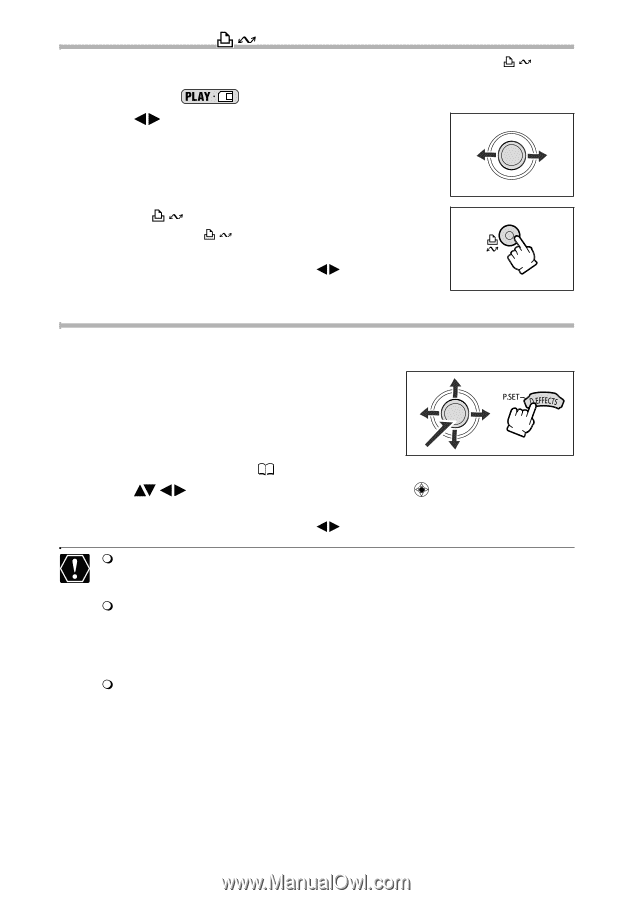
Printing with the (Print/Share) Button You can print an image without changing the settings by simply pressing the share) button. Available only in the mode. 1. Select ( ) the still image you wish to print. (print/ 2. Press the (print/share) button. • Printing starts. The button flashes and then stays on when the printing is completed. • If you wish to continue printing, select ( ) another still image. Printing after Selecting the Print Settings You can select the number of copies and other settings for printing. The setting options vary depending on your printer model. 1. Press the P.SET button. • The print setting menu appears. • Depending on the printer, the message "BUSY." may appear before the camcorder displays the print setting menu. 2. Select the print settings ( 100). 3. Select ( ) the [PRINT] option and press ( ). • Printing starts. The print setting menu disappears when the printing is completed. • If you wish to continue printing, select ( ) another still image. Images not recorded with this camcorder, uploaded from a computer, edited on a computer and images whose file names have been changed may not be printed correctly. Observe the following precautions during printing: - Do not turn off the camcorder or the printer. - Do not change the position of the TAPE/CARD switch. - Do not detach the cable. - Do not open the memory card cover or remove the memory card. If the message "BUSY." does not disappear, disconnect the cable from camcorder and printer and reconnect the camcorder to the printer. 98
-
 1
1 -
2
-
3
-
4
-
5
-
6
-
7
-
8
-
9
-
10
-
11
-
12
-
13
-
14
-
15
-
16
-
17
-
18
-
19
-
20
-
21
-
22
-
23
-
24
-
25
-
26
-
27
-
28
-
29
-
30
-
31
-
32
-
33
-
34
-
35
-
36
-
37
-
38
-
39
-
40
-
41
-
42
-
43
-
44
-
45
-
46
-
47
-
48
-
49
-
50
-
51
-
52
-
53
-
54
-
55
-
56
-
57
-
58
-
59
-
60
-
61
-
62
-
63
-
64
-
65
-
66
-
67
-
68
-
69
-
70
-
71
-
72
-
73
-
74
-
75
-
76
-
77
-
78
-
79
-
80
-
81
-
82
-
83
-
84
-
85
-
86
-
87
-
88
-
89
-
90
-
91
-
92
-
 93
93 -
 94
94 -
 95
95 -
 96
96 -
 97
97 -
 98
98 -
 99
99 -
 100
100 -
 101
101 -
 102
102 -
 103
103 -
104
-
105
-
106
-
107
-
108
-
109
-
110
-
111
-
112
-
113
-
114
-
115
-
116
-
117
-
118
-
119
-
120
-
121
-
122
-
123
-
124
-
125
-
126
-
127
-
128
-
129
-
130
-
131
-
132
 |
 |