Canon FS300 FS30 / FS31 / FS300 Instruction Manual - Page 63
Additional Functions - reviews
 |
View all Canon FS300 manuals
Add to My Manuals
Save this manual to your list of manuals |
Page 63 highlights
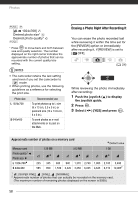
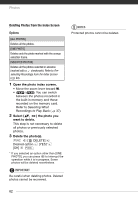
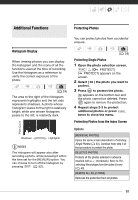
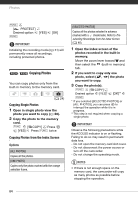
Additional Functions Protecting Photos Histogram Display When viewing photos you can display the histogram and the icons of all the functions used at the time of recording. Use the histogram as a reference to verify the correct exposure of the photo. ( 24) The area to the right of the histogram represents highlights and the left side represents shadows. A photo whose histogram skews to the right is relatively bright; while one whose histogram peaks to the left, is relatively dark. Pixel Count Shadows Highlights NOTES The histogram will appear also after recording a photo, while reviewing it within the time set for the [REVIEW] option. You can choose to turn off the histogram by pressing DISP. ( 52). You can protect photos from accidental erasure. ( 24) Protecting Single Photos 1 Open the photo selection screen. FUNC. [ PROTECT] [ PROTECT] appears on the screen. 2 Select ( ) the photo you want to protect. 3 Press to protect the photo. appears on the bottom bar and the photo cannot be deleted. Press again to remove the protection. 4 Repeat steps 2-3 to protect additional photos or press FUNC. twice to close the menu. Protecting Photos from the Index Screen Options [INDIVIDUAL PHOTOS] Opens the same screen described in Protecting Single Photos ( 63). Continue from step 3 of that procedure to protect the photo. [SELECTED PHOTOS] Protects all the photos selected in advance (marked with a checkmark). Refer to Preselecting Recordings from the Index Screen ( 40). [REMOVE ALL SELECTIONS] Removes the protection from all photos. 63
-
 1
1 -
2
-
3
-
4
-
5
-
6
-
7
-
8
-
9
-
10
-
11
-
12
-
13
-
14
-
15
-
16
-
17
-
18
-
19
-
20
-
21
-
22
-
23
-
24
-
25
-
26
-
27
-
28
-
29
-
30
-
31
-
32
-
33
-
34
-
35
-
36
-
37
-
38
-
39
-
40
-
41
-
42
-
43
-
44
-
45
-
46
-
47
-
48
-
49
-
50
-
51
-
52
-
53
-
54
-
55
-
56
-
57
-
 58
58 -
 59
59 -
 60
60 -
 61
61 -
 62
62 -
 63
63 -
 64
64 -
 65
65 -
 66
66 -
 67
67 -
 68
68 -
69
-
70
-
71
-
72
-
73
-
74
-
75
-
76
-
77
-
78
-
79
-
80
-
81
-
82
-
83
-
84
-
85
-
86
-
87
-
88
-
89
-
90
-
91
-
92
-
93
-
94
-
95
-
96
-
97
-
98
-
99
-
100
-
101
-
102
-
103
-
104
-
105
-
106
-
107
-
108
-
109
-
110
-
111
-
112
-
113
-
114
-
115
-
116
 |
 |
