Canon LV S3 LV-S3_Inst.pdf
Canon LV S3 - SVGA LCD Projector Manual
 |
View all Canon LV S3 manuals
Add to My Manuals
Save this manual to your list of manuals |
Canon LV S3 manual content summary:
- Canon LV S3 | LV-S3_Inst.pdf - Page 1
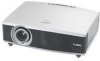
Multimedia Projector LV-S3 Owner's Manual E English - Canon LV S3 | LV-S3_Inst.pdf - Page 2
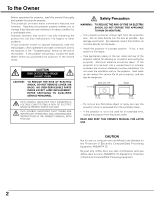
the problem still persists, contact the sales dealer where you purchased the projector or the service center. CAUTION RISK OF ELECTRIC SHOCK DO NOT OPEN CAUTION : TO REDUCE THE RISK OF ELECTRIC SHOCK, DO NOT REMOVE COVER (OR BACK). NO USER-SERVICEABLE PARTS INSIDE EXCEPT LAMP REPLACEMENT. REFER - Canon LV S3 | LV-S3_Inst.pdf - Page 3
conditions: a. When the power cord or plug is damaged or frayed. b. If liquid has been spilled into the projector. c. If the projector has been exposed to rain or water. d. If the projector does not operate normally by following the operating instructions. Adjust only those controls that are covered - Canon LV S3 | LV-S3_Inst.pdf - Page 4
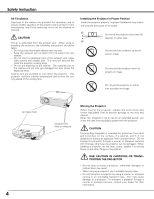
fans are provided to cool down the projector. This projector monitors internal temperature and control the running speed of the cooling fans. Installing the Projector in Proper Position Install the projector properly. Improper Installation may reduce the lamp life and cause a fire hazard. 20˚ Do - Canon LV S3 | LV-S3_Inst.pdf - Page 5
Class B digital apparatus meets all requirements of the Canadian Interference-Causing Equipment Regulations. For use in Germany This product is intended for use in residential, commercial and light industry environment. AC POWER CORD REQUIREMENT The AC Power Cord supplied with this projector meets - Canon LV S3 | LV-S3_Inst.pdf - Page 6
Remote Control Unit . . . . .39 Presentation Remote Control Unit 39 Installation 39 Maintenance 40 Lamp Replacement 40 Lamp Replace 40 Lamp Replace Counter 41 Warning Indicator 42 Air Filter 43 Cleaning the Projection Lens 43 Appendix 44 Troubleshooting 44 Indicators and Projector - Canon LV S3 | LV-S3_Inst.pdf - Page 7
to reduce power consumption and maintain the lamp life. ( P37 ) Key Lock Function Provided to lock the operation of the projector. This function protects the projector from being tampered with by third persons. ( P38 ) Presentation Remote Control Unit The provided Presentation Remote Control Unit - Canon LV S3 | LV-S3_Inst.pdf - Page 8
e Bottom q 8 q Focus Ring ( P20 ) w Infrared Remote Receiver ( e Projection Lens ( P43 ) r Zoom Lever ( P10, 15,16 ) t e Power Cord Connector ( P12 ) r Exhaust Vent t Top Controls and Indicators ( P9 ) CAUTION Hot part. This area will become hot while the projector is being used. This projector - Canon LV S3 | LV-S3_Inst.pdf - Page 9
image in Digital zoom +/- mode. ( P29 ) - Adjust volume level. (Point 7 8 buttons) ( P21 ) w MENU button Opens or closes the On-Screen Menu. ( P17 ) e LAMP REPLACE indicator Turns yellow when the life of the projection lamp draws to an end. ( P40 ) r WARNING indicator Lights red when the projector - Canon LV S3 | LV-S3_Inst.pdf - Page 10
P16 ) w S-VIDEO IN Connect S-video output from video equipment. ( P16 ) e SERVICE PORT This jack is used to service this projector. r USB Connect the USB port of your computer to this port when you wish to use the PAGE ed buttons on the remote control to scroll back and forth pages on the screen of - Canon LV S3 | LV-S3_Inst.pdf - Page 11
Remote Control Unit e w q COMPUTER VIDEO POWER !5 MENU VOL- SET VOL+ r !4 t !3 KEYSTONE NO SHOW !2 y D.ZOOM PAGE AUTO PC P-TIMER !1 u IMAGE FREEZE MUTE i o !0 Overview q POWER button Turns the projector on or off. ( P19 ) w VIDEO button Selects VIDEO input source. ( P30 ) e - Canon LV S3 | LV-S3_Inst.pdf - Page 12
ON THE POWER CORD The AC Power Cord must meet the requirements of the country where you use the projector. Confirm the AC plug type with the chart below. The proper AC power cord must be used. If the supplied AC Power Cord does not match the AC outlet, contact your sales dealer. Projector side AC - Canon LV S3 | LV-S3_Inst.pdf - Page 13
feet, lift the front of the projector and pull and undo the feet lock latches. Keystone distortion of the projected image can be adjusted by Menu Operation. ( P20 and P36 ) CAUTION Tilt the projector within the adjustable angle not to shorten the lamp life. Proper angle should be taken. Adjustable - Canon LV S3 | LV-S3_Inst.pdf - Page 14
- Do not drop the remote control unit. - If a battery has leaked on remote control unit, carefully wipe case clean and install new batteries. - Risk of explosion if battery is replaced by an incorrect type. - Dispose of used batteries according to the instructions. Attaching the Lens Cover 1 Thread - Canon LV S3 | LV-S3_Inst.pdf - Page 15
(VGA / SVGA / XGA / SXGA) Monitor Output Audio Output USB port VGA Cable Audio Cable (Stereo) ✽ USB Cable ✽ RESET VIDEO IN S-VIDEO IN SERVICE PORT If you wish to use Page buttons on the remote control unit, connect USB port of your computer to the USB socket of the projector with a USB - Canon LV S3 | LV-S3_Inst.pdf - Page 16
as LV-CA32) ✽ Not supplied. 16 Terminals of the Projector Note : The S-VIDEO jack has priority over the VIDEO jack under the condition of connecting both the S-VIDEO jack and the VIDEO jack when selecting AUTO in the Input Menu. Note: When connecting the cable, the power cords of both the projector - Canon LV S3 | LV-S3_Inst.pdf - Page 17
Screen Menu The projector can be 7 8 buttons to adjust value or set function. COMPUTER VIDEO POWER Remote Control Unit MENU VOL- SET VOL+ Point button Used to move IMAGE FREEZE MUTE Top Control SET MENU Point buttons Used to move the Pointer up/ down / right / left. - VOL + LAMP REPLACE WARN - Canon LV S3 | LV-S3_Inst.pdf - Page 18
among Standard, High Contrast, and Custom.( P27 ) Screen Menu Used to adjust size of image. [Normal / True / Wide / Digital zoom +/-] ( P29 ) Setting Menu Used to change settings of the projector or reset Lamp replace counter. ( P36-38 ) Input Menu Used to select input source either Computer or - Canon LV S3 | LV-S3_Inst.pdf - Page 19
can be changed. ( " Capture " P36 ) Selected Image and Lamp Mode Lamp mode ( " Lamp mode " P37 ) Turning Off the Projector 1 Press the POWER button on the top control or the remote control unit, and the message " Power off? " appears on the screen. 2 Press the POWER button again to turn off the - Canon LV S3 | LV-S3_Inst.pdf - Page 20
to reduce the upper part of image, and press Point d button to reduce the lower part. - Arrows are blue in no correction. - The arrow of direction being corrected turns light blue. - The arrow disappears at the maximum correction. - If you press the KEYSTONE on the remote control unit once more - Canon LV S3 | LV-S3_Inst.pdf - Page 21
No Show Function Press NO SHOW button on the remote control unit to black out the image. To restore to normal, press the NO SHOW button again or press any other button. When a projected image is captured and set as "User" in the Logo item in the Setting menu ( P36 ), the screen changes each time you - Canon LV S3 | LV-S3_Inst.pdf - Page 22
Computer Input Input Source Selection Direct Operation Choose Computer by pressing INPUT button on the top control or COMPUTER button on the remote control unit. Before using these buttons, correct input source should be selected through menu operation as described below. INPUT button Computer - Canon LV S3 | LV-S3_Inst.pdf - Page 23
Menu icon. ( P24.) When image is not provided properly, manual adjustment is required. ( P25 - 26 ) ----- There is no signal input from computer. Make sure the connection of computer and a projector is set correctly. ( " Troubleshooting" P44 ) Mode 1 User preset adjustment in Computer Adjustment - Canon LV S3 | LV-S3_Inst.pdf - Page 24
on the remote control unit. To store adjustment parameters : Adjustment parameters from Auto PC Adjustment can be memorized in this projector. Once parameters are memorized, the setting can be done just by selecting Mode in PC System Menu ( P23 ). Refer to " Store " of Manual PC Adjustment section - Canon LV S3 | LV-S3_Inst.pdf - Page 25
tuned by Multi-Scan system of this projector. In this case, the projector cannot reproduce a proper image and the image may be recognized as a flickering picture, a nonsynchronized picture, a non-centered picture or a skewed picture. The Manual PC Adjustment function allows you to precisely adjust - Canon LV S3 | LV-S3_Inst.pdf - Page 26
the resolution at Display area dialog box. Display area H Adjustment of horizontal area displayed with this projector. Press Point 7 8 buttons to decrease/increase value to match the resolution of image. Then press the SET button. Press SET button at Display area icon to show the Display area - Canon LV S3 | LV-S3_Inst.pdf - Page 27
by pressing IMAGE button on the remote control unit. Standard Normal picture adjustment preset on this projector. High contrast Picture adjustment improved in reproduction of the halftones. This adjustment is suitable for providing a better image in a brighter place. Custom User preset image in the - Canon LV S3 | LV-S3_Inst.pdf - Page 28
"ON", it automatically enhances contrast of bright and dark part of image. Selected Image level Press Point 7 8 buttons to adjust value. Store Reset Reset all adjustment to previous figure. Store To store the image data adjusted manually, move the red frame pointer to the Store icon and press the - Canon LV S3 | LV-S3_Inst.pdf - Page 29
to compress image size. A projected image can be also compressed by pressing D.ZOOM button on the remote control unit. To cancel Digital Zoom +/- 1024, reset the resolution to the lower before connecting projector. - The image data in other than SVGA (800 x 600) is modified to fit the screen - Canon LV S3 | LV-S3_Inst.pdf - Page 30
Video by pressing INPUT button on the top control or VIDEO button on the remote control unit. Before using these buttons, correct input selecting Auto, the projector automatically detects incoming video signal, and adjusts itself to optimize its performance. The projector selects connection in the - Canon LV S3 | LV-S3_Inst.pdf - Page 31
Computer by pressing INPUT button on the top control or COMPUTER button on the remote control unit. Before using these buttons, correct input . Note : Component-VGA Cable and Scart-VGA Cable are optionally supplied. See page 51 for order. Source Select Menu Move the pointer to Component or RGB - Canon LV S3 | LV-S3_Inst.pdf - Page 32
and adjusts itself to optimize its performance. When Video System is PAL-M or PAL-N, select system manually. PAL / SECAM / NTSC / NTSC4.43 / PAL-M / PAL-N If projector cannot reproduce proper video image, it is necessary to select a specific broadcast signal format among PAL, SECAM, NTSC, NTSC 4.43 - Canon LV S3 | LV-S3_Inst.pdf - Page 33
level among Standard, Cinema, Custom by pressing IMAGE button on the remote control unit. Standard Normal picture adjustment preset on this projector. Cinema Picture level adjusted for the picture with fine tone. Custom User preset picture adjustment in Image Adjust Menu ( P34-35 ). Video Input - Canon LV S3 | LV-S3_Inst.pdf - Page 34
adjust value. White balance (Blue) Press Point 7 8 buttons to adjust the blue tone. (From 0 to 63.) Sharpness Press Point 7 8 buttons to adjust the image sharpness. (From 0 to 15.) Gamma Press Point 7 8 buttons to obtain better balance of contrast. (From 0 to 15.) Press SET button at this icon to - Canon LV S3 | LV-S3_Inst.pdf - Page 35
"ON", it automatically enhances contrast of bright and dark part of image. progressive Interlace video signal can be displayed in a icon Screen Size Adjustment This projector has a picture screen resize function, which enables you to display the desirable image size. 1 Press MENU button - Canon LV S3 | LV-S3_Inst.pdf - Page 36
Store the keystone adjustment data even if the AC power cord is disconnected. Reset ···· Reset the keystone adjustment data when the AC power cord is disconnected from the AC outlet. Blue back When this function is "On," the projector will project a blue image on the screen if any input signal is - Canon LV S3 | LV-S3_Inst.pdf - Page 37
mounted projector. Ceiling function Rear When this function is "On," picture is left / right reversed. This function is used to project the image to a rear projection screen. Rear function Setting Power management For reducing power consumption as well as maintaining the lamp life, the Power - Canon LV S3 | LV-S3_Inst.pdf - Page 38
have the remote control unit nearby, disconnect the AC power cord to turn off the power, and then while pressing the SET button, reinsert the AC power cord. This will unlock the top control operation. Factory default Lamp counter reset This function is used to reset the lamp replace counter. When - Canon LV S3 | LV-S3_Inst.pdf - Page 39
mouse function to be used. Refer to Remote Control Unit your computer's owner's manual for details. - When switching the remote control code of the projector and the remote control, that of the presentation remote control also needs to be Presentation Remote Receiver switched. Press and hold both - Canon LV S3 | LV-S3_Inst.pdf - Page 40
to an end, LAMP REPLACE indicator lights yellow. If this indicator lights yellow, replace the projection lamp with a new one promptly. TOP CONTROL SET MENU VOL + LAMP REPLACE WARN This indicator lights yellow when the life of the projection lamp draws to an end. Allow a projector to cool, for - Canon LV S3 | LV-S3_Inst.pdf - Page 41
be replaced, i.e., if the LAMP REPLACE INDICATOR lights up, replace the lamp with a new one IMMEDIATELY after the projector has cooled down. ( Follow carefully the instructions in the LAMP REPLACEMENT section of this manual. ) Continuous use of the lamp with the LAMP REPLACE INDICATOR lighted may - Canon LV S3 | LV-S3_Inst.pdf - Page 42
disconnect the AC power cord and contact the service station for check and repair. CAUTION DO NOT LEAVE THE PROJECTOR WITH THE AC POWER CORD CONNECTED UNDER THE ABNORMAL CONDITION. IT MAY RESULT IN FIRE OR ELECTRIC SHOCK. Top Control SET MENU IN L + LAMP REPLACE WARNING WARNING lights red 42 - Canon LV S3 | LV-S3_Inst.pdf - Page 43
below: 1 Turn off the projector, and disconnect AC power cord from the AC outlet. Air filters 2 Turn the projector upside down and remove air filters by pulling the latches upward. 3 Clean the air filters with a brush or wash out dust and particles. 4 Replace each air filter properly. Make - Canon LV S3 | LV-S3_Inst.pdf - Page 44
it does not project an image, restart the computer. Problem: No power. - Try these Solutions - Plug the projector into your AC outlet. - Make sure if the POWER Indicator lights red. - Wait 90 seconds after a projector is turned OFF when turning the projector back on. The projector can be turned on - Canon LV S3 | LV-S3_Inst.pdf - Page 45
mouse setting on your computer. WARNING : High voltages are used to operate this projector. Do not attempt to open the cabinet. If the problem still persists after following all operating instructions, contact the sales dealer where you purchased the projector or the service center. Give the model - Canon LV S3 | LV-S3_Inst.pdf - Page 46
Condition Check the indicators for projector condition. Indicators LAMP POWER WARNING REPLACE red/green red yellow Projector Condition The projector is OFF. (The AC power cord is unplugged.) ✽ The projector is preparing for stand-by or the projection lamp is being cooled down. The - Canon LV S3 | LV-S3_Inst.pdf - Page 47
Main menu System (1) MODE 1 MODE 2 SVGA 1 - - - - ✽Systems displayed in the system menu vary depending on the using environment. Image Select Image Adjust PC Adjust Auto PC Adj. Fine sync 63 0 - 63 0 - 63 0 - 15 On / Off Yes / No Custom Quit Normal True Wide Digital zoom + Digital zoom - 47 - Canon LV S3 | LV-S3_Inst.pdf - Page 48
Main menu Sound Setting Image Adjust Contrast Brightness Color Power management Lamp mode Remote control USB Key Lock Lamp counter User Default Yes/No On / Off On / Off Off Ready Shut down 1 - 30 Min Quit Normal Mode Auto Mode Silent Mode Code 1 Code 2 Mouse Projector Off Projector Remote Control - Canon LV S3 | LV-S3_Inst.pdf - Page 49
Appendix Compatible Computer Specifications Basically this projector can accept the signal from all computers SVGA 1 800 x 600 SVGA 2 800 x 600 SVGA 3 800 x 600 SVGA 4 800 x 600 SVGA 5 800 x 600 SVGA 6 800 x 600 SVGA 7 800 x 600 SVGA 8 800 x 600 SVGA 9 800 x 600 SVGA 10 800 x 600 SVGA - Canon LV S3 | LV-S3_Inst.pdf - Page 50
x 0.91"(H) x 4.8"(D) (51.5mm x 23.2mm x 123mm) : 2.11oz (60 g) (including battery) Accessories Owner's Manual AC Power Cord Remote Control Unit and Battery Presentation Remote Control Unit and Battery Presentation Remote Receiver VGA Cable Carrying Bag Lens Cover String for Lens Cover - The - Canon LV S3 | LV-S3_Inst.pdf - Page 51
11 CONTROL PORT Parts The parts listed below are optionally supplied. When ordering those parts, give name and Type No. of it to the sales dealer. • COMPONENT-VGA Cable Type No. : LV-CA32 • SCART-VGA Cable Type No. : LV-CA31 • MAC Adapter Type No. : LV-AD02 • CEILING HANGER Type No. : LV - Canon LV S3 | LV-S3_Inst.pdf - Page 52
CANADA, INC. 6390 Dixie Road Mississauga, Ontario L5T 1P7 Canada CANON LATIN AMERICA, INC. 703 Waterford Way Suite 400 Miami, Florida 33126 U.S.A. CANON EUROPA N.V. P.O.Box 2262, 1180 EG Amstelveen, The Netherlands CANON COMMUNICATION & IMAGE FRANCE S.A. 102, Avenue du General de Gaulle, 92250 La
-
 1
1 -
 2
2 -
 3
3 -
 4
4 -
 5
5 -
 6
6 -
 7
7 -
8
-
9
-
10
-
11
-
12
-
13
-
14
-
15
-
16
-
17
-
18
-
19
-
20
-
21
-
22
-
23
-
24
-
25
-
26
-
27
-
28
-
29
-
30
-
31
-
32
-
33
-
34
-
35
-
36
-
37
-
38
-
39
-
40
-
41
-
42
-
43
-
44
-
45
-
46
-
47
-
48
-
49
-
50
-
51
-
52
 |
 |
E
English
Multimedia Projector
Owner’s Manual
LV-S3