Canon PIXMA MX882 Network Setup Troubleshooting - Page 13
WEP 40 bit, WEP Transitional Security Network, PSK AES, WEP key 1, FUNCTION - wireless all in one
 |
View all Canon PIXMA MX882 manuals
Add to My Manuals
Save this manual to your list of manuals |
Page 13 highlights
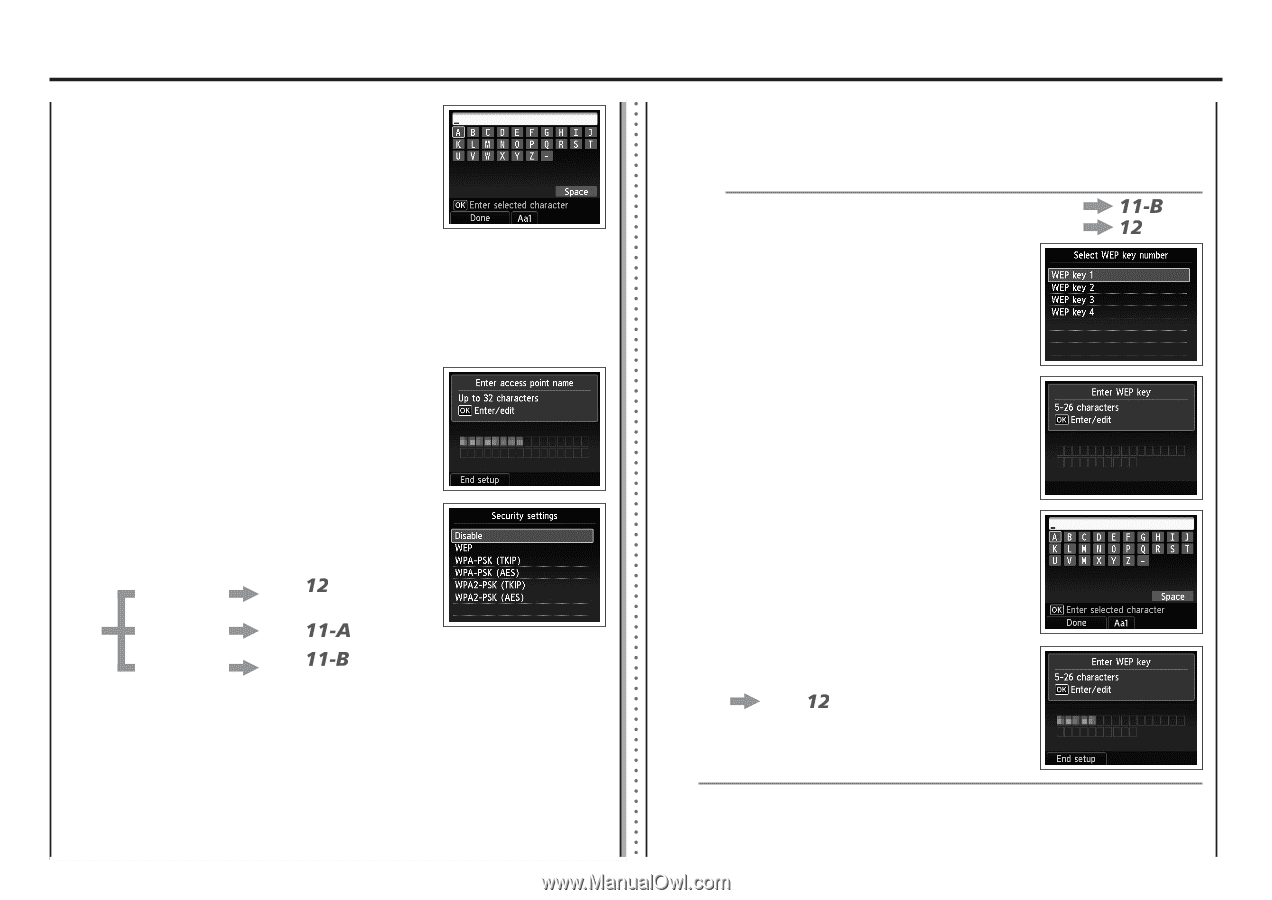
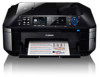
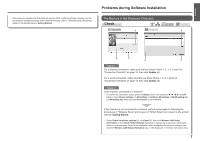
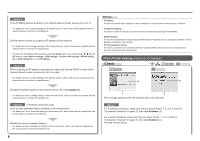
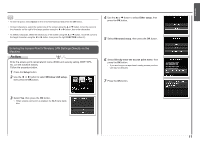
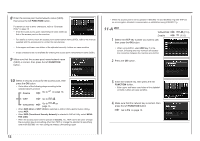
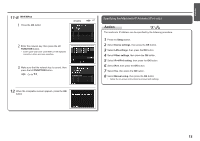
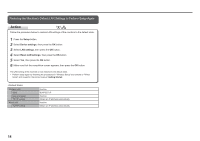
8 Enter the access point name/network name (SSID), then press the left FUNCTION button. For details on how to enter characters, refer to "Character Entry" on page 10. • Enter the same access point name/network name (SSID) as that of the access point on the machine. • For details on how to check the access point name/network name (SSID), refer to the manual supplied with the access point or contact its manufacturer. • Enter upper and lower case letters of the alphabet correctly. Letters are case sensitive. • 2-byte characters are not available for entering the access point name/network name (SSID). 9 Make sure that the access point name/network name (SSID) is correct, then press the left FUNCTION button. • When the access point is set to operate in IEEE802.11n and IEEE802.11g with TKIP set as an encryption standard, communication is established using IEEE802.11g. 11-A WEP WPA/WPA2 Disable 1 Select the WEP key number you want to use, then press the OK button. (P.13) (P.13) • When using AirPort, select WEP key 1 in the screen. Selecting other key numbers will disable the connection between the machine and AirPort. 2 Press the OK button. 10 Select a security protocol for the access point, then press the OK button. • Go to either of the following steps according to the selected security protocol. Disable Go to on page 13. WEP Go to . WPA/WPA2 Go to on page 13. • When WEP 40 bit or WEP 128 bit is selected in AirPort Utility (AirPort Admin Utility), select WEP. • When WEP (Transitional Security Network) is selected in AirPort Utility, select WPA2- PSK (AES). • When the access point is set to operate in IEEE802.11n, TKIP cannot be used. Change the encryption type to something other than TKIP or change the standard to something other than IEEE802.11n, then configure wireless LAN settings again. 12 3 Enter the network key, then press the left FUNCTION button. • Enter upper and lower case letters of the alphabet correctly. Letters are case sensitive. 4 Make sure that the network key is correct, then press the left FUNCTION button. Go to on page 13.
-
 1
1 -
2
-
3
-
4
-
5
-
6
-
7
-
 8
8 -
 9
9 -
 10
10 -
 11
11 -
 12
12 -
 13
13 -
 14
14 -
 15
15 -
 16
16 -
 17
17 -
 18
18 -
19
-
20
-
21
-
22
-
23
-
24
-
25
-
26
-
27
-
28
-
29
-
30
-
31
-
32
-
33
-
34
 |
 |