Canon PIXMA SELPHY CP600 SELPHY CP600 User Guide - Page 31
Connecting a Power Source and the Camera to, the Printer
 |
View all Canon PIXMA SELPHY CP600 manuals
Add to My Manuals
Save this manual to your list of manuals |
Page 31 highlights
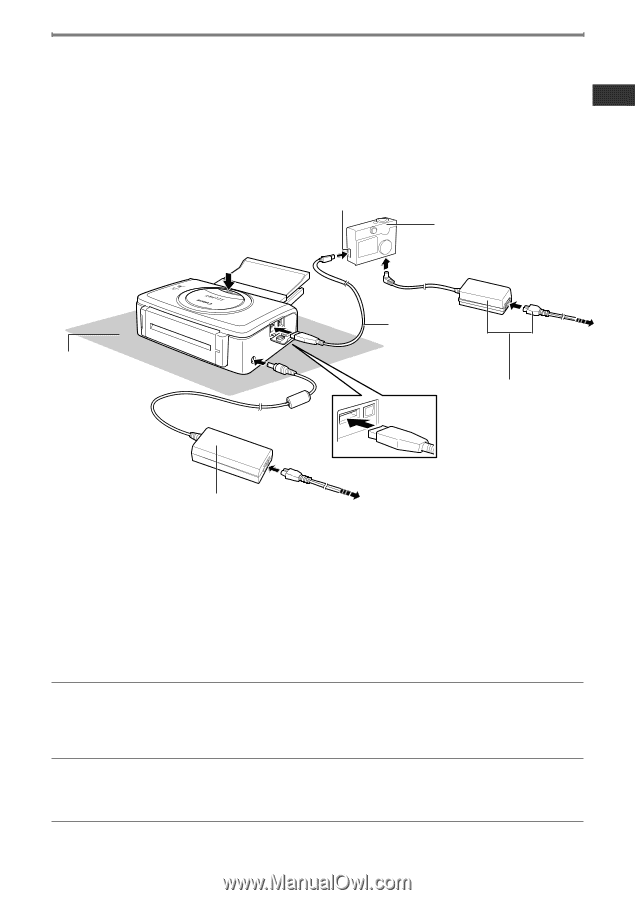
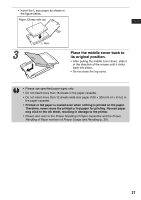
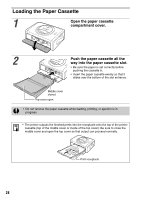
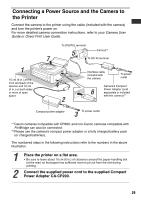
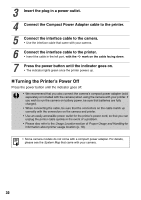
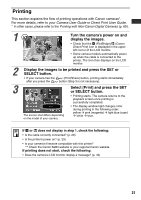
Connecting a Power Source and the Camera to the Printer Connect the camera to the printer using the cable (included with the camera) and turn the printer's power on. For more detailed camera connection instructions, refer to your Camera User Guide or Direct Print User Guide. To DIGITAL terminal 5 Camera*1 7 To DC IN terminal 1 15 cm (6 in.) at the front and back of the devices and 10 cm (4 in.) on both sides or more of open space 4 2 Interface cable included with the camera To power outlet Camera's Compact 6 Power Adapter (sold separately or included with the camera)*2 Compact power adapter 3 To power outlet *1 Canon cameras compatible with CP600, and non-Canon cameras compatible with PictBridge can also be connected. *2 Please use the camera's compact power adapter or a fully charged battery pack (or charged batteries). The numbered steps in the following instructions refer to the numbers in the above illustration. 1 Place the printer on a flat area. • Be sure to leave about 15 cm (6 in.) of clearance around the paper-handling slot (at the rear) so that paper has sufficient room to jut out from the slot during printing. 2 Connect the supplied power cord to the supplied Compact Power Adapter CA-CP200. 29
-
 1
1 -
2
-
3
-
4
-
5
-
6
-
7
-
8
-
9
-
10
-
11
-
12
-
13
-
14
-
15
-
16
-
17
-
18
-
19
-
20
-
21
-
22
-
23
-
24
-
25
-
 26
26 -
 27
27 -
 28
28 -
 29
29 -
 30
30 -
 31
31 -
 32
32 -
 33
33 -
 34
34 -
 35
35 -
 36
36 -
37
-
38
-
39
-
40
-
41
-
42
-
43
-
44
-
45
-
46
-
47
-
48
-
49
-
50
-
51
-
52
-
53
-
54
-
55
-
56
-
57
-
58
-
59
-
60
-
61
-
62
-
63
-
64
-
65
-
66
-
67
-
68
 |
 |