Canon PIXMA SELPHY CP600 SELPHY CP600 User Guide - Page 58
Double-click the [Printer Setup Utility] or [Print Center] icon
 |
View all Canon PIXMA SELPHY CP600 manuals
Add to My Manuals
Save this manual to your list of manuals |
Page 58 highlights
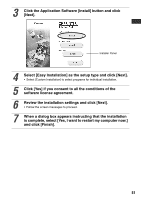
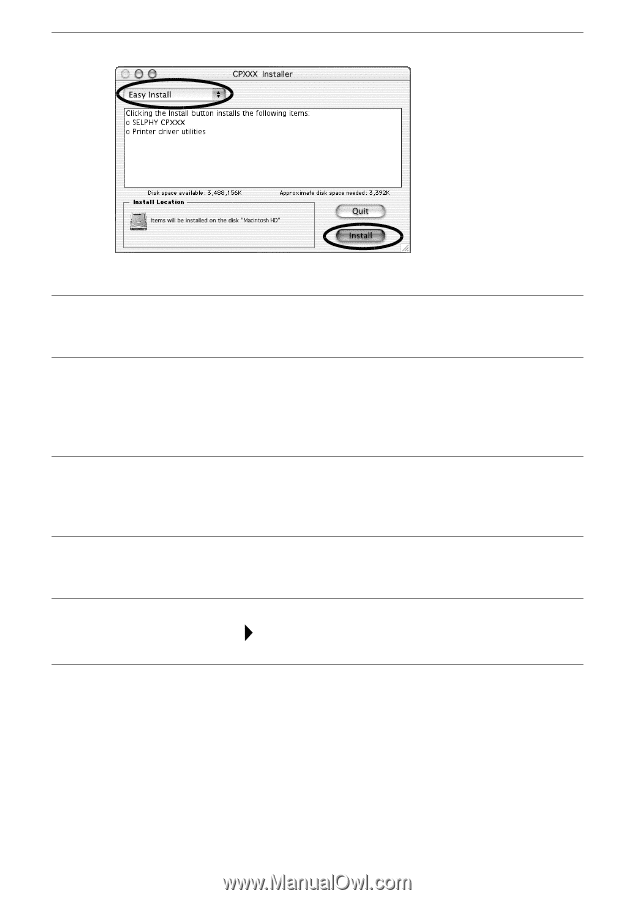
11 Select [Easy Install], and then click the [Install] button. • Follow the screen messages to proceed. • Restart your computer when a dialog box appears instructing you to do so. 12 When the computer desktop displays, remove the CP Printer Solution Disk from the CD-ROM drive. Next, register your printer on the Printer List. 13 Connect the printer to the computer with a commercially available USB cable and turn the printer's power on. • For directions on connecting the printer, see Connecting the Printer to Your Computer (p. 58). 14 Double-click the hard disk icon where Mac OS X is installed. 15 Double-click the [Printer Setup Utility] or [Print Center] icon in [Applications] [Utilities] folder. • The [Printer List] window appears. 56
-
 1
1 -
2
-
3
-
4
-
5
-
6
-
7
-
8
-
9
-
10
-
11
-
12
-
13
-
14
-
15
-
16
-
17
-
18
-
19
-
20
-
21
-
22
-
23
-
24
-
25
-
26
-
27
-
28
-
29
-
30
-
31
-
32
-
33
-
34
-
35
-
36
-
37
-
38
-
39
-
40
-
41
-
42
-
43
-
44
-
45
-
46
-
47
-
48
-
49
-
50
-
51
-
52
-
 53
53 -
 54
54 -
 55
55 -
 56
56 -
 57
57 -
 58
58 -
 59
59 -
 60
60 -
 61
61 -
 62
62 -
 63
63 -
64
-
65
-
66
-
67
-
68
 |
 |
56
Next, register your printer on the Printer List.
11
Select [Easy Install], and then click the [Install] button.
•
Follow the screen messages to proceed.
•
Restart your computer when a dialog box appears instructing you to do so.
12
When the computer desktop displays, remove the CP
Printer Solution Disk from the CD-ROM drive.
13
Connect the printer to the computer with a commercially
available USB cable and turn the printer’s power on.
•
For directions on connecting the printer, see
Connecting the Printer to Your
Computer
(p. 58).
14
Double-click the hard disk icon where Mac OS X is installed.
15
Double-click the [Printer Setup Utility] or [Print Center] icon
in [Applications]
[Utilities] folder.
•
The [Printer List] window appears.