Canon PIXMA iP1500 Service Manual - Page 10
Troubleshooting Flowchart
 |
View all Canon PIXMA iP1500 manuals
Add to My Manuals
Save this manual to your list of manuals |
Page 10 highlights
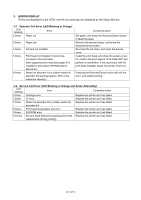
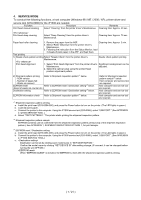
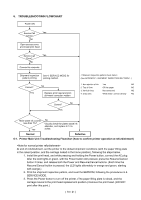
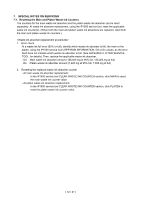
6. TROUBLESHOOTING FLOWCHART Power ON Service Call Yes Error? No Open access cover, and install print head Service Call Yes Error? No Connect to computer Shipment inspection See 4. SERVICE MODE for pattern printing printing method. Correct? Yes No Replace print head and print shipment inspection pattern No Correct? Yes < Shipment inspection pattern check items> (See APPENDIX 1, SHIPMENT INSPECTION PATTERN 1.) 1. Non-ejection of ink: Yes NG 2. Top of form: Off the paper NG 3. Vertical lines: Not connected NG 4. Gray area: White lines / uneven density NG Main waste ink counter less than 7%? Yes No Visually check the platen waste ink absorber, and replace it if it is soiled. Normal Defective 6-1. Printer Main Unit Troubleshooting Flowchart (how to confirm printer operation at refurbishment) At end of refurbishment, set the printer to the default shipment conditions (with the paper lifting plate in the raised position, and the carriage locked in the home position), following the steps below. 1. Install the print head, and while pressing and holding the Power button, connect the AC plug. After the LED lights in green, with the Power button still pressed, press the Resume/Cancel button 2 times, and release both the Power and Resume/Cancel buttons. (Each time the Resume/Cancel button is pressed, the LED lights alternately in orange and green, starting with orange.) 2. Print the shipment inspection pattern, and reset the EEPROM, following the procedures in 4. SERVICE MODE. 3. Press the Power button to turn off the printer. (The paper lifting plate is raised, and the carriage moves to the print head replacement position.) Remove the print head. (DO NOT print after this point.) ( 10 / 21 )
-
 1
1 -
2
-
3
-
4
-
 5
5 -
 6
6 -
 7
7 -
 8
8 -
 9
9 -
 10
10 -
 11
11 -
 12
12 -
 13
13 -
 14
14 -
 15
15 -
16
-
17
-
18
-
19
-
20
-
21
 |
 |
