Canon VIXIA HF G60 Instruction Manual - Page 20
Preparing the Camcorder, Attaching the Lens Hood
 |
View all Canon VIXIA HF G60 manuals
Add to My Manuals
Save this manual to your list of manuals |
Page 20 highlights
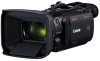
Preparing the Camcorder Preparing the Camcorder This section covers basic preparations for the camcorder such as attaching the lens hood, adjusting the viewfinder and LCD screen, and adjusting the grip belt. 20 IMPORTANT • Be careful not to drop the camcorder when attaching, removing or adjusting the various accessories. Using a table or other stable surface is recommended. Attaching the Lens Hood While recording, the supplied lens hood with lens barrier is effective for reducing stray light that can be the cause of lens flare and ghost images. Additionally, closing the lens barrier can help prevent fingerprints and dirt accumulation on the lens. 1 Remove the lens cap. 2 Align the groove on the lens hood with the index mark on the top of the lens (ቢ), and then turn the lens hood clockwise until it stops with a click (ባ). • Be careful not to deform the lens hood. • Make sure that the lens hood is aligned with the thread. To remove the lens hood 1 Press and hold the lens hood release button and turn the lens hood counterclockwise. 2 Place the lens cap back on the lens. ባ ቢ Lens hood release button NOTES About the lens cap: • Use the supplied lens cap when carrying the camcorder or storing it after use. • The lens cap and lens hood cannot be used simultaneously. To attach the lens hood, remove the lens cap in advance.
-
 1
1 -
2
-
3
-
4
-
5
-
6
-
7
-
8
-
9
-
10
-
11
-
12
-
13
-
14
-
 15
15 -
 16
16 -
 17
17 -
 18
18 -
 19
19 -
 20
20 -
 21
21 -
 22
22 -
 23
23 -
 24
24 -
 25
25 -
26
-
27
-
28
-
29
-
30
-
31
-
32
-
33
-
34
-
35
-
36
-
37
-
38
-
39
-
40
-
41
-
42
-
43
-
44
-
45
-
46
-
47
-
48
-
49
-
50
-
51
-
52
-
53
-
54
-
55
-
56
-
57
-
58
-
59
-
60
-
61
-
62
-
63
-
64
-
65
-
66
-
67
-
68
-
69
-
70
-
71
-
72
-
73
-
74
-
75
-
76
-
77
-
78
-
79
-
80
-
81
-
82
-
83
-
84
-
85
-
86
-
87
-
88
-
89
-
90
-
91
-
92
-
93
-
94
-
95
-
96
-
97
-
98
-
99
-
100
-
101
-
102
-
103
-
104
-
105
-
106
-
107
-
108
-
109
-
110
-
111
-
112
-
113
-
114
-
115
-
116
-
117
-
118
-
119
-
120
-
121
-
122
-
123
-
124
-
125
-
126
-
127
-
128
-
129
 |
 |
