Canon iP90v Quick Start Guide - Page 83

Maintenance tab and then click Low Ink Warning Setting, Printer Setup Utility icon in the Utilities - reset waste tank error message

Page 83 highlights

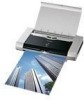
Troubleshooting Problem "Error No.: 300" Possible Cause Try This Printer not ready If the POWER lamp is off, turn the printer on. If the POWER lamp is flashing green, the printer is initializing. Wait until the POWER lamp stops flashing. Printer not properly connected Ensure that the printer is securely connected to the computer. Note If you are using a switching hub or other device, disconnect the printer and reconnect it directly to the computer and try printing again. If successful, the problem may have been with the device. There could also be a problem with the cable(s). Replace the cable(s) and try printing again. "Error No.:1700" "Error No.:2001" Your printer name is 1. Select Applications from the Go menu. not displayed in the 2. Double-click the Printer Setup Utility icon in the Utilities folder. Printer List of If you are using an OS other than Mac OS X v.10.3, double-click the Print Printer Setup Utility Center icon. (or Print Center) 3. Ensure that iP90 is displayed in the Printer List. If iP90 is not displayed in the Printer List, reinstall the printer driver. Note If the problem persists, delete all unnecessary documents from the Extensions and Control Panels folder. Waste ink absorber almost full The printer has a built-in waste ink absorber to hold the ink used during print head cleaning. Eight flashes indicates that this absorber is nearly full. Press the RESUME/CANCEL button to clear the error so you can continue printing. Before the waste ink absorber becomes completely full, contact the Customer Care Center. A specified period of time has elapsed without receiving a response from the digital camera/The digital camera or digital video camcorder connected is not compatible with this printer Disconnect the camera cable, press the RESUME/CANCEL button on the printer and reconnect the cable. If the error is still unresolved, there is a possibility that you are using a digital camera or digital video camcorder that is not supported by this printer. Use a digital camera or digital video camcorder compatible with this printer. If the ink tank has Have you replaced an ink tank with a been replaced with a new one new one? message is displayed If the ink tank has been removed for a certain period (the ink tank has not been replaced) Click Yes to reset the ink counter. See "Resetting the Ink Counter" on page 64. Click No on the dialog box described above. You can choose the option to disable the diaplay of this confirmation message. 1. Ensure that the printer is turned on and open the Printer Properties dialog box. 2. Click the Maintenance tab and then click Low Ink Warning Setting. 3. Clear the check box of Display a confirmation message of ink tank replacement and click Send. 79

  • 1
  • 2
  • 3
  • 4
  • 5
  • 6
  • 7
  • 8
  • 9
  • 10
  • 11
  • 12
  • 13
  • 14
  • 15
  • 16
  • 17
  • 18
  • 19
  • 20
  • 21
  • 22
  • 23
  • 24
  • 25
  • 26
  • 27
  • 28
  • 29
  • 30
  • 31
  • 32
  • 33
  • 34
  • 35
  • 36
  • 37
  • 38
  • 39
  • 40
  • 41
  • 42
  • 43
  • 44
  • 45
  • 46
  • 47
  • 48
  • 49
  • 50
  • 51
  • 52
  • 53
  • 54
  • 55
  • 56
  • 57
  • 58
  • 59
  • 60
  • 61
  • 62
  • 63
  • 64
  • 65
  • 66
  • 67
  • 68
  • 69
  • 70
  • 71
  • 72
  • 73
  • 74
  • 75
  • 76
  • 77
  • 78
  • 79
  • 80
  • 81
  • 82
  • 83
  • 84
  • 85
  • 86
  • 87
  • 88
  • 89
  • 90
  • 91
  • 92
  • 93
  • 94
  • 95
  • 96
  • 97
  • 98
  • 99
  • 100
  • 101
  • 102
  • 103
  • 104
  • 105
  • 106
  • 107
  • 108

Troubleshooting
79
“Error No.: 300”
Printer not ready
If the POWER
POWER
POWER
POWER lamp is off, turn the printer on.
If the POWER
POWER
POWER
POWER lamp is flashing green, the printer is initializing. Wait until the
POWER
POWER
POWER
POWER lamp stops flashing.
Printer not properly
connected
Ensure that the printer is securely connected to the computer.
Your printer name is
not displayed in the
Printer List
Printer List
Printer List
Printer List of
Printer Setup Utility
(or Print Center
Print Center
Print Center
Print Center)
1.
Select Applications
Applications
Applications
Applications from the Go
Go
Go
Go menu.
2.
Double-click the Printer Setup Utility
Printer Setup Utility
Printer Setup Utility icon in the Utilities
Utilities
Utilities
Utilities folder.
If you are using an OS other than Mac OS X v.10.3, double-click the Print
Print
Print
Print
Center
Center
Center
Center icon.
3.
Ensure that iP90
iP90
iP90
iP90 is displayed in the Printer List
Printer List
Printer List
Printer List.
If iP90
iP90
iP90
iP90 is not displayed in the Printer List
Printer List
Printer List
Printer List, reinstall the printer driver.
“Error No.:1700”
Waste ink absorber
almost full
The printer has a built-in waste ink absorber to hold the ink used during print
head cleaning. Eight flashes indicates that this absorber is nearly full.
Press the RESUME/CANCEL
RESUME/CANCEL
RESUME/CANCEL
RESUME/CANCEL button to clear the error so you can continue
printing. Before the waste ink absorber becomes completely full, contact the
Customer Care Center.
“Error No.:2001”
A specified period
of time has elapsed
without receiving a
response from the
digital camera/The
digital camera or
digital video
camcorder
connected is not
compatible with
this printer
Disconnect the camera cable, press the RESUME/CANCEL
RESUME/CANCEL
RESUME/CANCEL
RESUME/CANCEL button on the printer
and reconnect the cable.
If the error is still unresolved, there is a possibility that you are using a digital
camera or digital video camcorder that is not supported by this printer. Use a
digital camera or digital video camcorder compatible with this printer.
Have you replaced
an ink tank with a
new one? message is
displayed
If the ink tank has
been replaced with
a new one
Click
Yes
Yes
Yes
Yes
to reset the ink counter.
See "
Resetting the Ink Counter
" on page 64.
If the ink tank has
been removed for a
certain period (the
ink tank has not
been replaced)
Click
No
No
No
No
on the dialog box described above.
You can choose the option to disable the diaplay of this confirmation message.
1.
Ensure that the printer is turned on and open the Printer Properties
Printer Properties
Printer Properties
Printer Properties dialog
box.
2.
Click the Maintenance
Maintenance
Maintenance
Maintenance tab and then click Low Ink Warning Setting
Low Ink Warning Setting
Low Ink Warning Setting.
3.
Clear the check box of Display a confirmation message of ink tank
Display a confirmation message of ink tank
replacement
replacement
replacement
replacement and click Send
Send
Send
Send.
Problem
Possible Cause
Try This
Note
Note
Note
Note
If you are using a switching hub or other device, disconnect the
printer and reconnect it directly to the computer and try printing
again.
If successful, the problem may have been with the device.
There could also be a problem with the cable(s). Replace the
cable(s) and try printing again.
Note
Note
Note
Note
If the problem persists, delete all unnecessary documents
from the Extensions and Control Panels folder.