Canon imageCLASS MF5770 imageCLASS MF5700 Series Software Guide - Page 169
Changing Fax Settings, From a Windows Application
 |
View all Canon imageCLASS MF5770 manuals
Add to My Manuals
Save this manual to your list of manuals |
Page 169 highlights
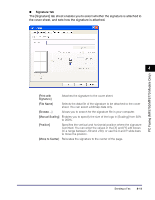
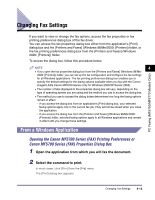
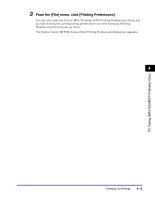
PC Faxing (MF5750/MF5770 Models Only) Changing Fax Settings If you want to view or change the fax options, access the fax properties or fax printing preferences dialog box of the fax driver. You can access the fax properties dialog box either from the application's [Print] dialog box and the [Printers and Faxes] (Windows 98/Me/2000: [Printers]) folder, or the fax printing preferences dialog box from the [Printers and Faxes] (Windows 2000: [Printers]) folder. To access the dialog box, follow this procedure below. NOTE 4 • If you open the fax properties dialog box from the [Printers and Faxes] (Windows 98/Me/ 2000: [Printers]) folder, you can set up the fax configuration and configure the fax settings for all Windows applications. The fax printing preferences dialog box enables you to specify the default settings for the faxing options available when you fax with the Canon imageCLASS Canon MF5700 Series (only for Windows 2000/XP/Server 2003). • The number of tabs displayed in the properties dialog box will vary, depending on the type of operating system you are using and the method you use to access the dialog box. • The method you use to access the dialog boxes determines how long the faxing options remain in effect: - If you access the dialog box from an application's [Print] dialog box, your selected faxing options apply only to the current fax job. They will not be stored when you close the application. - If you access the dialog box from the [Printers and Faxes] (Windows 98/Me/2000: [Printers]) folder, selected faxing options apply to all Windows applications and remain in effect until you change those settings. From a Windows Application Opening the Canon MF5700 Series (FAX) Printing Preferences or Canon MF5700 Series (FAX) Properties Dialog Box 1 Open the application from which you will fax the document. 2 Select the command to print. In most cases, click [Print] from the [File] menu. The [Print] dialog box appears. Changing Fax Settings 4-13
-
 1
1 -
2
-
3
-
4
-
5
-
6
-
7
-
8
-
9
-
10
-
11
-
12
-
13
-
14
-
15
-
16
-
17
-
18
-
19
-
20
-
21
-
22
-
23
-
24
-
25
-
26
-
27
-
28
-
29
-
30
-
31
-
32
-
33
-
34
-
35
-
36
-
37
-
38
-
39
-
40
-
41
-
42
-
43
-
44
-
45
-
46
-
47
-
48
-
49
-
50
-
51
-
52
-
53
-
54
-
55
-
56
-
57
-
58
-
59
-
60
-
61
-
62
-
63
-
64
-
65
-
66
-
67
-
68
-
69
-
70
-
71
-
72
-
73
-
74
-
75
-
76
-
77
-
78
-
79
-
80
-
81
-
82
-
83
-
84
-
85
-
86
-
87
-
88
-
89
-
90
-
91
-
92
-
93
-
94
-
95
-
96
-
97
-
98
-
99
-
100
-
101
-
102
-
103
-
104
-
105
-
106
-
107
-
108
-
109
-
110
-
111
-
112
-
113
-
114
-
115
-
116
-
117
-
118
-
119
-
120
-
121
-
122
-
123
-
124
-
125
-
126
-
127
-
128
-
129
-
130
-
131
-
132
-
133
-
134
-
135
-
136
-
137
-
138
-
139
-
140
-
141
-
142
-
143
-
144
-
145
-
146
-
147
-
148
-
149
-
150
-
151
-
152
-
153
-
154
-
155
-
156
-
157
-
158
-
159
-
160
-
161
-
162
-
163
-
 164
164 -
 165
165 -
 166
166 -
 167
167 -
 168
168 -
 169
169 -
 170
170 -
 171
171 -
 172
172 -
 173
173 -
 174
174 -
175
-
176
-
177
-
178
-
179
-
180
-
181
-
182
-
183
-
184
-
185
-
186
-
187
-
188
-
189
-
190
-
191
-
192
-
193
-
194
-
195
-
196
-
197
-
198
-
199
-
200
-
201
-
202
-
203
-
204
-
205
-
206
-
207
-
208
-
209
-
210
-
211
-
212
-
213
-
214
-
215
-
216
-
217
-
218
-
219
-
220
-
221
-
222
-
223
-
224
-
225
-
226
-
227
-
228
-
229
-
230
-
231
-
232
-
233
-
234
-
235
-
236
-
237
-
238
-
239
-
240
-
241
-
242
-
243
-
244
-
245
-
246
-
247
-
248
-
249
-
250
-
251
-
252
-
253
-
254
-
255
 |
 |
