Canon imagePROGRAF W7200 Setup Guide - Page 82
If you are using Windows Me, Windows 98 or Windows 95, in the Host Name, Under Port to Add
 |
View all Canon imagePROGRAF W7200 manuals
Add to My Manuals
Save this manual to your list of manuals |
Page 82 highlights
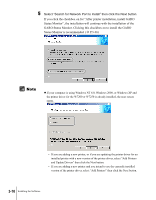
If an older version of a printer driver for the W7200 or W7250 is already installed, the "Select process" screen opens. Select the type of installation method and click the Next button. Type of Installation Methods: • If you are installing a new printer driver on the same printer, select "Update Drivers", click the Next button, then go to Step 10. (Æ P.3-14) • If you are adding a new printer, select "Add Printers", then click the Next button. • If you are adding a new printer and also updating the driver on an old printer with a new version of the printer driver, select "Add Printers and Update Drivers" then click the Next button. 4. On the "Select Printers for Driver Installation" screen, click the Add/Delete button. 5. In the "Printer List" select the name of the printer to install, then click the "Add to the Printer List for Driver Installation" button. 6. Make sure the name of the printer is in the "Printer List for Driver Installation", then click the OK button. 7. Check the names of the printers displayed in the list, then click the Next button. 8. On the Printer Information screen, under Port Settings select Add Port then click the Settings button. 9. Under Port to Add, select "Standard TCP/IP Port" for Windows XP or Windows 2000 or select "Canon LPR Port" for Windows Me, Windows 98, Windows 95 or select "LPR Port" for Windows NT 4.0, then click the OK button and follow the instructions on the screen. 10. If you are using Windows XP or Windows 2000, in the "Printer Name or IP Address" text box, enter the IP address assigned to the printer then follow the instructions on the screen. If you are using Windows Me, Windows 98 or Windows 95, in the "Host Name or IP Address" text box enter the Printer Name or IP address of the printer. If you are using Windows NT 4.0, enter the IP address in the "Name or address of server providing lpd" text box, then enter "lp" in the "Name of printer or print queue on that server" text box. 11. When you return to the Printer Information screen, check the entry in the "Port Set" box to confirm that the entered IP address is displayed: With Windows XP or Windows 2000 you should see: IP_XXX.XXX.XXX.XXX With Windows Me, Windows 98 or Windows 95 you should see: XXX.XXX.XXX.XXX@LP With Windows NT 4.0 you should see: XXX.XXX.XXX.XXX:LP Click the Next button. 12. Confirm the settings in the "Printer List fot Driver Installation", then follow the procedure from Step 10 to perform the procedure for installing the printer driver. (Æ P.3-14) 3-12 Installing the Software
-
 1
1 -
2
-
3
-
4
-
5
-
6
-
7
-
8
-
9
-
10
-
11
-
12
-
13
-
14
-
15
-
16
-
17
-
18
-
19
-
20
-
21
-
22
-
23
-
24
-
25
-
26
-
27
-
28
-
29
-
30
-
31
-
32
-
33
-
34
-
35
-
36
-
37
-
38
-
39
-
40
-
41
-
42
-
43
-
44
-
45
-
46
-
47
-
48
-
49
-
50
-
51
-
52
-
53
-
54
-
55
-
56
-
57
-
58
-
59
-
60
-
61
-
62
-
63
-
64
-
65
-
66
-
67
-
68
-
69
-
70
-
71
-
72
-
73
-
74
-
75
-
76
-
 77
77 -
 78
78 -
 79
79 -
 80
80 -
 81
81 -
 82
82 -
 83
83 -
 84
84 -
 85
85 -
 86
86 -
 87
87 -
88
-
89
-
90
-
91
-
92
-
93
-
94
-
95
-
96
-
97
-
98
-
99
-
100
-
101
-
102
-
103
-
104
-
105
-
106
-
107
-
108
-
109
-
110
-
111
-
112
-
113
-
114
-
115
-
116
-
117
-
118
-
119
-
120
-
121
-
122
-
123
-
124
-
125
-
126
 |
 |
