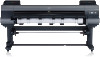
Canon imagePROGRAF iPF9400 Setup Guide - Page 9
Install the Printheads
 |
View all Canon imagePROGRAF iPF9400 manuals
Add to My Manuals
Save this manual to your list of manuals |
Page 9 highlights
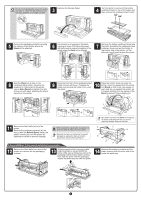
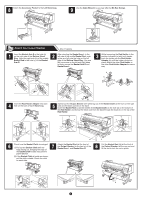
10 Make sure the ink lamp lights red. 11 Check that the ink lamp is alight, and then push the ink tank more strongly until is touches the base. 12 Repeat steps 5 to 11 to mount each of the ink tanks. Close the ink tank covers. PM M BK R G B • If the ink lamp does not light, repeat steps 5, 8, and 9. PM M BK R G B Install the Printheads 1 When the display screen shows Open Upper Cover, open the top cover. Install both printheads. 2 Lift the carriage cover to open it fully. 3 Pull the printhead fixer lever forward all the way to open it completely. Instructions on printhead installation are shown on the display screen. 4 Lift the printhead fixer cover to open it fully. 5 Hold the printhead by the grips (a) as you remove it from the pouch. 6 Remove the orange protective part (a). Remove the other orange protective part (b) while holding the grip (c). bc a a a . • Never touch the parts covered by the protective parts. Doing so may damage the printhead and affect printing quality. • The printhead contains ink, so be careful not to spill it once the protective parts are removed. • Do not reattach the protective parts after removing them. Dispose of these materials according to local regulations. 7 Insert the printhead into the carriage (b) with the ink holes (a) up and facing the front of the printer as shown in the figure. Carefully push the printhead firmly into the carriage (b), ensuring that the parts that were covered by the protective parts do not touch the carriage (b). a 8 Pull the printhead fixer cover down toward the front to lock the printhead in place. 9 Push the printhead fixer lever all the way back. b 9
-
 1
1 -
2
-
3
-
 4
4 -
 5
5 -
 6
6 -
 7
7 -
 8
8 -
 9
9 -
 10
10 -
 11
11 -
 12
12 -
 13
13 -
 14
14 -
15
-
16
-
17
-
18
-
19
-
20
 |
 |
