Casio LK94 User Guide - Page 49
Connection to a Computer - usb driver
 |
View all Casio LK94 manuals
Add to My Manuals
Save this manual to your list of manuals |
Page 49 highlights
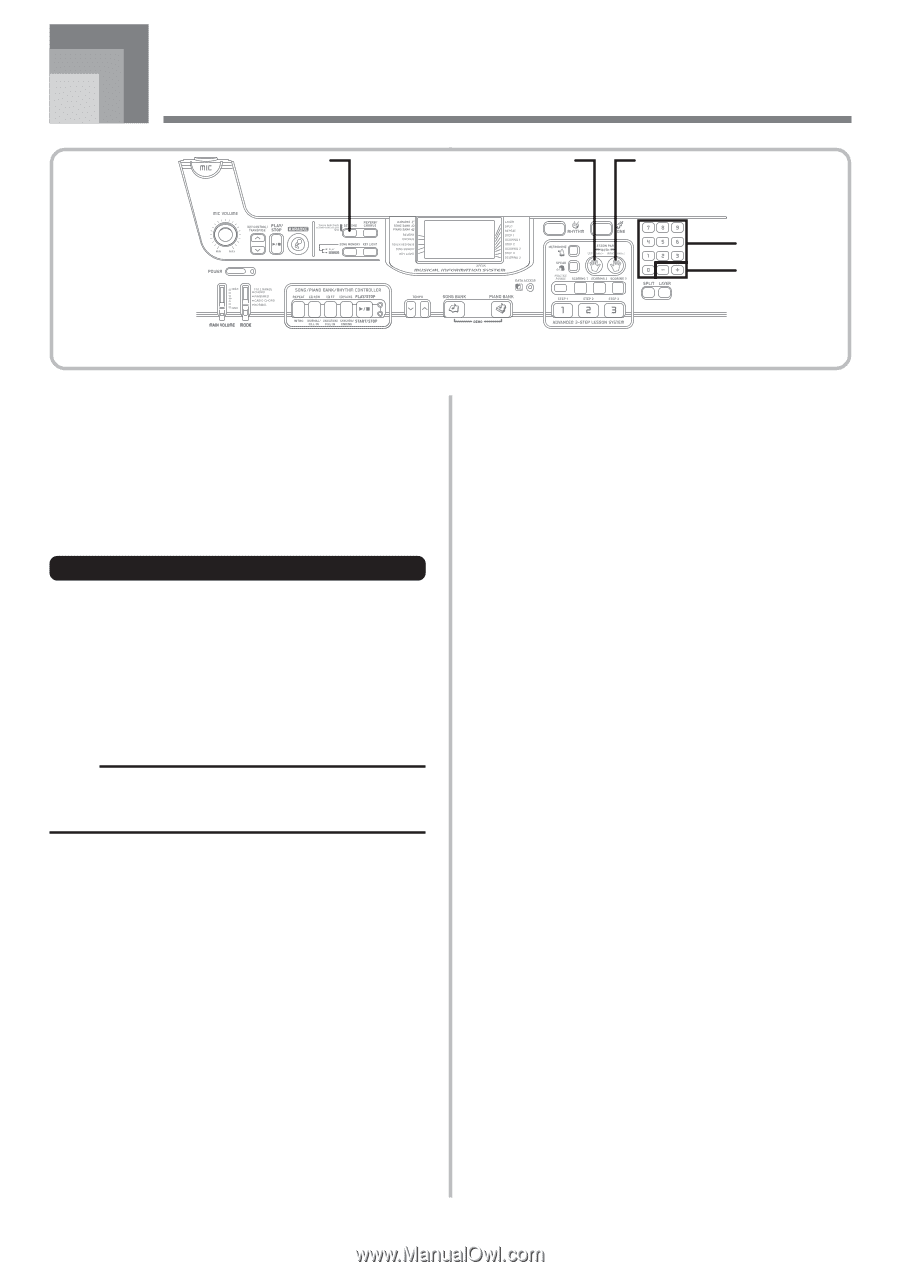
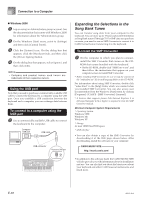
Connection to a Computer SETTING LEFT/TRACK 1 RIGHT/TRACK 2 Number buttons [+] / [-] Connecting to a Computer The keyboard's USB port makes it quick and simple to connect to a computer. After installing the USB MIDI driver onto your computer from the CD-ROM that comes with the keyboard, you will be able to use commercially available MIDI software on your computer to exchange data between the keyboard and your computer. To install the USB MIDI driver 1 On the computer to which you plan to connect, install the USB MIDI driver that comes on the CDROM that comes bundled with the keyboard. • For information about installing the USB MIDI driver, see the "CASIO USB MIDI Driver User's Guide" (manual_e.pdf) on the "USB Manual and Driver CDROM". NOTE • Before starting actual installation of USB MIDI driver, be sure to read the contents of the "readme.txt" file in the "English" folder on the CD-ROM. • Use Adobe Reader or Acrobat Reader to access the USB MIDI driver user's guide.* * You need to have Adobe Reader or Acrobat Reader installed on your computer in order to view the contents of the "CASIO USB MIDI Driver User's Guide" (manual_e.pdf). If your computer does not have either Adobe Reader or Acrobat Reader installed, use the procedure below to install it. Installing Adobe Reader (Acrobat Reader**) • Place the "USB Manual and Driver CD-ROM" into your computer's CD-ROM drive. • On the CD-ROM, navigate to the folder named "Adobe", open the folder named "English", and then double-click "ar601enu.exe" ("ar505enu.exe"**). Follow the instructions that appear on your computer screen to install Adobe Reader. ** Adobe Reader cannot be installed on a computer running Windows 98. If your computer is running under Windows 98, double-click "ar505enu.exe" to install Acrobat Reader. 655A-E-049A Minimum Computer system Requirements Supported Operating Systems Operation is supported under Windows® XP, Windows® 2000, Windows® Me, Windows® 98SE, and Windows® 98. G Universal • IBM AT or compatible computer • USB port that provides normal operation under Windows • CD-ROM drive (for installation) • At least 2MB of free hard disk space (not including space required for Adobe Reader) G Windows XP • 300MHz or higher Pentium processor • At least 128MB of memory G Windows 2000 • 166MHz or higher Pentium processor • At least 64MB of memory G Windows Me, Windows 98SE, Windows 98 • 166MHz or higher Pentium processor • At least 32MB of memory Driver Signing G Windows XP 1 Log on to Windows XP using a Computer administrator account. See the documentation that comes with Windows XP for information about Computer administrator accounts. 2 On the Windows [Start] menu, click [Control Panel]. • If you cannot see the [System] icon on the Control Panel, click [Switch to Classic View]. 3 Click the [System icon]. On the dialog box that appears, click the [Hardware] tab, and then click the [Driver Signing] button. 4 On the dialog box that appears, select [Ignore], and then click [OK]. E-47
-
 1
1 -
2
-
3
-
4
-
5
-
6
-
7
-
8
-
9
-
10
-
11
-
12
-
13
-
14
-
15
-
16
-
17
-
18
-
19
-
20
-
21
-
22
-
23
-
24
-
25
-
26
-
27
-
28
-
29
-
30
-
31
-
32
-
33
-
34
-
35
-
36
-
37
-
38
-
39
-
40
-
41
-
42
-
43
-
 44
44 -
 45
45 -
 46
46 -
 47
47 -
 48
48 -
 49
49 -
 50
50 -
 51
51 -
 52
52 -
 53
53 -
 54
54 -
55
-
56
-
57
-
58
-
59
-
60
-
61
-
62
-
63
-
64
-
65
-
66
-
67
-
68
-
69
 |
 |