Casio XJ-A240 User Guide - Page 15
Getting Ready - projector lamp
 |
View all Casio XJ-A240 manuals
Add to My Manuals
Save this manual to your list of manuals |
Page 15 highlights
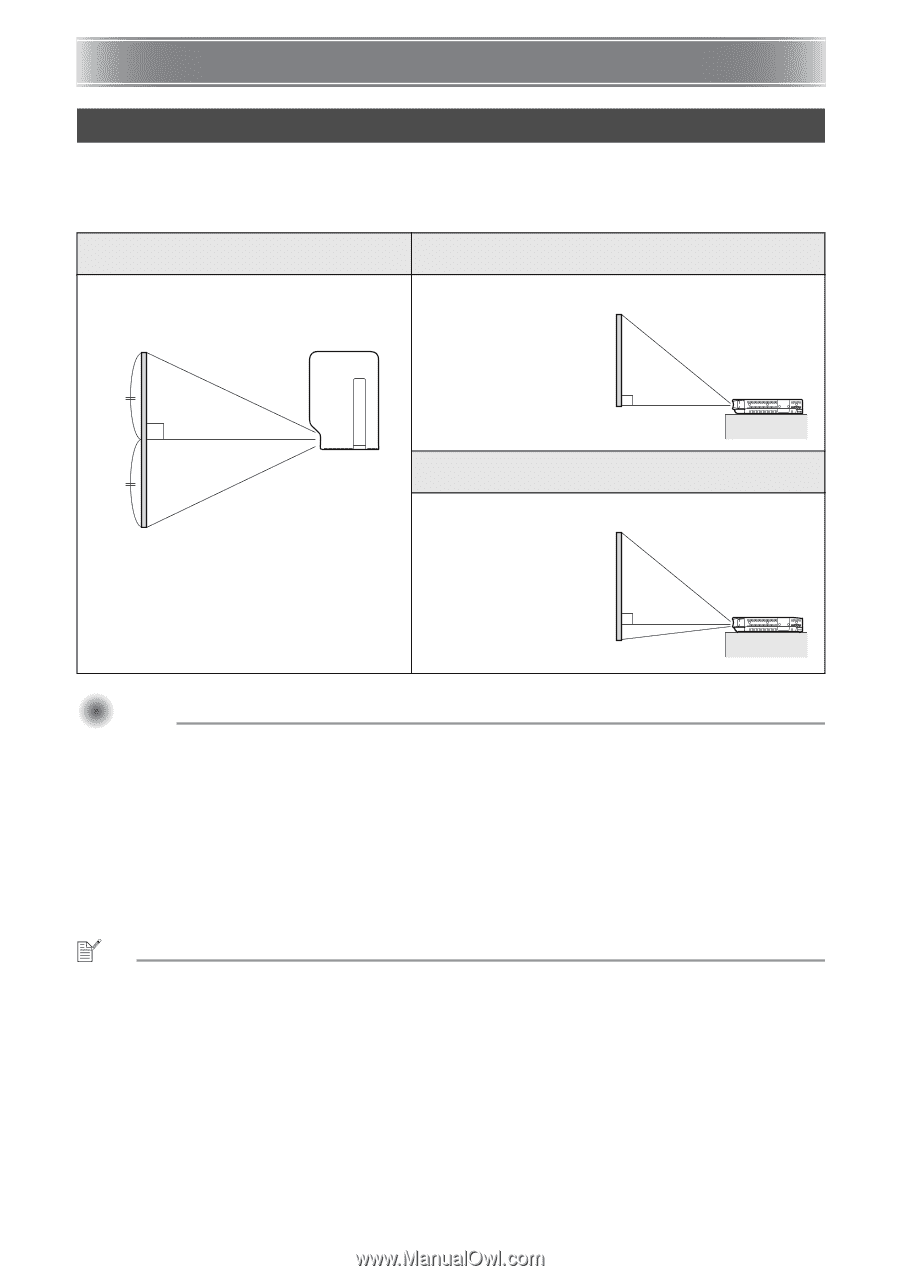
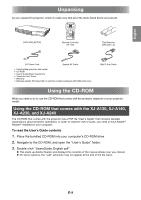
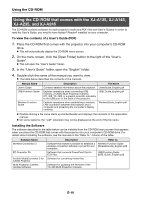
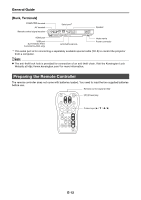
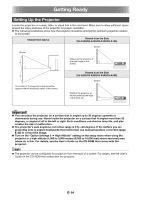
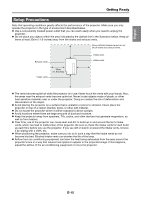
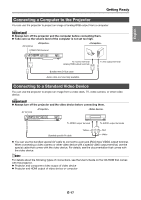
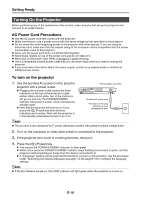
Getting Ready Setting Up the Projector Locate the projector on a desk, table, or stand that is firm and level. Make sure to allow sufficient space around the sides and back of the projector for proper ventilation. The following illustrations show how the projector should be oriented for optimum projection relative to the screen. Viewed from Above Viewed from the Side (XJ-A130/XJ-A135/XJ-A140/XJ-A145) Screen Screen Make sure the projector is at a right angle to the screen. The center of the projector's lens should be aligned with the horizontal center of the screen. Viewed from the Side (XJ-A230/XJ-A235/XJ-A240/XJ-A245) Screen Position the projector so the lens side is at the edge of the table, etc. Important! You can place the projector on a surface that is angled up to 30 degrees upwards or downwards during use. Never locate the projector on a surface that is angled more than 30 degrees, or angled at all to the left or right. Such conditions can shorten lamp life, and also creates the risk of malfunction. The projector's auto keystone correction range is 0 to +30 degrees. If the surface you are projecting onto is angled downwards from horizontal, use manual keystone correction (page E-22) to correct the image. Turn on the "Option Settings 2 High Altitude" setting on the setup menu when using the projector in a high altitude (1,500 to 3,000 meters (5,000 to 10,000 feet) above sea level) area where air is thin. For details, see the User's Guide on the CD-ROM that comes with the projector. NOTE The projector can be configured for projection from the back of a screen. For details, see the User's Guide on the CD-ROM that comes with the projector. E-14
-
 1
1 -
2
-
3
-
4
-
5
-
6
-
7
-
8
-
9
-
 10
10 -
 11
11 -
 12
12 -
 13
13 -
 14
14 -
 15
15 -
 16
16 -
 17
17 -
 18
18 -
 19
19 -
 20
20 -
21
-
22
-
23
-
24
-
25
-
26
-
27
-
28
-
29
-
30
-
31
-
32
-
33
-
34
-
35
-
36
-
37
 |
 |