Celestron CPC Deluxe 800 HD Computerized Telescope CPC Deluxe HD Manual - Page 33
Optional Accessories
 |
View all Celestron CPC Deluxe 800 HD Computerized Telescope manuals
Add to My Manuals
Save this manual to your list of manuals |
Page 33 highlights
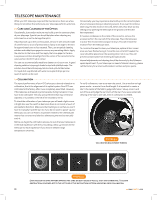
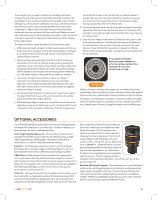
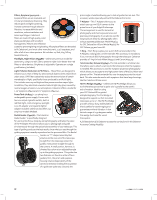
To accomplish this, you need to tighten the secondary collimation screw(s) that move the star across the field toward the direction of the skewed light. These screws are located on the secondary mirror holder (see figure 9-1). To access the collimation screws you will need to remove the collimation screw cover to expose the three collimation screws underneath. To remove the cover, place the tip of a flat screwdriver underneath the cover and twist until the cover lifts off. Make only small 1/6 to 1/8 adjustments to the collimation screws and re-center the star by moving the scope before making any improvements or before making further adjustments. To make collimation a simple procedure, follow these easy steps: 1. While looking through a medium to high power eyepiece, de-focus a bright star until a ring pattern with a dark shadow appears (see figure 9-2). Center the de-focused star and notice in which direction the central shadow is skewed. 2. Place your finger along the edge of the front cell of the telescope (be careful not to touch the corrector plate), pointing towards the collimation screws. The shadow of your finger should be visible when looking into the eyepiece. Rotate your finger around the tube edge until its shadow is seen closest to the narrowest portion of the rings (i.e., the same direction in which the central shadow is skewed). 3. Locate the collimation screw closest to where your finger is positioned. This will be the collimation screw you will need to adjust first. (If your finger is positioned exactly between two of the collimation screws, then you will need to adjust the screw opposite where your finger is located). 4. Use the hand control buttons to move the de-focused star image to the edge of the field of view in the same direction that the central obstruction of the star image is skewed. 5. While looking through the eyepiece, use an Allen wrench to turn the collimation screw you located in step 2 and 3. Usually a tenth of a turn is enough to notice a change in collimation. If the star image moves out of the field of view in the direction that the central shadow is skewed, than you are turning the collimation screw the wrong way. Turn the screw in the opposite direction, so that the star image is moving towards the center of the field of view. 6. If while turning you notice that the screws get very loose, then simply tighten the other two screws by the same amount. Conversely, if the collimation screw gets too tight, then loosen the other two screws by the same amount. 7. Once the star image is in the center of the field of view, check to see if the rings are concentric. If the central obstruction is still skewed in the same direction, then continue turning the screw(s) in the same direction. If you find that the ring pattern is skewed in a different direction, than simply repeat steps 2 through 6 as described above for the new direction. A collimated telescope should appear symmetrical with the central obstruction centered in the star's diffraction pattern. FIGURE 9-3 Perfect collimation will yield a star image very symmetrical just inside and outside of focus. In addition, perfect collimation delivers the optimal optical performance specifications that your telescope is built to achieve. If seeing (i.e., air steadiness) is turbulent, collimation is difficult to judge. Wait until a better night if it is turbulent or aim to a steadier part of the sky. A steadier part of the sky is judged by steady versus twinkling stars. OPTIONAL ACCESSORIES You will find that additional accessories enhance your viewing pleasure and expand the usefulness of your telescope. For ease of reference, all the accessories are listed in alphabetical order. Erect Image Diagonal (#94112-A) - This accessory is an Amici prism arrangement that allows you to look into the telescope at a 45° angle with images that are oriented properly (upright and correct from left-to-right). It is useful for daytime, terrestrial viewing. Eyepieces - Like telescopes, eyepieces come in a variety of designs. Each design has its own advantages and disadvantages. For the 1.25" barrel diameter there are four different eyepiece designs available. OMNI Plössl - Plössl eyepieces have a 4-element lens designed for low-to-high power observing. All are fully multi-coated for maximum light transmission. These Plössls offer razor sharp views across the entire field, even at the edges! In the 1.25" barrel diameter, they are available in the following focal lengths: 3.6 mm, 6 mm, 8 mm, 10 mm, 13 mm, 17 mm, 25 mm, 32 mm and 40 mm. X-CEL LX - The newly enhanced X-Cel LX eyepiece series is what you've been waiting for in a high quality eyepiece for planetary viewing. With a brand new sleek and robust design and a twist-up eye guard, these eyepieces are especially designed for comfort and ease of use. They also have a wide field of view of 60° and 6-element fully multi-coated optics for magnificent wide field performance. X-Cel LX eyepieces are parfocal and require little to no focusing when changing from low to high power. The X-Cel LX series is offered in the following seven sizes: 2.3 mm, 5 mm, 7 mm, 9 mm, 12 mm, 18 mm and 25 mm. Ultima LX - Celestron Ultima LX Series parfocal eyepieces feature wide fields of view for high and low magnifications. 70 º field of view for high and low magnifications and extendable twist-up eyecups - Good for eyeglass wearers. Available in the following focal lengths: 5 mm, 8 mm, 13 mm, 17 mm, 22 mm and 32 mm. Eyepiece, Micro Guide (#94171) - This multipurpose 12.5 mm illuminated reticle can be used for guiding deep-sky astrophotos, measuring position angles, angular separations and more. The laser etched reticle provides razor sharp lines, and the variable brightness illuminator is completely cordless. The Micro Guide Eyepiece produces 224 power when used with the CPC 1100 at f/10 and 163 power with the CPC 800. >> www.celestron.com 31
-
 1
1 -
2
-
3
-
4
-
5
-
6
-
7
-
8
-
9
-
10
-
11
-
12
-
13
-
14
-
15
-
16
-
17
-
18
-
19
-
20
-
21
-
22
-
23
-
24
-
25
-
26
-
27
-
 28
28 -
 29
29 -
 30
30 -
 31
31 -
 32
32 -
 33
33 -
 34
34 -
 35
35 -
 36
36 -
 37
37 -
 38
38 -
39
-
40
-
41
-
42
-
43
-
44
-
45
-
46
-
47
-
48
-
49
-
50
 |
 |
