Chamberlain B2212T Installation Manual - English - Page 11
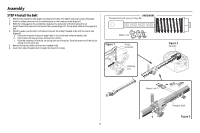
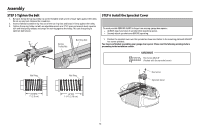
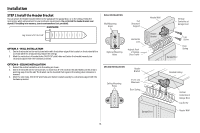
STEP 4 Install the Belt
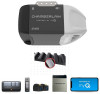 |
View all Chamberlain B2212T manuals
Add to My Manuals
Save this manual to your list of manuals |
Page 11 highlights
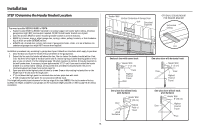
Assembly STEP 3 Install the Idler Pulley 1. Lay the belt beside the rail, as shown. Grasp the end with the hooked trolley connector and pass approximately 12" (30 cm) of belt through the window. Keep the ribbed side toward the rail, and allow it to hang until Assembly Step 4. 2. Remove the tape from the idler pulley. The inside center should be pre-greased. If dry, regrease to ensure proper operation. 3. Place the idler pulley into the window as shown. 4. Insert the idler bolt from the top through the rail and pulley. Tighten with a 3/8" lock washer and nut underneath the rail until the lock washer is compressed. 5. Rotate the pulley to be sure it spins freely. 6. Locate the rail tab. The rail tab is between the idler bolt and the trolley in the front rail section. Use a flathead screwdriver and lift the rail tab until the tab is vertical (90º). HARDWARE Nut 3/8" Lock Washer 3/8" Bolt Rail Tab Belt Bolt Lock Washer Nut 11 Rail Grease Inside Pulley Idler Pulley Trolley Connector
-
 1
1 -
2
-
3
-
4
-
5
-
 6
6 -
 7
7 -
 8
8 -
 9
9 -
 10
10 -
 11
11 -
 12
12 -
 13
13 -
 14
14 -
 15
15 -
 16
16 -
17
-
18
-
19
-
20
-
21
-
22
-
23
-
24
-
25
-
26
-
27
-
28
-
29
-
30
-
31
-
32
-
33
-
34
-
35
-
36
-
37
-
38
-
39
-
40
-
41
-
42
-
43
-
44
-
45
-
46
-
47
-
48
-
49
-
50
-
51
-
52
 |
 |
