Cisco CISCO876-SEC-I-K9 Configuration Guide - Page 75
Apply the Crypto Map to the Physical Interface
 |
UPC - 882658021800
View all Cisco CISCO876-SEC-I-K9 manuals
Add to My Manuals
Save this manual to your list of manuals |
Page 75 highlights
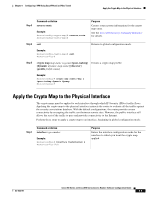
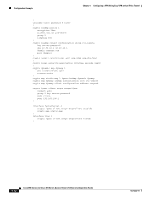
Chapter 6 Configuring a VPN Using Easy VPN and an IPSec Tunnel Apply the Crypto Map to the Physical Interface Step 3 Command or Action reverse-route Example: Router(config-crypto-map)# reverse-route Router(config-crypto-map)# Purpose Creates source proxy information for the crypto map entry. See the Cisco IOS Security Command Reference for details. Step 4 exit Returns to global configuration mode. Example: Router(config-crypto-map)# exit Router(config)# Step 5 crypto map map-name seq-num [ipsec-isakmp] Creates a crypto map profile. [dynamic dynamic-map-name] [discover] [profile profile-name] Example: Router(config)# crypto map static-map 1 ipsec-isakmp dynamic dynmap Router(config)# Apply the Crypto Map to the Physical Interface The crypto maps must be applied to each interface through which IP Security (IPSec) traffic flows. Applying the crypto map to the physical interface instructs the router to evaluate all the traffic against the security associations database. With the default configurations, the router provides secure connectivity by encrypting the traffic sent between remote sites. However, the public interface still allows the rest of the traffic to pass and provides connectivity to the Internet. Perform these steps to apply a crypto map to an interface, beginning in global configuration mode: Step 1 Command or Action interface type number Example: Router(config)# interface fastethernet 4 Router(config-if)# Purpose Enters the interface configuration mode for the interface to which you want the crypto map applied. OL-5332-01 Cisco 850 Series and Cisco 870 Series Access Routers Software Configuration Guide 6-9
-
 1
1 -
2
-
3
-
4
-
5
-
6
-
7
-
8
-
9
-
10
-
11
-
12
-
13
-
14
-
15
-
16
-
17
-
18
-
19
-
20
-
21
-
22
-
23
-
24
-
25
-
26
-
27
-
28
-
29
-
30
-
31
-
32
-
33
-
34
-
35
-
36
-
37
-
38
-
39
-
40
-
41
-
42
-
43
-
44
-
45
-
46
-
47
-
48
-
49
-
50
-
51
-
52
-
53
-
54
-
55
-
56
-
57
-
58
-
59
-
60
-
61
-
62
-
63
-
64
-
65
-
66
-
67
-
68
-
69
-
 70
70 -
 71
71 -
 72
72 -
 73
73 -
 74
74 -
 75
75 -
 76
76 -
 77
77 -
 78
78 -
 79
79 -
 80
80 -
81
-
82
-
83
-
84
-
85
-
86
-
87
-
88
-
89
-
90
-
91
-
92
-
93
-
94
-
95
-
96
-
97
-
98
-
99
-
100
-
101
-
102
-
103
-
104
-
105
-
106
-
107
-
108
-
109
-
110
-
111
-
112
-
113
-
114
-
115
-
116
-
117
-
118
-
119
-
120
-
121
-
122
-
123
-
124
-
125
-
126
-
127
-
128
-
129
-
130
-
131
-
132
-
133
-
134
-
135
-
136
-
137
-
138
-
139
-
140
-
141
-
142
-
143
-
144
-
145
-
146
-
147
-
148
-
149
-
150
-
151
-
152
-
153
-
154
-
155
-
156
-
157
-
158
-
159
-
160
-
161
-
162
-
163
-
164
-
165
-
166
-
167
-
168
-
169
-
170
-
171
-
172
-
173
-
174
-
175
-
176
-
177
-
178
-
179
-
180
-
181
-
182
-
183
-
184
-
185
-
186
-
187
-
188
-
189
-
190
-
191
-
192
-
193
-
194
-
195
-
196
 |
 |