Cisco E1550 User Manual - Page 15
How to set up guest access to your network - default password
 |
View all Cisco E1550 manuals
Add to My Manuals
Save this manual to your list of manuals |
Page 15 highlights
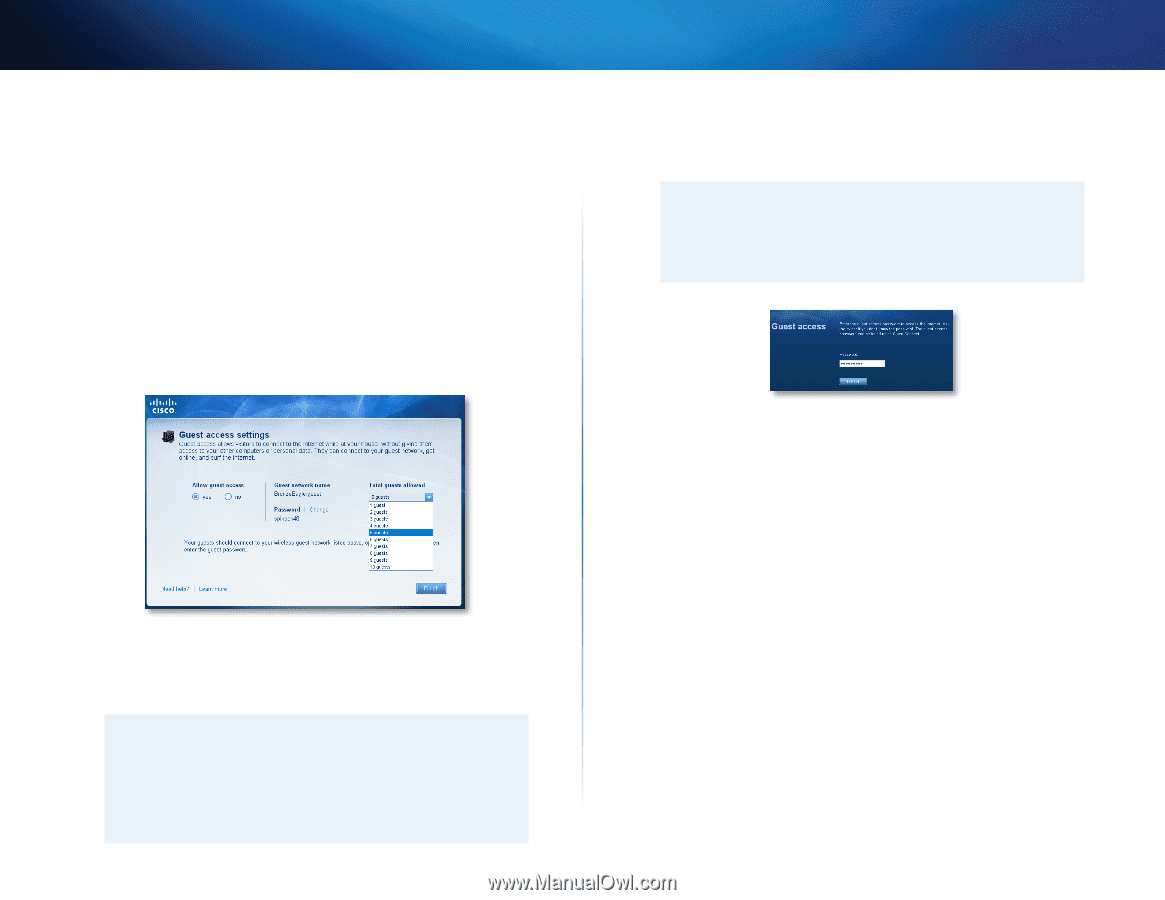
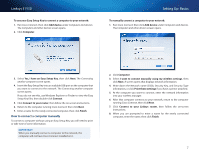
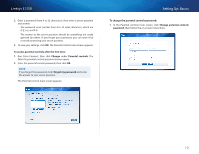
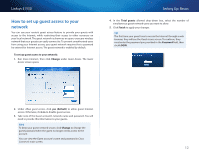
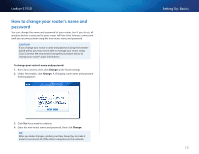
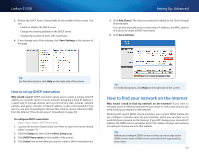
Linksys E1550 How to set up guest access to your network You can use your router's guest access feature to provide your guests with access to the Internet, while restricting their access to other resources on your local network. The guest network is shown as an open, unsecure wireless network that your guests can easily connect to. To prevent unauthorized users from using your Internet access, your guest network requires that a password be entered for Internet access. The guest network is enabled by default. To set up guest access to your network: 1. Run Cisco Connect, then click Change under Guest Access. The Guest Access screen opens. Setting Up: Basics 4. In the Total guests allowed drop-down box, select the number of simultaneous guest network users you want to allow. 5. Click Finish to apply your changes. TIP The first time your guest tries to access the Internet through a web browser, they will see the Guest access screen. To continue, they must enter the password you provided in the Password field, then click LOGIN. 2. Under Allow guest access, click yes (default) to allow guest Internet access. Otherwise, click no to disable guest access. 3. Take note of the Guest account's network name and password. You will need to provide this information to your guests. TIPS To keep your guest network secure, click Change to change the guest password when the guest no longer needs access to the account. You can view the Guest account's name and password in Cisco Connect's main screen. 12
-
 1
1 -
2
-
3
-
4
-
5
-
6
-
7
-
8
-
9
-
 10
10 -
 11
11 -
 12
12 -
 13
13 -
 14
14 -
 15
15 -
 16
16 -
 17
17 -
 18
18 -
 19
19 -
 20
20 -
21
-
22
-
23
-
24
-
25
-
26
-
27
-
28
-
29
-
30
-
31
-
32
-
33
-
34
-
35
-
36
-
37
-
38
-
39
-
40
-
41
-
42
-
43
-
44
-
45
-
46
-
47
-
48
-
49
-
50
-
51
-
52
-
53
-
54
-
55
 |
 |