Craftsman 21237 Operation Manual - Page 13
WAR.ING - miter saw manual
 |
View all Craftsman 21237 manuals
Add to My Manuals
Save this manual to your list of manuals |
Page 13 highlights
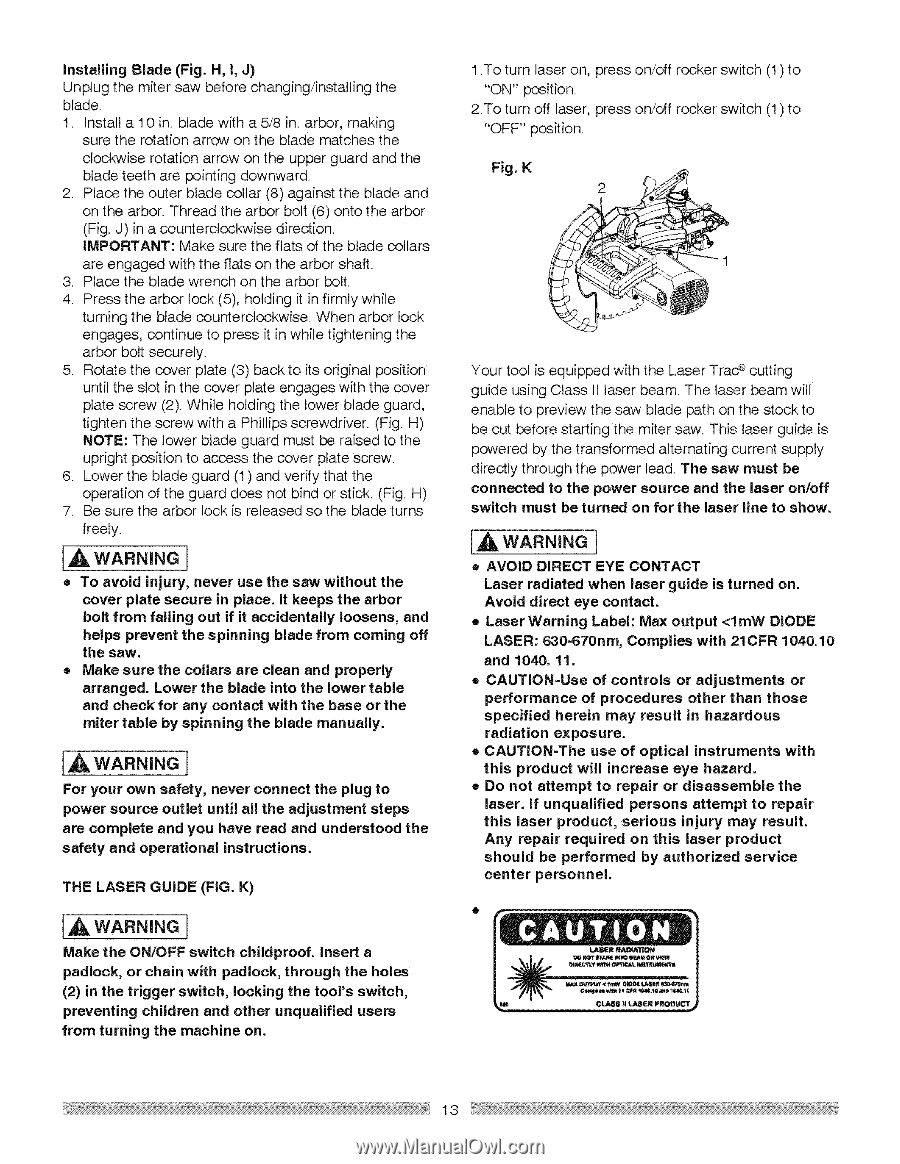
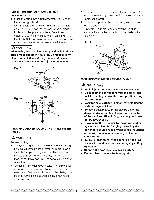
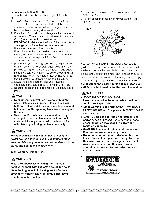
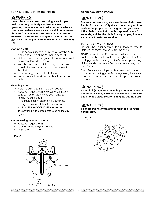
Installing Blade (Fig. H, I, J) Unplug the miter saw before changing/installing the blade. I. Install a I 0 in. blade with a 5/8 in. arbor, making sure the rotation arrow on the blade matches the clockwise rotation arrow on the upper guard and the blade teeth are pointing downward. 2. Place the outer blade collar (8) against the blade and on the arbor. Thread the arbor bolt (6) onto the arbor (Fig. J) in a counterclockwise direction. IMPORTANT: Make sure the flats of the blade collars are engaged with the flats on the arbor shaft. 3. Place the blade wrench on the arbor bolt. 4. Press the arbor lock (5), holding it in firmly while turning the blade counterclockwise. When arbor lock engages, continue to press it in while tightening the arbor bolt securely. 5. Rotate the cover plate (3) back to its original position until the slot in the cover plate engages with the cover plate screw (2). While holding the lower blade guard, tighten the screw with a Phillips screwdriver. (Fig. H) NOTE: The lower blade guard must be raised to the upright position to access the cover plate screw. 6. Lower the blade guard (1) and verify that the operation of the guard does not bind or stick. (Fig. H) 7. Be sure the arbor lock is released so the blade turns freely. [A wARN.'JI G • To avoid injury, never use the saw without the cover plate secure in place. It keeps the arbor bolt from falling out if it accidentally loosens, and helps prevent the spinning blade from coming off the saw. • Make sure the collars are clean and properly arranged. Lower the blade into the lower table and check for any contact with the base or the miter table by spinning the blade manually. [A WAR.INIG For your own safety, never connect the plug to power source outlet until all the adjustment steps are complete and you have read and understood the safety and operational instructions. THE LASER GUIDE (FIG. K) [A WARNINI G Make the ON/OFF switch childproof. Insert a padlock, or chain with padlock, through the holes (2) in the trigger switch, locking the tool's switch, preventing children and other unqualified users from turning the machine on. 1 .To turn laser on, press on/off rocker switch (1) to "ON" position: 2.To turn off laser, press on/off rocker switch (1) to "OFF" position. Fig. K Your tool is equipped with the Laser Trad _ cutting guide using Class II laser beam. The laser beam will enable to preview the saw blade path on the stock to be cut before starting the miter saw. This laser guide is powered by the transformed alternating current supply directly through the power lead. The saw must be connected to the power source and the laser on/off switch must be turned on for the laser line to show. [A WARNIN] G • AVOID DIRECT EYE CONTACT Laser radiated when laser guide is turned on. Avoid direct eye contact. • Laser Warning Label: Max output
-
 1
1 -
2
-
3
-
4
-
5
-
6
-
7
-
 8
8 -
 9
9 -
 10
10 -
 11
11 -
 12
12 -
 13
13 -
 14
14 -
 15
15 -
 16
16 -
 17
17 -
 18
18 -
19
-
20
-
21
-
22
-
23
-
24
-
25
-
26
-
27
-
28
-
29
-
30
 |
 |