Craftsman 21237 Operation Manual - Page 24
Awarmg, Iawar'jgi
 |
View all Craftsman 21237 manuals
Add to My Manuals
Save this manual to your list of manuals |
Page 24 highlights
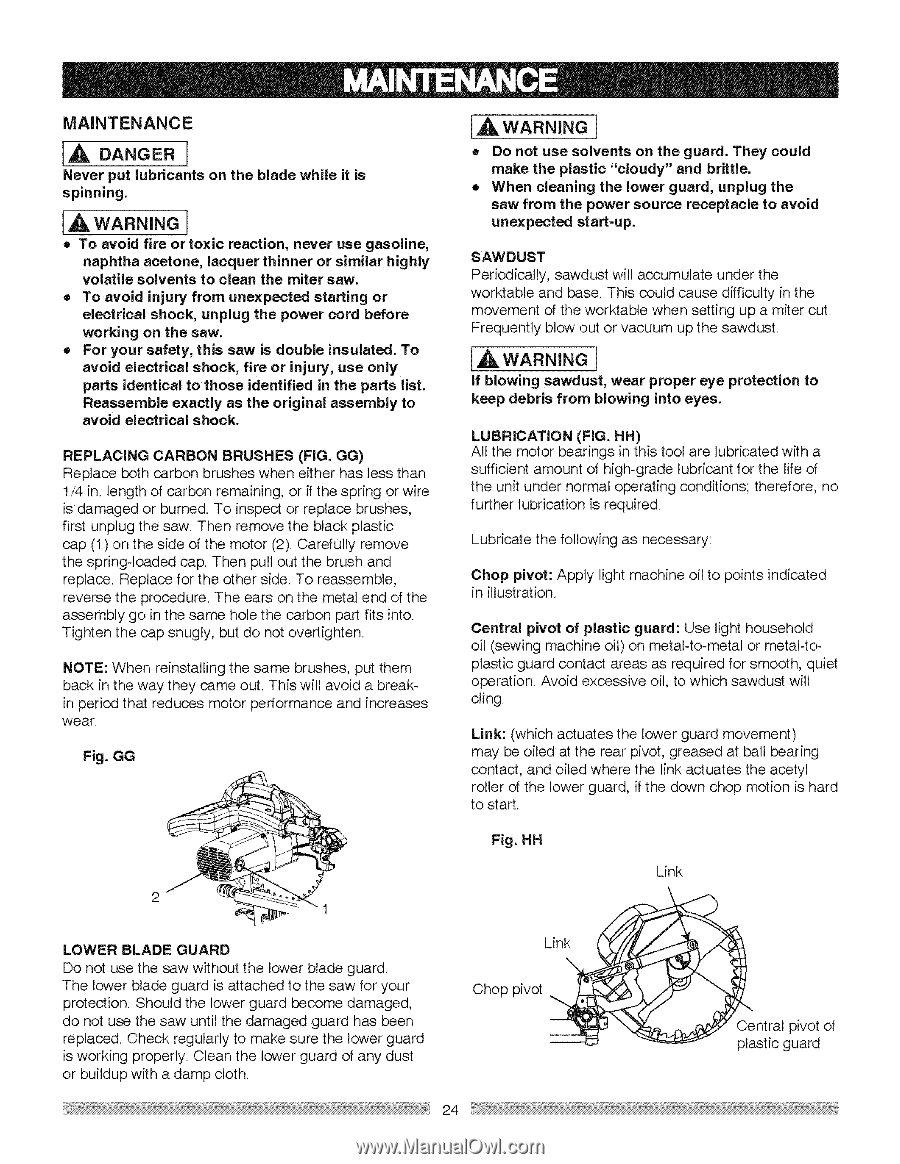
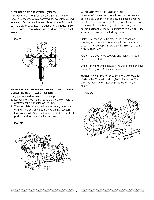
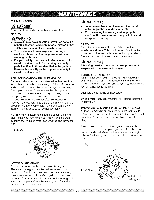
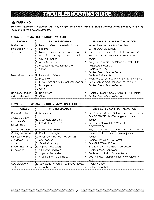
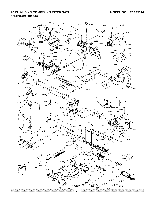
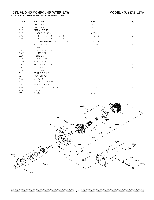
MAINTENANCE [,_ DANGER Never put lubricants on the blade while it is spinning. [A WAR.. GI • To avoid fire or toxic reaction, never use gasoline, naphtha acetone, lacquer thinner or similar highly volatile solvents to clean the miter saw. • To avoid injury from unexpected starting or electrical shock, unplug the power cord before working on the saw. • For your safety, this saw is double insulated. To avoid electrical shock, fire or injury, use only parts identical to those identified in the parts list. Reassemble exactly as the original assembly to avoid electrical shock. REPLACING CARBON BRUSHES (FIG. GG) Replace both carbon brushes when either has less than I/4 in. length of carbon remaining, or ff the spring or wire is damaged or burned. To inspect or replace brushes, first unplug the saw. Then remove the black plastic cap (I) on the side of the motor (2). Carefully remove the spring-loaded cap. Then pull out the brush and replace. Replace for the other side. To reassemble, reverse the procedure. The ears on the metal end of the assembly go in the same hole the carbon part fits into. Tighten the cap snugly, but do not overtighten. NOTE: When reinstalling the same brushes, put them back in the way they came out. This will avoid a breakin period that reduces motor performance and increases wear. Fig. GG [AWAR"m"]G = Do not use solvents on the guard. They could make the plastic "cloudy" and brittle. • When cleaning the lower guard, unplug the saw from the power source receptacle to avoid unexpected start-up. SAWDUST Periodically, sawdust will accumulate under the worktable and base. This could cause difficulty in the movement of the worktable when setting up a miter cut. Frequently blow out or vacuum up the sawdust. IAwAR"'JGI if blowing sawdust, wear proper eye protection to keep debris from blowing into eyes. LUBRICATION (FIG. HH) All the motor bearings in this tool are lubricated with a sufficient amount of high-grade lubricant for the life of the unit under normal operating conditions; therefore, no further lubrication is required. Lubricate the following as necessary: Chop pivot: Apply light machine oil to points indicated in illustration. Central pivot of plastic guard: Use light household oil (sewing machine oil) on metal-to-metal or metal-toplastic guard contact areas as required for smooth, quiet operation. Avoid excessive oil, to which sawdust will cling. Link: (which actuates the lower guard movement) may be oiled at the rear pivot, greased at bal! bearing contact, and oiled where the link actuates the acetyl roller of the lower guard, if the down chop motion is hard to start. Fig. HH Link LOWER BLADE GUARD Do not use the saw without the lower blade guard. The lower blade guard is attached to the saw for your protection. Should the lower guard become damaged, do not use the saw until the damaged guard has been replaced. Check regularly to make sure the lower guard is working properly. Clean the lower guard of any dust or buildup with a damp cloth. Link Chop pivot 24 _ntral pivot of stic guard
-
 1
1 -
2
-
3
-
4
-
5
-
6
-
7
-
8
-
9
-
10
-
11
-
12
-
13
-
14
-
15
-
16
-
17
-
18
-
 19
19 -
 20
20 -
 21
21 -
 22
22 -
 23
23 -
 24
24 -
 25
25 -
 26
26 -
 27
27 -
 28
28 -
 29
29 -
30
 |
 |