Craftsman 21237 Operation Manual - Page 19
unplug the saw
 |
View all Craftsman 21237 manuals
Add to My Manuals
Save this manual to your list of manuals |
Page 19 highlights
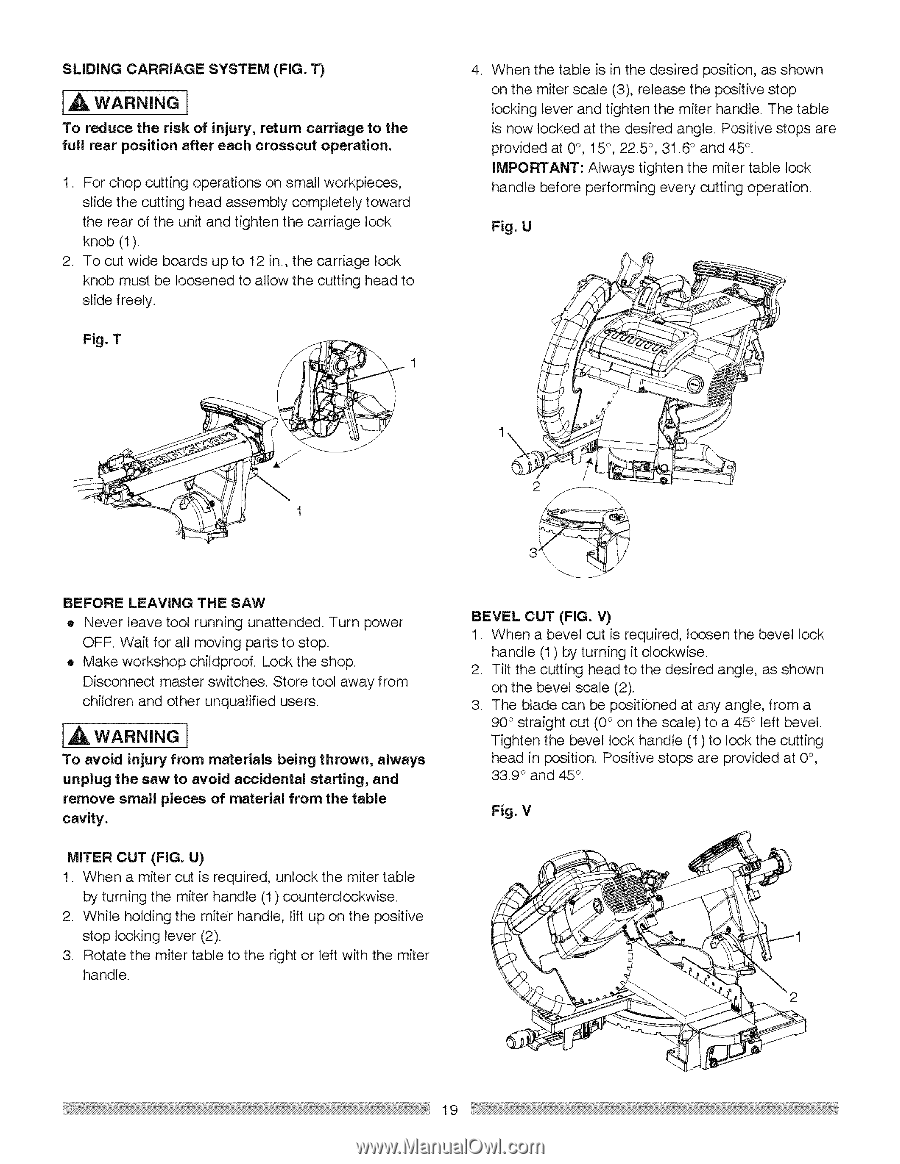
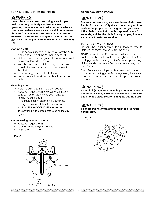
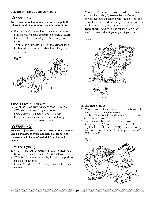
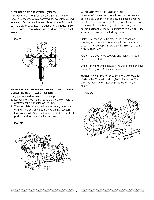
SLIDING CARRIAGE SYSTEM (FIG. 1") [A WARNIING To reduce the risk of injury, return carriage to the full rear position after each crosscut operation. I. For chop cutting operations on small workpieces, slide the cutting head assembly completely toward the rear of the unit and tighten the carriage lock knob (1). 2. To cut wide boards up to 12 in., the carriage lock knob must be loosened to allow the cutting head to slide freely. Fig. T When the table is in the desired position, as shown on the miter scale (3), release the positive stop locking lever and tighten the miter handle. The table is now locked at the desired angle. Positive stops are provided at 0 °, 15°, 225 °, 31.6 ° and 45 °. IMPORTANT: Always tighten the miter table lock handle before performing every cutting operation. Fig. U BEFORE LEAVING THE SAW , Never leave tool running unattended. Turn power OFF. Wait for all moving parts to stop. ® Make workshop childproof. Lock the shop. Disconnect master switches. Store tool away from children and other unqualified users. [A wAR.mJGrI, To avoid injury from materials being thrown, always unplug the saw to avoid accidental starting, and remove small pieces of material from the table cavity. MITER CUT (FIG. U) I. When a miter cut is required, unlock the miter table by turning the miter handle (1) counterclockwise. 2. While holding the miter handle, lift up on the positive stop locking lever (2). 3. Rotate the miter table to the right or left with the miter handle. BEVEL CUT (FIG. V) 1. When a bevel cut is required, loosen the bevel lock handle (1) by turning it clockwise. 2. Tilt the cutting head to the desired angle, as shown on the bevel scale (2). 3. The blade can be positioned at any angle, from a 90 ° straight cut (0 ° on the scale) to a 45 ° left bevel. Tighten the bevel lock handle (1) to lock the cutting head in position. Positive stops are provided at 0 °, 33.9 ° and 45 °1 Fig. V 19
-
 1
1 -
2
-
3
-
4
-
5
-
6
-
7
-
8
-
9
-
10
-
11
-
12
-
13
-
 14
14 -
 15
15 -
 16
16 -
 17
17 -
 18
18 -
 19
19 -
 20
20 -
 21
21 -
 22
22 -
 23
23 -
 24
24 -
25
-
26
-
27
-
28
-
29
-
30
 |
 |