Craftsman 21829 Operation Manual - Page 12
Operating, Components
 |
View all Craftsman 21829 manuals
Add to My Manuals
Save this manual to your list of manuals |
Page 12 highlights
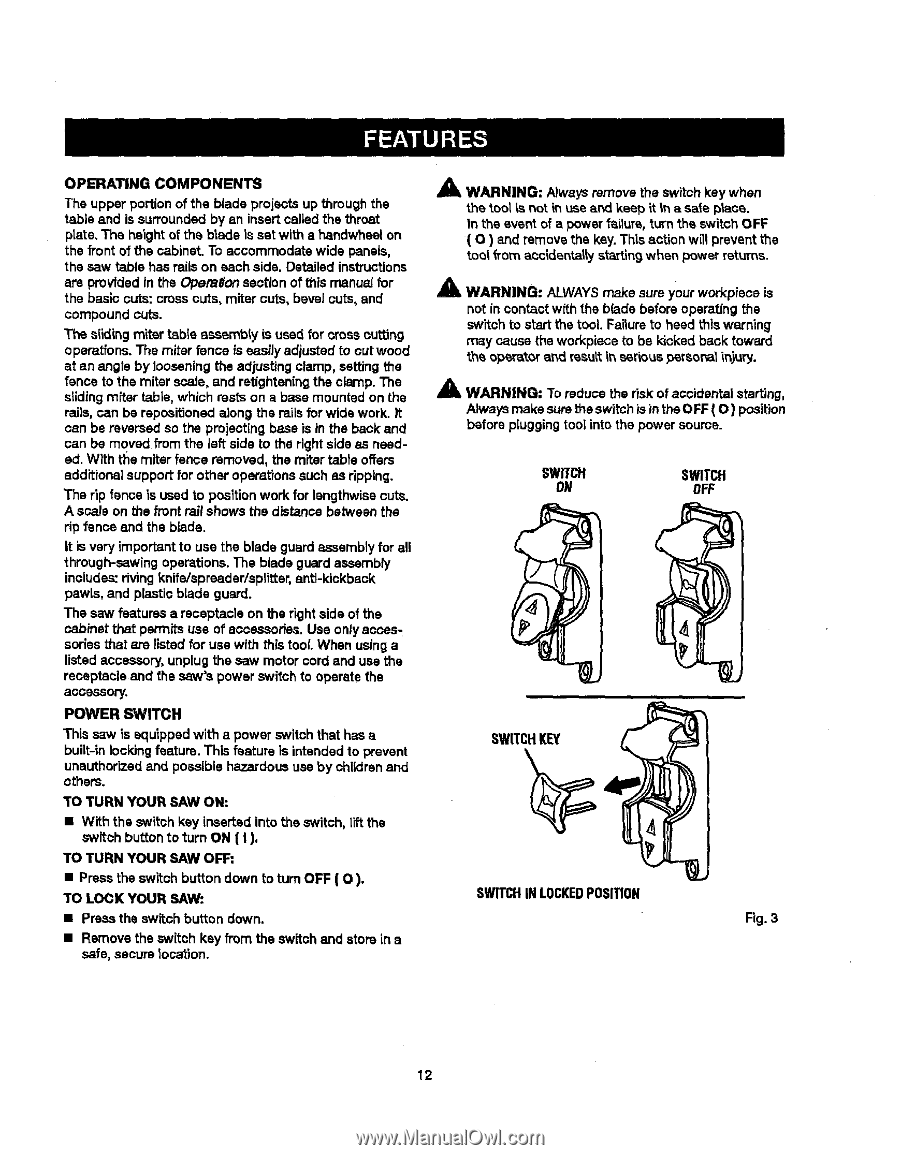
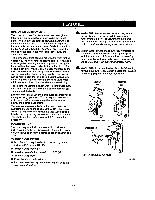
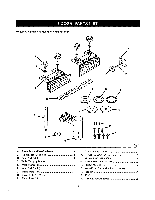
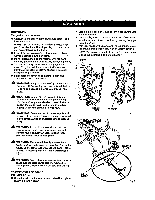
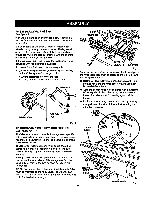
OPERATINGCOMPONENTS The upper portion of the blade projects up through the table and is surroundedby an insertcalled the throat prate.The height of the blade is sat with a handwhsel on the front of the cabinet. To accommodate wide panels, the saw table has rails on each side. Detailed instructions are provided in the Opera,on section of this rnanualfor the basic cuts: crosscuts, miter cuts, bevel cuts, and compound ¢U_l The slidinmgitertableaseemblyisused forcrosscutting operatfenTsh.e miterfenceiseasilaydjustedtocutwood at an angle by looseningthe adjusting clamp, setting the fence to the miter scale, and retightening the clamp. The stlding miter table, which restson a base mounted on the rails, can be repositfehedalong the mils for wide work. _t can be reversed so the projectingbase is in the back and can be moved from the left side to the right side as needed. With _a miter fence removed, the miter table offers additions]support"for other operations such as ripping. The rip fence is used to positionwork for lengthwisecuts. A scale on the front rail shows the distance between the ripfence and the blade. it is very importantto use the blade guard assemblyfor all through-sewing operations.The blade guard assembly includes:riving knife/spreader/splitter, anti-kickback pawls, and plastic blade guard. The saw features a receptacle on the right side of the cabinet that permitsuse of accessories. Use onlyaccessories that are listed for use with this tool When usinga listed accessory, unplug the saw motor cord and usa the receptacle and the saw'-, power switch to operate the accessory. POWER SWITCH This saw is equipped with a power switch that has a built-in locking feature. This feature is intendedto prevent unauthorizedand possible hazardoususe by chUdrenand others. TO TURN YOUR SAW ON: • With the switch kay inserted into the switch, tilt the switch bu_tonto turn ON ( I ), TO TURN YOUR SAW OFF: • Press the switch button down to turn OFF ( O ). TO LOCK YOUR SAW: • Press the switch button down. • Remove the switch kay from the switch and store in a safe, secure location. Am, WARNING: Atwaysremove the switch kay when the tool L_not m use and keep it in a sate ptsce. In the event of a power f_zLluret,urn the switch OFF ( O ) 8.ridremove the key.This action will preventthe tool _rom aoc_dsntalty st_tln 9 when power returns. _' WARNING: ALWAYSmake sure your workpisce is not in contact with the b(ade before opsrat(ng the switch to startthe tool. Faitureto heed this warning may cause the workpieca to be kicked back toward theoperatoraridresulitts_erious_rsor_iinjury. _lz WARNING: To reduce the risk of accidental starting, Always make surethe switchis in the OFF ( O ) position before pIugging tool into the power source. SWTfCH ON SWITCH OFF SWITCHKEY SWITCHIN LOCKEDPOSITION Fig. 3 12
-
 1
1 -
2
-
3
-
4
-
5
-
6
-
 7
7 -
 8
8 -
 9
9 -
 10
10 -
 11
11 -
 12
12 -
 13
13 -
 14
14 -
 15
15 -
 16
16 -
 17
17 -
18
-
19
-
20
-
21
-
22
-
23
-
24
-
25
-
26
-
27
-
28
-
29
-
30
-
31
-
32
-
33
-
34
-
35
-
36
-
37
-
38
-
39
-
40
-
41
-
42
-
43
-
44
-
45
-
46
-
47
-
48
-
49
-
50
-
51
-
52
-
53
-
54
-
55
-
56
-
57
-
58
 |
 |