Craftsman 21829 Operation Manual - Page 35
See See g., screw, securely
 |
View all Craftsman 21829 manuals
Add to My Manuals
Save this manual to your list of manuals |
Page 35 highlights
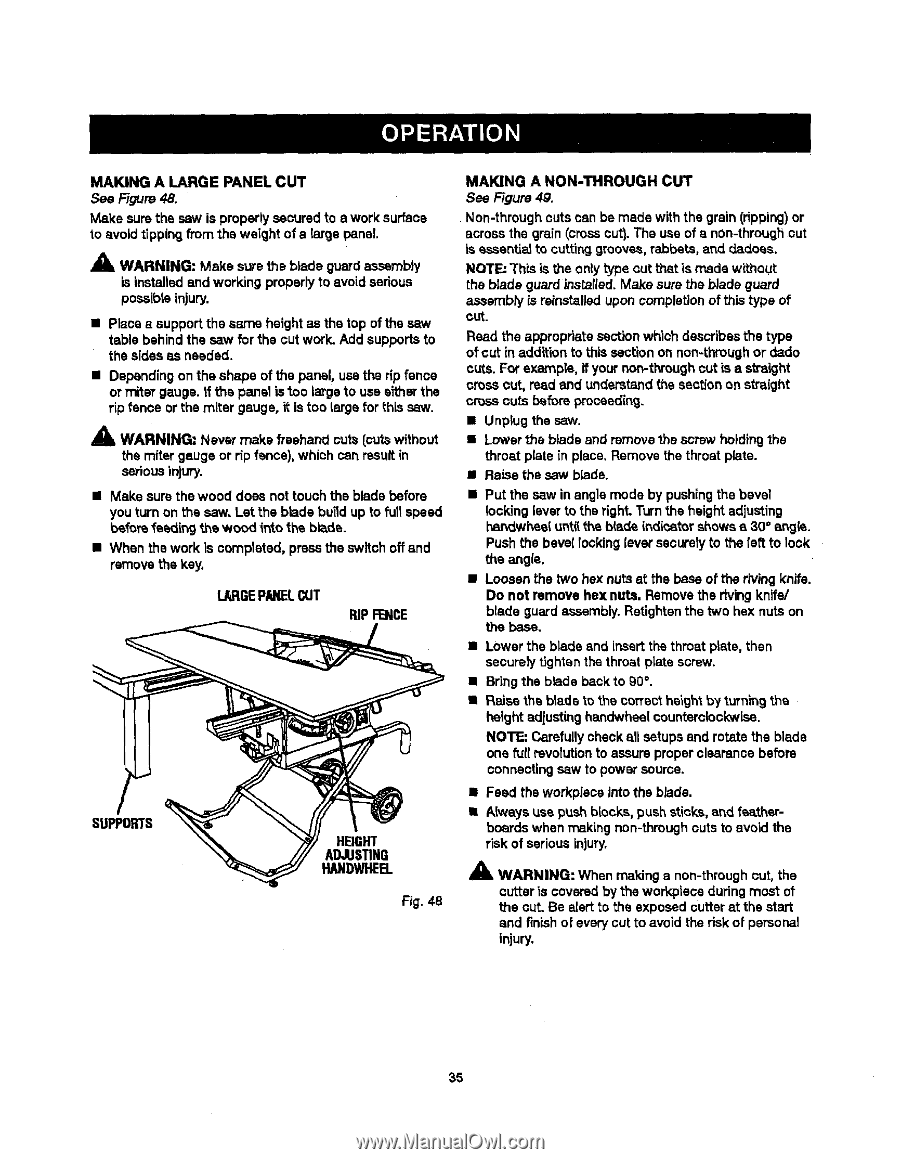
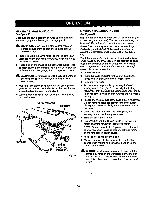
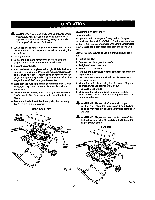
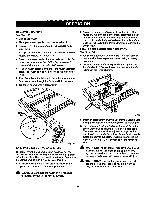
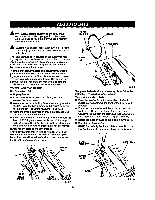
MAKING A LARGE PANEL CUT See Figure48. Make sure the sew is properly securedto e work surface to avoidtipping from the weight of a large panel _, WARNING: Make sure the b_ade guard assembly is installedand working properly to avoidserious pessibteinjury. • Place a supportthe same height as the top of the saw table behind the saw for the cut work. Add supportsto the sides as needed. • Depending on the shape of the pansl, use the rip fence or miteTgauge, ff the panel is too large to use s_'herthe rip {once or the miter gauge, it is too {argofor this saw. _IL WARNING: Nsvsr make freehand cuts {cutswithout the miter gauge or rip fence), which can resultin seriousinjury. • Make sure thewood does not touch the blade before you turn on the saw, Let the blade bu_d up to full speed beforefoeding the wood _,ntothe blade. • When the work is oemplstod, press the switch offand remove the key. lARGEPN(EL CUT RIP FENCE HEIGHT ADJUSTING HANDWHEEL Fig. _-8 MAKING A NON-THROUGH CUT See Figure4g. Non-through cuts can be made with the grain (ripping)or across the grain (crosscut}.The use of a nOn-throughcut is essentialto cuttinggrooves,rabbets, and d,ad.oes. NOTE: TtT_sis the onlytype out that is made without the blade guard instsIled.Make sure the blade guard assembly la reinstalledupon completion of this type of cut. Read the appropriate sectionwhich describesthe type of cut inaddition to this section on non-throughor dado cuts. For example, if yournon-throughcut is a straight cross cut, read and understandthe sectionon straight cross cuts before procaed{ng. • Unplug the saw. • Lower the blade and removethe screw holdingthe throat plate in place. Remove the throat plate. • RaLsethe saw blade. • Put the sew in angle mode by pushingthe bevel locking lavar to the right. Turnthe height adjusting hsndwheel until the b(ade indicster showsa 30" ar_jis. Push the bevel locking{eversecurelyto the [eft to lock the angle, • Loosen the two hex nuts st the base of the riving knife. Do not remove hex nuts. Removethe rivingknife/ blade guard assembly.Retightanthe two hex nuts on the base, • Lower the blade and insert the throat plate, then securelytighten the throat plate screw. • Bring the blade backto gO°. • Raise the blade _o the correcthaigh'tby tuTningthe height ad{ustinghandwheelcounterclockwise. NOTE: Carefullycheckall setups and rctsta the blade one fur{revolutionto assure properclearance before connecting saw to power source. • Feed the workpiscs into the blade. • Always use push blocks, push sticks,and featherboards when makingnon-throughcuts to avoid the risk of seriousinjury, _1= WARNING: When making a non-through cut, the cutter is covered by the warYp, iece during most ot the cut. Be alert to the exposed cutter at the start and finishof everycut to avoid the risk of personal injury. 35
-
 1
1 -
2
-
3
-
4
-
5
-
6
-
7
-
8
-
9
-
10
-
11
-
12
-
13
-
14
-
15
-
16
-
17
-
18
-
19
-
20
-
21
-
22
-
23
-
24
-
25
-
26
-
27
-
28
-
29
-
 30
30 -
 31
31 -
 32
32 -
 33
33 -
 34
34 -
 35
35 -
 36
36 -
 37
37 -
 38
38 -
 39
39 -
 40
40 -
41
-
42
-
43
-
44
-
45
-
46
-
47
-
48
-
49
-
50
-
51
-
52
-
53
-
54
-
55
-
56
-
57
-
58
 |
 |