Creative 70PF169000026 User Guide - Page 8
Step 3, Turn On Your Player, Step 4, Transfer Content
 |
UPC - 054651135116
View all Creative 70PF169000026 manuals
Add to My Manuals
Save this manual to your list of manuals |
Page 8 highlights
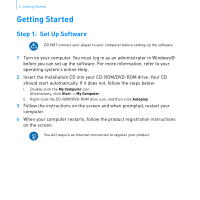
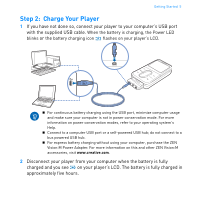
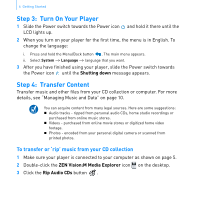
6 Getting Started Step 3: Turn On Your Player 1 Slide the Power switch towards the Power icon and hold it there until the LCD lights up. 2 When you turn on your player for the first time, the menu is in English. To change the language: i. Press and hold the Menu/Back button . The main menu appears. ii. Select System → Language → language that you want. 3 After you have finished using your player, slide the Power switch towards the Power icon until the Shutting down message appears. Step 4: Transfer Content Transfer music and other files from your CD collection or computer. For more details, see "Managing Music and Data" on page 10. You can acquire content from many legal sources. Here are some suggestions: „ Audio tracks - ripped from personal audio CDs, home studio recordings or purchased from online music stores. „ Videos - purchased from online movie stores or digitized home video footage. „ Photos - encoded from your personal digital camera or scanned from printed photos. To transfer or 'rip' music from your CD collection 1 Make sure your player is connected to your computer as shown on page 5. 2 Double-click the ZEN Vision:M Media Explorer icon on the desktop. 3 Click the Rip Audio CDs button .
-
 1
1 -
2
-
 3
3 -
 4
4 -
 5
5 -
 6
6 -
 7
7 -
 8
8 -
 9
9 -
 10
10 -
 11
11 -
 12
12 -
 13
13 -
14
-
15
-
16
-
17
-
18
-
19
-
20
-
21
-
22
-
23
-
24
-
25
-
26
-
27
-
28
-
29
-
30
-
31
-
32
-
33
 |
 |
