D-Link DCS-4603 User Manual - Page 9
Installation, Mounting the Camera
 |
View all D-Link DCS-4603 manuals
Add to My Manuals
Save this manual to your list of manuals |
Page 9 highlights
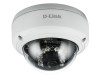
Section 2: Installation Installation Mounting the Camera It is highly recommended that you configure and test your camera before mounting it. Step 1 Place the mounting sticker where you want to position the camera. Use a 6 mm drill bit to make the required holes approximately 25 mm deep, then insert the wall anchors into the holes. If you are running the camera cables through the wall or ceiling, drill a hole in the center and pull the cables through the hole. Step 2 Use the included wrench to loosen the 3 screws on the top of the camera, then lift the camera cover off. D-Link DCS-4603 User Manual 9
-
 1
1 -
2
-
3
-
 4
4 -
 5
5 -
 6
6 -
 7
7 -
 8
8 -
 9
9 -
 10
10 -
 11
11 -
 12
12 -
 13
13 -
 14
14 -
15
-
16
-
17
-
18
-
19
-
20
-
21
-
22
-
23
-
24
-
25
-
26
-
27
-
28
-
29
-
30
-
31
-
32
-
33
-
34
-
35
-
36
-
37
-
38
-
39
-
40
-
41
-
42
-
43
-
44
-
45
-
46
-
47
-
48
-
49
-
50
-
51
-
52
-
53
-
54
-
55
-
56
-
57
-
58
-
59
-
60
-
61
-
62
-
63
-
64
-
65
-
66
 |
 |

9
D-Link DCS-4603 User Manual
Section 2: Installation
Installation
Mounting the Camera
It is highly recommended that you configure and test your camera before mounting it.
Step 1
Place the mounting sticker where you want to position the camera.
Use a 6 mm drill bit to make the required holes approximately 25 mm deep, then
insert the wall anchors into the holes.
If you are running the camera cables through the wall or ceiling
, drill a hole
in the center and pull the cables through the hole.
Step 2
Use the included wrench to loosen the 3 screws on the top of the camera, then
lift the camera cover off.