D-Link DGS-1250 Quick Install Guide - Page 8
Ports, Reset Button, Console, 100/1000 Mbps RJ45, Gigabit SFP/SFP+ Ports, SFP+/SFP Ports - 28xmp
 |
View all D-Link DGS-1250 manuals
Add to My Manuals
Save this manual to your list of manuals |
Page 8 highlights
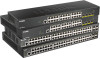
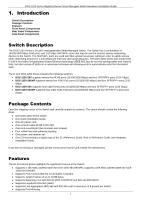
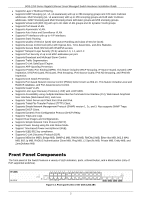
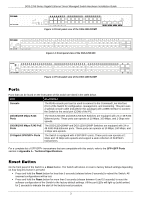
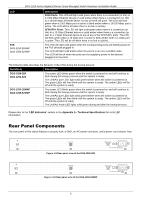
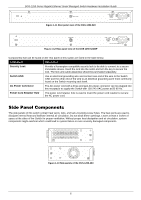
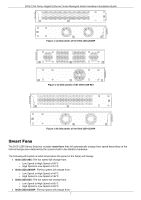
DGS-1250 Series Gigabit Ethernet Smart Managed Switch Hardware Installation Guide Figure 1-2 Front panel view of the DGS-1250-28XMP Figure 1-3 Front panel view of the DGS-1250-52X Figure 1-4 Front panel view of the DGS-1250-52XMP Ports Ports that can be found on the front panel of this switch are listed in the table below. Port Description Console The RJ45 console port can be used to connect to the Command Line Interface (CLI) of the Switch for configuration, management, and monitoring. This port uses a special console cable (included in this package) with a DB9 interface to connect the Switch to the serial port (COM) of the PC. 10/100/1000 Mbps RJ45 Ports The DGS-1250-28X and DGS-1250-52X Switches are equipped with 24 or 48 RJ45 Ethernet ports. These ports can operate at 10 Mbps, 100 Mbps, and 1 Gbps wirespeeds. 10/100/1000 Mbps RJ45 PoE The DGS-1250-28XMP and DGS-1250-52XMP Switches are equipped with 24 or Ports 48 RJ45 PoE Ethernet ports. These ports can operate at 10 Mbps, 100 Mbps, and 1 Gbps wire-speeds. 10 Gigabit SFP/SFP+ Ports The Switch is equipped with 4 SFP/SFP+ ports. These ports can operate at 1 Gbps and 10 Gbps wire-speeds and support a wide collection of SFP/SFP+ transceivers. For a complete list of SFP/SFP+ transceivers that are compatible with this switch, refer to the SFP+/SFP Ports section in Appendix A - Technical Specifications. Reset Button On the front panel of the Switch is a Reset button. The Switch will reboot or reset to factory default settings depending on how long this button is pressed. Press and hold the Reset button for less than 5 seconds (release before 5 seconds) to reboot the Switch. All unsaved configurations will be lost. Press and hold the Reset button for more than 5 seconds (release between 6 and 10 seconds) to reset the software configuration of the Switch to the factory default settings. All the port LEDs will light up (solid amber) for 2 seconds to indicate the start of the factory reset procedure. 3
-
 1
1 -
2
-
 3
3 -
 4
4 -
 5
5 -
 6
6 -
 7
7 -
 8
8 -
 9
9 -
 10
10 -
 11
11 -
 12
12 -
 13
13 -
14
-
15
-
16
-
17
-
18
-
19
-
20
-
21
-
22
-
23
-
24
-
25
-
26
-
27
-
28
-
29
-
30
-
31
-
32
-
33
-
34
-
35
-
36
-
37
-
38
-
39
-
40
-
41
-
42
-
43
-
44
-
45
 |
 |
