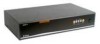
D-Link DKVM-16 Manual - Page 16
Daisy-Chaining the DKVM-16 - kvm switch
 |
UPC - 790069254987
View all D-Link DKVM-16 manuals
Add to My Manuals
Save this manual to your list of manuals |
Page 16 highlights
Daisy-Chaining the DKVM-16 Please closely follow the steps below to daisy-chain your DKVM-16 units. You can daisy chain up to 8 DKVM-16s. Step 1 Connect your keyboard, mouse, and monitor to the console port (white color block) of the master KVM bank (bank1). Step 2 Use the 3-in-one Cable Kit to connect the daisy-chain port of bank 1 to the console port (white color block) of the 2nd KVM switch. Step 2 Please repeat step 2 to daisy-chain up to as many as 8 DKVM-16s. Please use the attached 3 feet 3-in-one Cable Kit to daisy chain the KVM Switches. Bank 1 MASTER (Bank 1) Bank 2 Slave (Bank 2) Bank 3 Slave (Bank 3) Bank 8 Slave (Bank 8) 16
-
 1
1 -
2
-
3
-
4
-
5
-
6
-
7
-
8
-
9
-
10
-
 11
11 -
 12
12 -
 13
13 -
 14
14 -
 15
15 -
 16
16 -
 17
17 -
 18
18 -
 19
19 -
 20
20 -
 21
21 -
22
-
23
-
24
-
25
-
26
-
27
-
28
-
29
-
30
 |
 |

16
Daisy-Chaining the DKVM-16
Connect your keyboard, mouse, and monitor to the console port (white color
block) of the master KVM bank (bank1).
Please closely follow the steps below to daisy-chain your
DKVM-16
units. You
can daisy chain up to 8
DKVM-16
s.
Step 1
Step 2
Use the 3-in-one Cable Kit to connect the daisy-chain port of bank 1 to the
console port (white color block) of the 2nd KVM switch.
Step 2
Please repeat step 2 to daisy-chain up to as many as 8
DKVM-16
s.
-
Please use the attached 3 feet 3-
in-one Cable Kit to daisy chain the
KVM Switches.
Bank 1
Bank 2
Bank 3
Bank 8
MASTER (Bank 1)
Slave (Bank 2)
Slave (Bank 8)
Slave (Bank 3)