D-Link DKVM-16 Manual - Page 9
Step 5, Back of PC
 |
UPC - 790069254987
View all D-Link DKVM-16 manuals
Add to My Manuals
Save this manual to your list of manuals |
Page 9 highlights
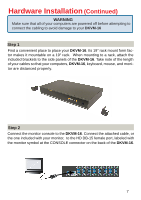
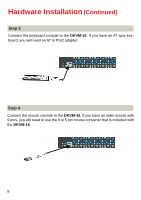
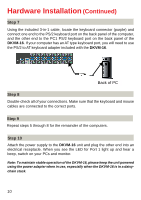
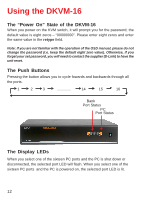
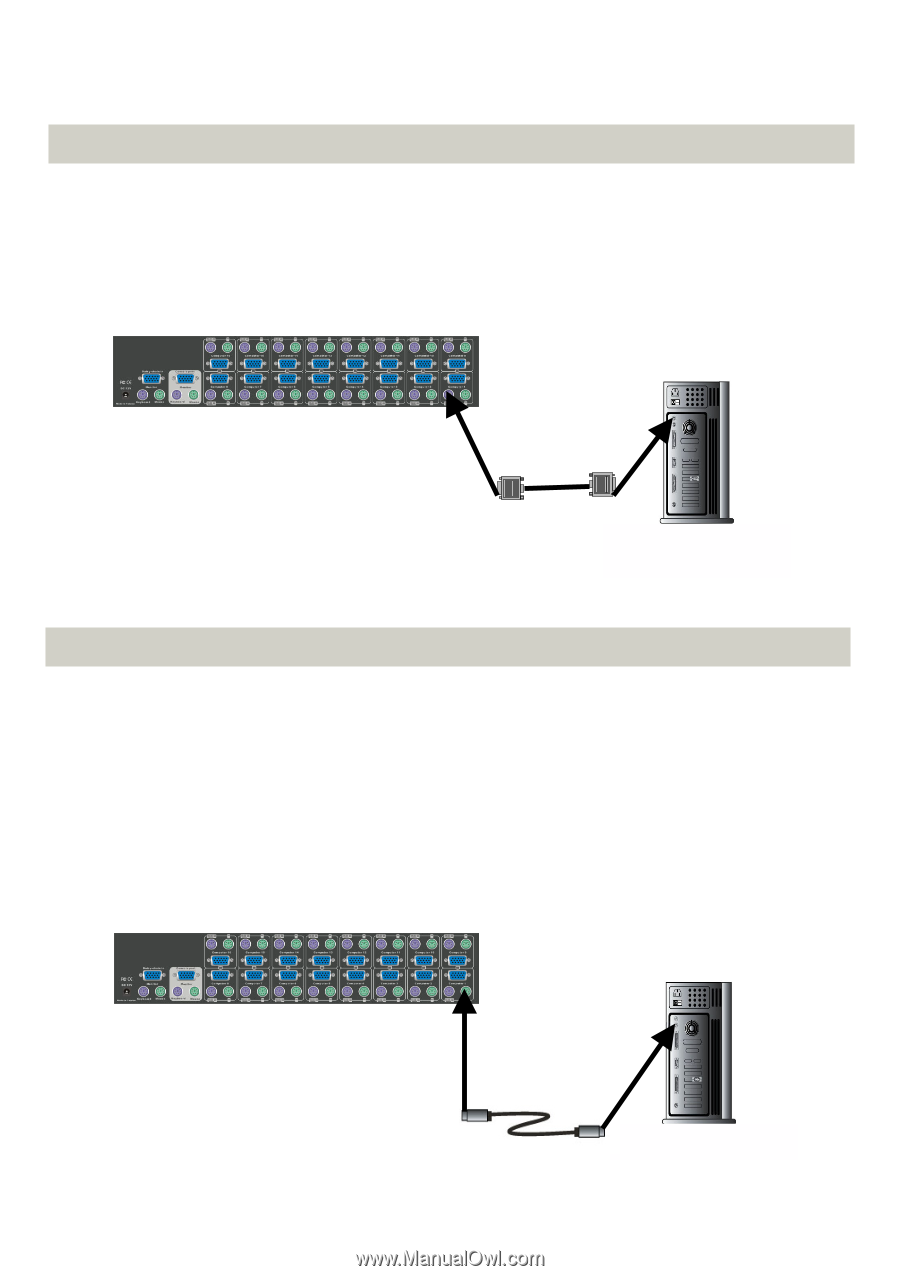
Hardware Installation (Continued) Step 5 Connect one end of the included VGA cable (15-pin HDDB Male / Male) to the female connectors on the back of the PC. Connect the other end of the cable to the rear panel of the DKVM-16. This step can be repeated for all PCs. Back of PC Step 6 Using the included 3-in-1 cable, locate the mouse connector (green) and connect one end to the PS/2 mouse port on the back panel of the computer, and the other end to the PC1 PS/2 mouse port on the back panel of the DKVM-16. If there are not enough PS/2 ports on the computer, you can choose a serial port for the mouse connection. Be sure to add a serial to PS/2 converter included with the DKVM-16 before connecting the 3-in-1 cable to the computer. Back of PC 9
-
 1
1 -
2
-
3
-
 4
4 -
 5
5 -
 6
6 -
 7
7 -
 8
8 -
 9
9 -
 10
10 -
 11
11 -
 12
12 -
 13
13 -
 14
14 -
15
-
16
-
17
-
18
-
19
-
20
-
21
-
22
-
23
-
24
-
25
-
26
-
27
-
28
-
29
-
30
 |
 |
9
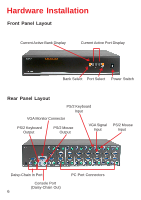
Hardware Installation
(Continued)
Step 5
Step 6
Connect one end of the included VGA cable (15-pin HDDB Male / Male) to the
female connectors on the back of the PC. Connect the other end of the cable to
the rear panel of the
DKVM-16
. This step can be repeated for all PCs.
Back of PC
Using the included 3-in-1 cable, locate the mouse connector (green) and con-
nect one end to the PS/2 mouse port on the back panel of the computer, and
the other end to the PC1 PS/2 mouse port on the back panel of the
DKVM-16
.
If there are not enough PS/2 ports on the computer, you can choose a serial
port for the mouse connection. Be sure to add a serial to PS/2 converter in-
cluded with the
DKVM-16
before connecting the 3-in-1 cable to the computer.
Back of PC