D-Link DPH-125MS Product Manual - Page 23
Configuration - compatible
 |
UPC - 790069298790
View all D-Link DPH-125MS manuals
Add to My Manuals
Save this manual to your list of manuals |
Page 23 highlights
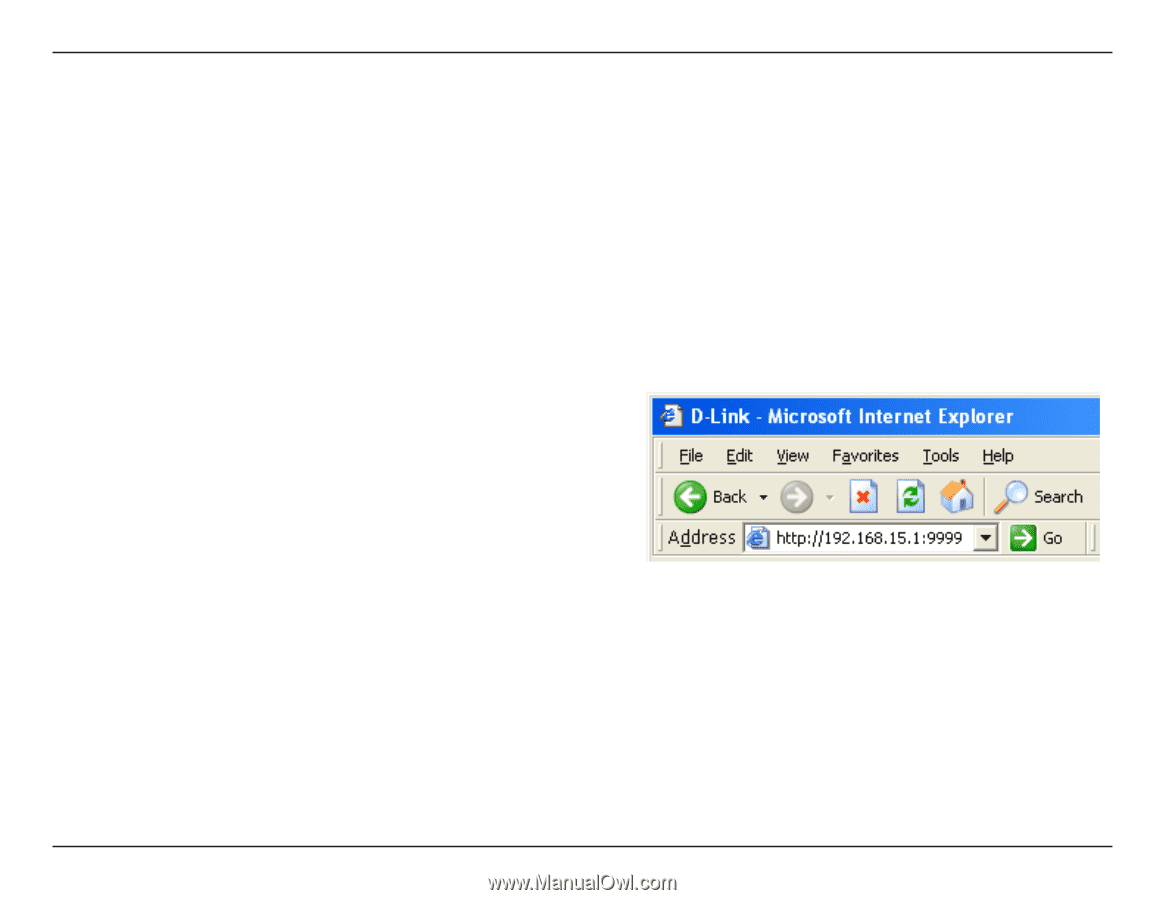
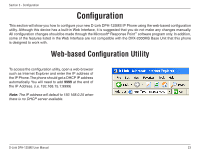
Section 3 - Configuration Configuration This section will show you how to configure your new D-Link DPH-125MS IP Phone using the web-based configuration utility. Although this device has a built-in Web Interface, it is suggested that you do not make any changes manually. All configuration changes should be made through the Microsoft® Response Point™ software program only. In addition, some of the features listed in the Web Interface are not compatible with the DVX-2000MS Base Unit that this phone is designed to work with. Web-based Configuration Utility To access the configuration utility, open a web-browser such as Internet Explorer and enter the IP address of the IP Phone. The phone should get a DHCP IP address automatically. You will need to add 9999 at the end of the IP Address. (i.e. 192.168.15.1:9999) Note: The IP address will default to 192.168.0.25 when there is no DHCP server available. D-Link DPH-125MS User Manual 23
-
 1
1 -
2
-
3
-
4
-
5
-
6
-
7
-
8
-
9
-
10
-
11
-
12
-
13
-
14
-
15
-
16
-
17
-
 18
18 -
 19
19 -
 20
20 -
 21
21 -
 22
22 -
 23
23 -
 24
24 -
 25
25 -
 26
26 -
 27
27 -
 28
28 -
29
-
30
-
31
-
32
-
33
-
34
-
35
-
36
-
37
-
38
-
39
-
40
-
41
-
42
-
43
-
44
-
45
-
46
-
47
-
48
-
49
-
50
-
51
-
52
-
53
 |
 |